Stock vehicle suspensions are designed as a compromise between the extremes of the vehicle being unladen or heavily loaded. 

002-OVR-Helwig-TRX-How-To

Ram’s TRX is no doubt a performance machine, but with a supple suspension and no rear sway bar it is a candidate for improved load control.

Unladen vehicles might feel a bit loose in spirited driving, while heavily loaded vehicles might not be able to control sway, or body roll, to the outside of a turn, creating dangerous understeer at the limit and causing the vehicle to lift a wheel while cornering.

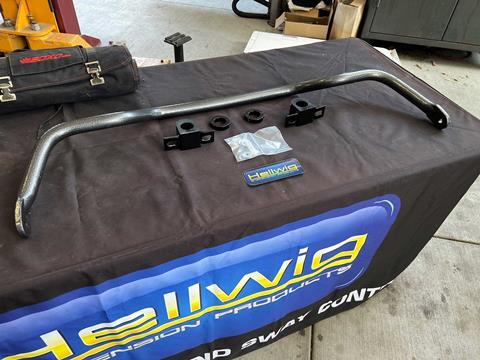
In many cases, a simple bolt-on sway bar or sway bar upgrade, also known as an anti-roll bar, can make a huge improvement in handling and driver confidence, especially when the vehicle is loaded down.

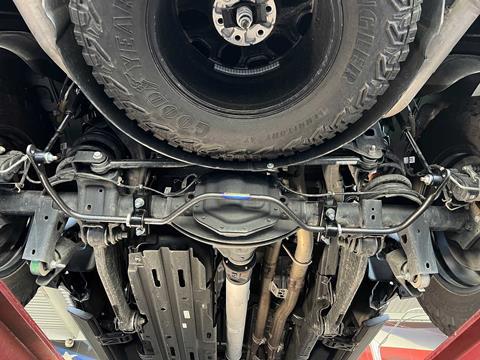
A sway bar, simply put, is a torsional spring connected to the suspension and frame on each side of the vehicle and resists wheel lift by always wanting to be parallel to the road surface.

003-OVR-Helwig-TRX-How-To

The front factory sway bar on the TRX is 1-1/4-inch in diameter and sized for use without a rear sway bar. Hellwig takes this into account with their front and rear sway bar upgrade.

004-OVR-Helwig-TRX-How-To

Hellwig’s TRX front sway bar is 1-3/8-inch in diameter and is made from solid heat-treated 4140 chromoly steel that results in a bar that is stiffer than the factory part. A signature Hammertone powdercoat ensures the bar remains protected from the elements for a long service life.

This resistance, caused by the twisting of the bar, is what fights the tendency for the body to roll to the outside of a turn, or conversely, an inside tire to want to lift in the same situation. Adding a sway bar keeps the body in check and the wheels planted to the ground, increasing stability and traction to improve handling.

When it comes to load control for trucks, Hellwig is a name that has been synonymous with quality for 78 years. Known for load control products such as sway bars and helper springs, Hellwig is a fourth-generation, family-owned company that was founded in 1946, after WWII.

Hellwig has a rich history of offering proudly American-made products and still manufactures said products in California’s Central Valley. Hellwig products even come with a limited lifetime warranty.

005-OVR-Helwig-TRX-How-To

STEP 1. The front sway bar is easily removed with hand tools, although power tools make removal easier. The factory sway bar end links are reused, but the frame mounts are replaced with Hellwig parts.

006-OVR-Helwig-TRX-How-To

The majority of Hellwig sway bars can be installed in a driveway, but a lift will certainly make removing and refitting parts easier and reduce the amount of time it takes to do the install. Taking our time, we were able to finish the entire upgrade in about two hours.

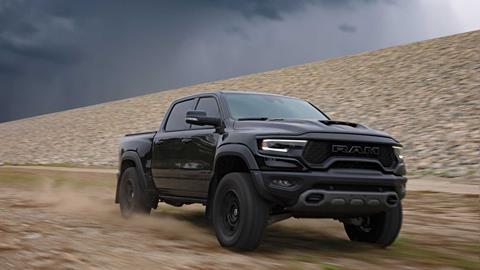
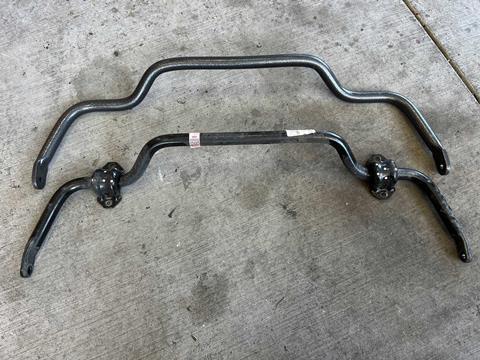
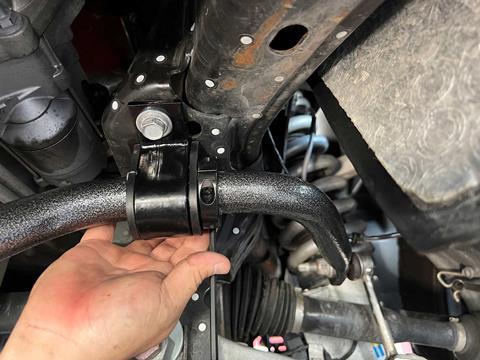
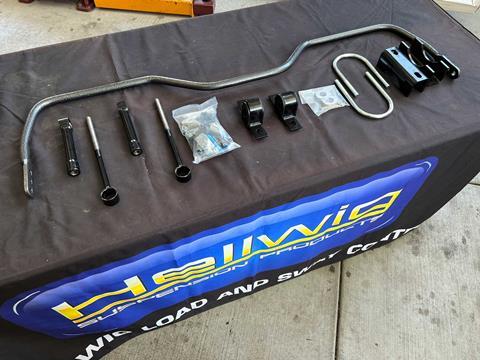
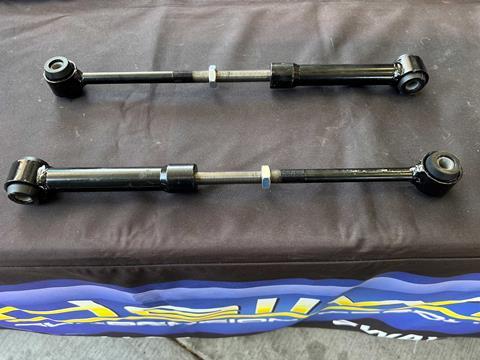
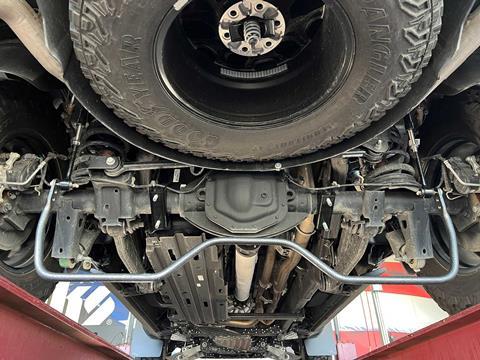
Performance vehicles such as the Ram 1500 TRX are biased toward off-road performance driving, which can leave something to be desired for on-road performance or when the vehicle is weighed down with gear for an off-road excursion. Like many trucks, the Ram TRX isn’t equipped with a rear sway bar from the factory, so making a big improvement in load control is as easy as upgrading the front sway bar and adding a rear.

After installing the Hellwig sway bars we took the TRX out for testing. We immediately felt an improvement in on-road handling, the TRX feeling much sportier, with flatter cornering and showcasing the ability to carry higher speeds more confidently through corners.

Mid-turn broken pavement no longer upsets the truck and cause it to step out, and on the highest setting the big Ram has more of a sports car feel. Because the TRX suspension is set up to be soft from the factory, the on-road change from the Hellwig upgrade is dramatic, making the truck a much more enjoyable daily driver.

007-OVR-Helwig-TRX-How-To

Here you can see the Hellwig sway bar next to the factory sway bar to illustrate the differences between the two.

008-OVR-Helwig-TRX-How-To

STEP 2. Hellwig provides new polyurethane D-bushings that need to be lubricated with the supplied grease prior to installation.

Off-road, the TRX is more controlled. At the softest sway bar setting, we didn’t notice any degradation in off-road performance. Even with the sway bar dialed down, load control and body roll off-road is also noticeably improved, making it even easier to steer with the throttle and hustle through faster terrain without negatively impacting slow-speed wheeling.

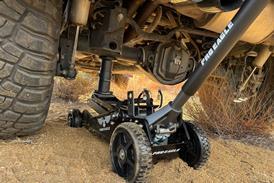
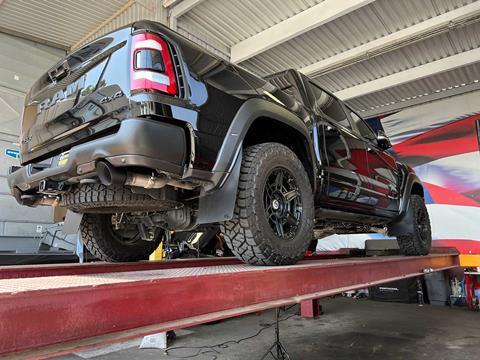
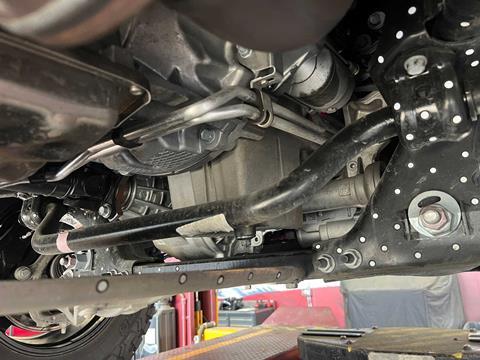
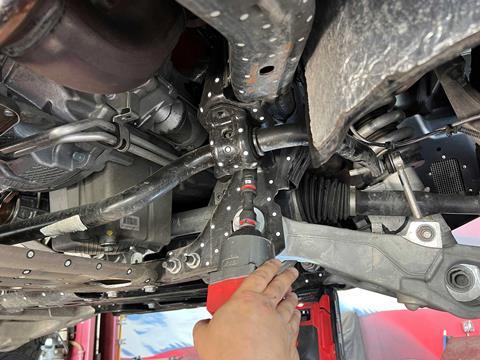
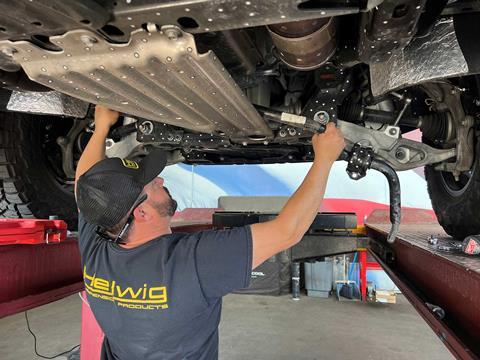
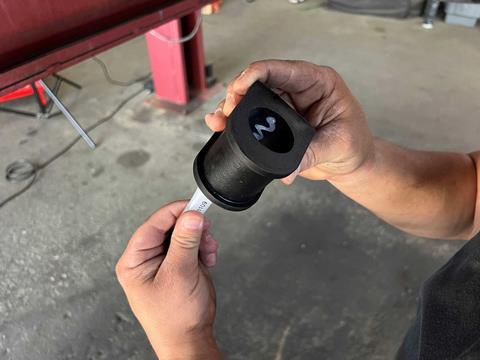
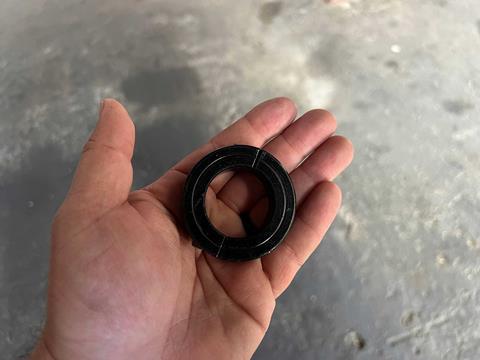
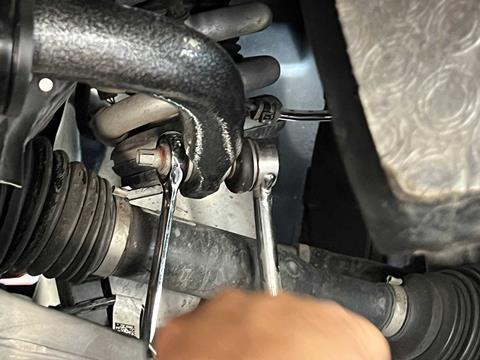
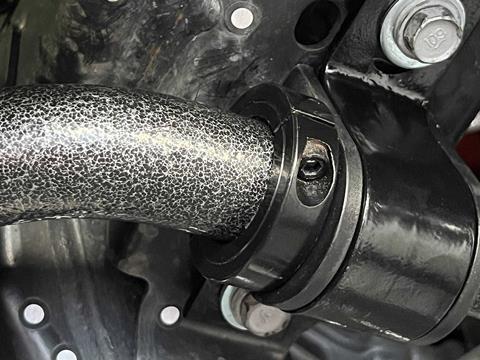
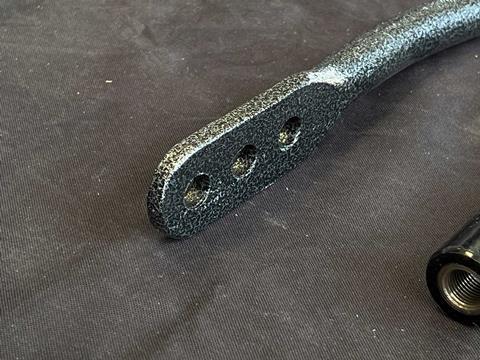
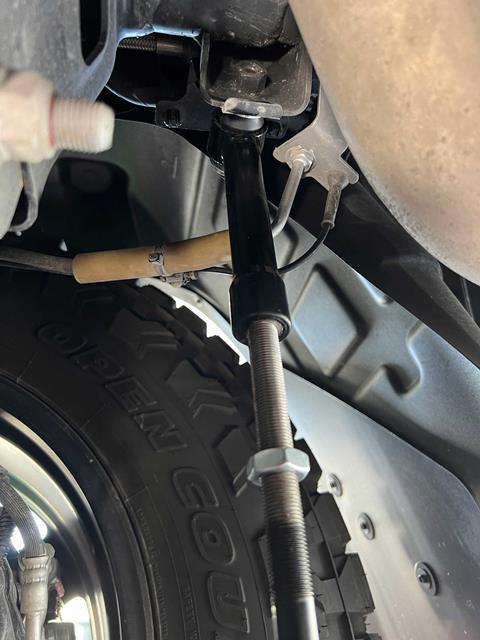
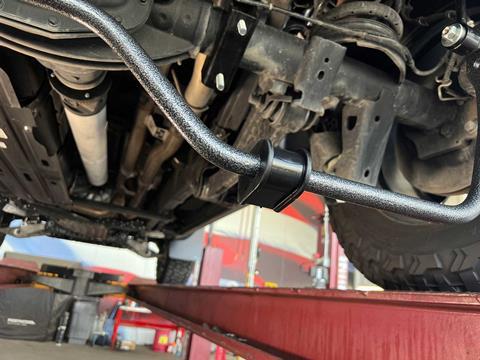
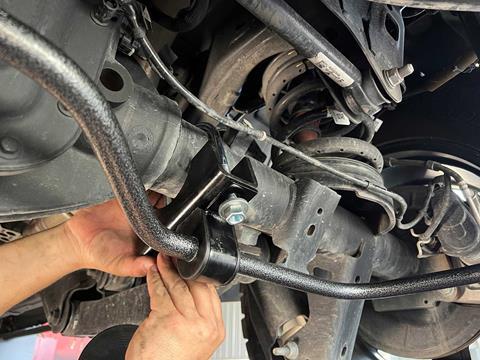
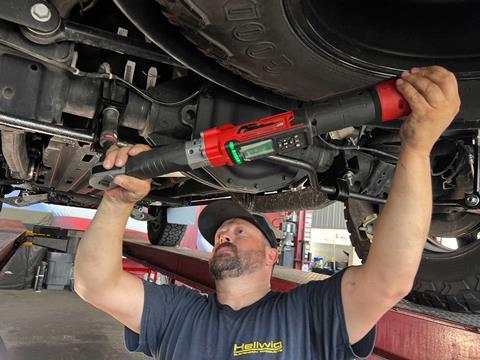
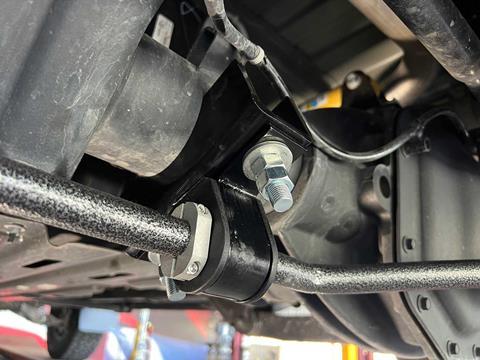
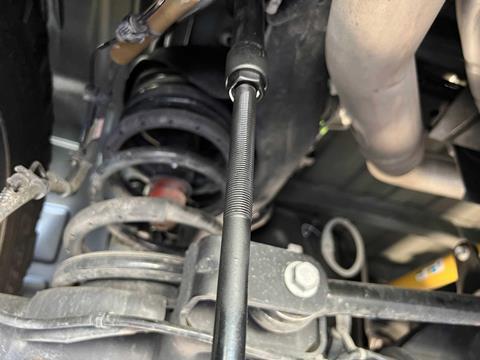
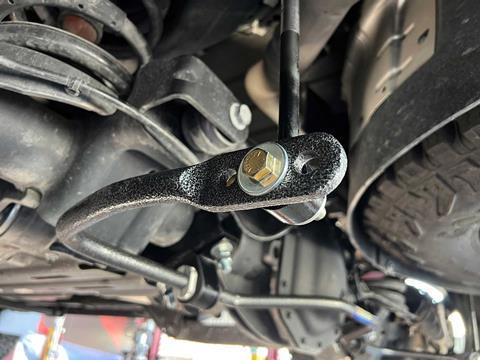
The beauty of the Hellwig rear sway bar is the ability to dial it in for the activity, or the driver’s preference, with a simple change. Follow along with the numbered steps for an overview of our bolt-on TRX install. The guide will give you a better understanding of what goes into adding more control to your rig.

009-OVR-Helwig-TRX-How-To

Hellwig also includes these metal retainer rings, or collar clamps, to keep the sway bar centered.

010-OVR-Helwig-TRX-How-To

STEP 3. After the Hellwig sway bar was lifted into position, we reattached the factory end links.

011-OVR-Helwig-TRX-How-To

STEP 4. With the bar in place, we centered it and installed the supplied brackets over the polyurethane D-bushings, reusing the factory holes in the frame. Next, the collar clamps were placed against the D-bushing bracket to prevent the sway bay from moving side-to-side in the mounts.

012-OVR-Helwig-TRX-How-To

A closer look reveals the installed sway bar, D-bushing, and positioning of the collar clamps.

013-OVR-Helwig-TRX-How-To

The rear sway bar is sized at 7/8-inch in diameter and, like the front bar, is constructed from 4140 solid chromoly and powdercoated for durability. The kit comes with everything needed to add a rear sway bar to the TRX.

014-OVR-Helwig-TRX-How-To

At the end of the rear sway bar are these three end link mounting holes, which allow the resistance to be changed depending on how the vehicle is being used. Each hole position closer to the axle increases the sway bar rate by approximately 11 percent.

015-OVR-Helwig-TRX-How-To

The rear sway bar uses specially constructed and adjustable-length end links machined from mild steel with polyurethane bushings that need to be pressed into the eye.

016-OVR-Helwig-TRX-How-To

STEP 5. Using existing mounting holes in the TRX frame, the new HD end links were bolted into place. While the end links can be used in any orientation, Hellwig recommends mounting them with the female end on the top (pointed down) to prevent any moisture or contamination from becoming trapped in the threads.

017-OVR-Helwig-TRX-How-To

STEP 6. Hellwig provides steel saddle brackets, attached with U-bolts around the axle tube, to provide for suspension-side sway bar mounting.

018-OVR-Helwig-TRX-How-To

Here you can see the Hellwig sway bar hanging from the end links and the saddle brackets installed in preparation for the next step.

019-OVR-Helwig-TRX-How-To

STEP 7. After greasing the polyurethane D-bushings, they were placed on the sway bar.

020-OVR-Helwig-TRX-How-To

STEP 8. Next, the provided U-plates were installed over the D-bushings in order to secure the sway bar to the saddle brackets.

021-OVR-Helwig-TRX-How-To

It is important to use a quality torque wrench to torque all of the sway bar hardware to the spec provided by Hellwig.

022-OVR-Helwig-TRX-How-To

STEP 9. After torquing the hardware, we installed jam nuts to the saddle bracket U-bolts to prevent the nuts from backing out. Like the front, the rear also uses collar clamps to ensure the bar stays centered.

023-OVR-Helwig-TRX-How-To

STEP 10. After setting the length of the end links so that the sway bar was parallel to the ground, the end link jam nuts were tightened and we coated the exposed threads with chassis paint to keep them protected from corrosion.

024-OVR-Helwig-TRX-How-To

STEP 11. We’ve found that the middle setting is the best place to start when setting up your rear sway bar. For us, it delivered the best compromise between on-road or off-road handling, while still leaving room to adjust in either direction.

025-OVR-Helwig-TRX-How-To

COMPLETE: With the rear sway bar in place, our TRX was ready to hit the road and trail again and is now better equipped for those longer trips that require carrying a load.


Source

Hellwig Suspension Products
hellwigproducts.com


Access More Great Stories!
This article originally appeared in OVR Issue 04. For more informative articles like this, consider subscribing to OVR Magazine in print or digital versions here. You can also find the print edition of OVR at your local newsstand by using our Magazine Finder.