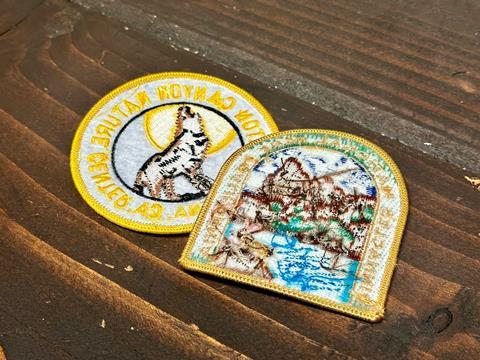
How many times have you been at a gift shop looking for a Velcro-backed patch only to find only sew-on or iron-on patches instead? Follow along for one of the easiest DIY’s that will turn any patch into a headliner-adhering decoration.

Lets-apply-Velcro-to-patches

Let’s apply Velcro to patches!

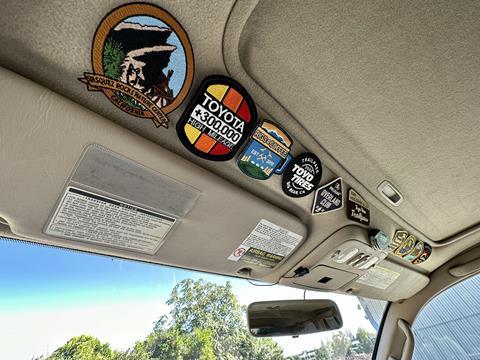
Most of us have seen the trend of adding morale patches to the headliners of overland and off-road vehicles by now. It’s a colorful way to decorate the interior of your vehicle while commemorating the places that you’ve visited, representing the groups or brands that you support or showing off designs that you just plain like. We’re not immune to this “headliner patch” trend either and wanted to get some fun patches up on the OVR LC100’s headliner too.

But how many times have you been at a gift shop looking for a Velcro-backed patch only to find only sew-on or iron-on patches instead? We’ve looked high and low and can say that hook-backed patches aren’t offered in many places yet as sew-on and iron-on seem to be the most popular patches. Well, follow along for one of the easiest DIY’s that will turn any patch into a headliner-adhering decoration.

Boo,-no-hook-material-on-the-backs-of-these-patches

Boo, no hook material on the backs of these patches. Let’s change that.

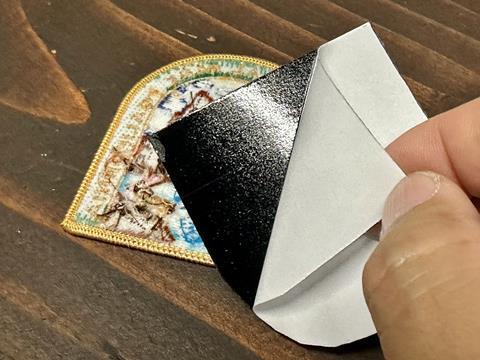
First off, let’s clarify that Vecro and “hook and loop” are essentially the same thing, so we will be using the terms interchangeably in this tutorial. Velcro is the brand name and the material that you know Velcro as is known as hook and loop, hook being the harder prickly side and loop being the soft side.

Our-Amazon-find,-the-perfect-self-adhesive-hook-and-loop-panels

Our Amazon find, the perfect self-adhesive hook and loop panels for this project.

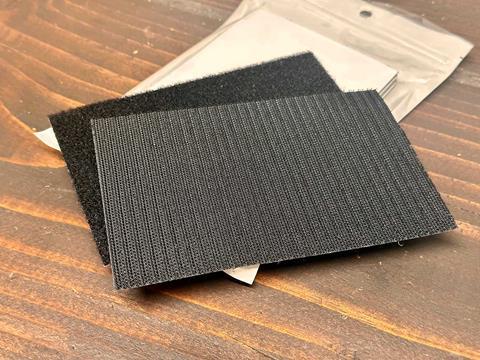
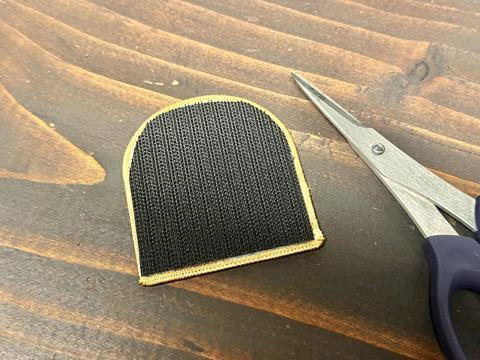
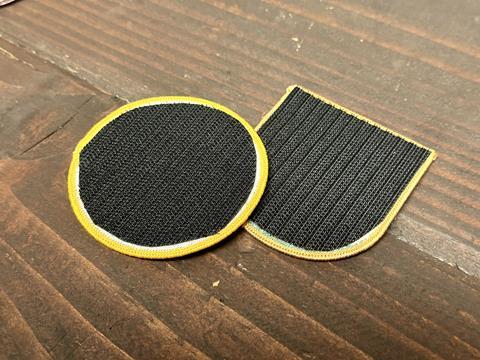
Now let’s examine what’s needed for this tutorial. It’s simple really; all we need are a pen or marker, a pair of scissors, the patch you want use and a panel of self-adhesive hook material. We bought our hook and loop from Amazon. We were careful to select panels that have a very strong adhesive backing in a generous size.

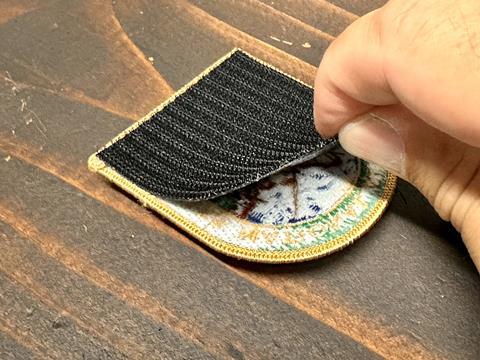
We wanted an especially strong adhesive, not because the patches are heavy, but because the patches live in a vehicle that goes through many heat and cold cycles just sitting in the driveway or parking lot and we don’t want them falling off. We chose 4 x 6-inch sized panels since most patches that we’ve encountered are about half that size so one panel can be used for two patches on average. Each “Velcro” set comes with both the hook side and the loop side, we will only be using the hook side for this DIY. Read on for suggestions on what to do with the loop side later on.

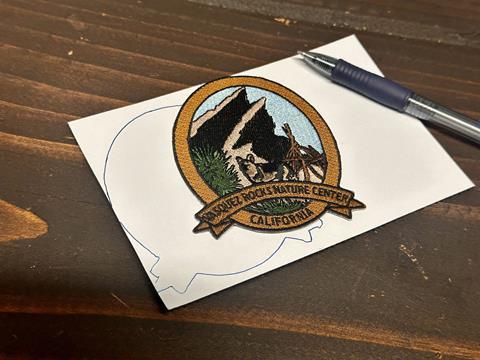
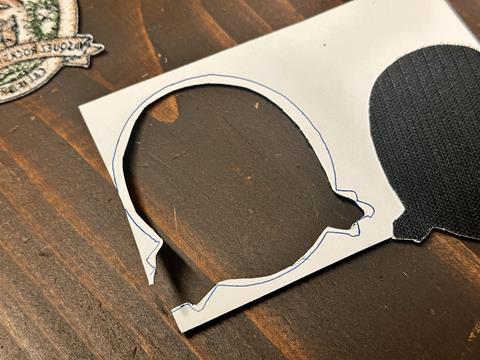
Now let’s get this patch and Velcro party started!

1 - The first step is to use a pen or market to trace the shape of the patch onto the hook panel’s backing

1. The first step is to use a pen or marker to trace the shape of the patch onto the hook panel’s backing.

2 - Next, using a pair of scissors cut just inside of the line you just drew.

2. Next, using a pair of scissors, cut just inside of the line you just drew. Cutting directly on the line will result in the Velcro being a tad bit too big, so cutting about 1/8-inch inside the line will result in a better fit. Don’t worry if it isn’t perfect, you can always trim the hook panel for a perfect fit.

3 - Verify that the Velcro backing is the right size

3. Verify that the Velcro backing is the right size. We like having it smaller than the outer boarders of the patch. If any hook material sticks out, now’s the time to trim it down.

4 -Once the hook is sized correctly, peel the paper backing off

4. Once the hook panel is sized correctly, peel its paper backing off.

5 - Carefully apply it to the patch

5. Now carefully apply it to the patch. Be careful, it’s very sticky so you only get once chance at this. We like applying it on a table making sure the patch is nice and flat. Some thinner patches may wrinkle if not completely flat so be careful.

6 - Once the hook backing is on the patch

6. Once the hook backing is on the patch, we bend it from all directions to make sure the adhesive sticks well and stays mailable.

7 - Voila, you now have Velcro-backed patches to stick on your headliner or anywhere else you want to use them.

7. Voila, you now have Velcro-backed patches to stick on your headliner, backpack or anywhere else you want to use them.

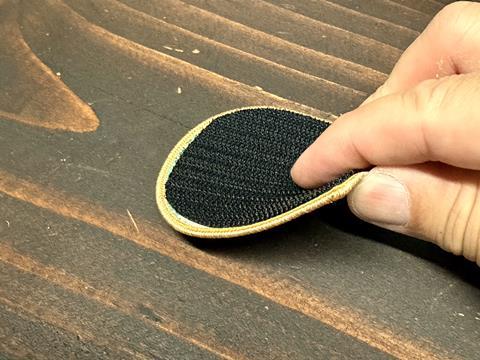
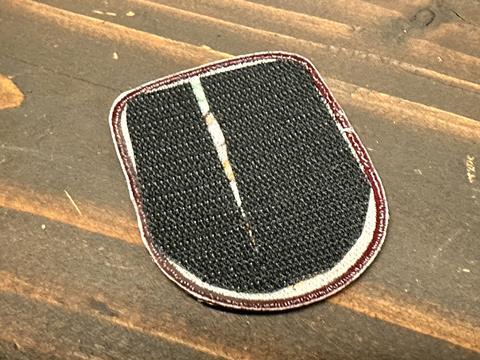
And there you have it, this is an easy way to convert any sew-on or iron-on patch into a Velcro hook-backed patch. For the left-over loop part of the hook and loop panel set, you can stick it onto other surfaces such as your dashboard, glove box door, rear drawer system or even fridge or storage cases to have more places to stick your patch collection to. For more tips, check out the two nuggets of patch widsom below.

Tip 1 - We were able to use one of the hook panels to cover three patches by using the scraps to carefully back the third patch. It’s not perfect or pretty, but it does the job and won’t be seen after the patch is applied.

Tip 1 - We were able to use one of the 4x6-inch hook panels to cover three patches by using scraps to carefully back the third patch. It’s not perfect or pretty, but it does the job and won’t be seen after the patch is applied.

Tip 2 - We enjoy buying patches from gift shops of the places that we visit such as National Parks and nature centers because not only do we enjoy having a souvenir of our trips, but also that the proceeds from some of the patch purchases give back to the place or organization too. It’s a win-win.

Tip 2 - We enjoy buying patches from gift shops of the places that we visit such as National Parks and nature centers because not only do we enjoy having a souvenir of our trips, but also that the proceeds from some of the patch purchases give back to the place or organization too. It’s a win-win.

Our patch collection is growing

Our OVR LC100’s patch collection is growing!

 Read more about OVR LC100 by clicking here