


K&N Engineering recently launched their newest line of NextGen Cold Air Intakes for today’s most popular trucks, Jeeps, and SUVs.
The new intake systems are dyno-proven and said to deliver increased horsepower and torque achieved with a semi-enclosed hybrid airbox, a larger-diameter tube, and an oversized high surface area air filter.
Designed specifically for your vehicle, K&N claims that the system should install easily thanks to a simplified layout, Quick-Lock filter tech, and a secure sealing bead that requires just one hose clamp.
I recently had the opportunity to install and test the NextGen Cold Air Intake on my 2015 Chevy Silverado 1500 5.3L V8. For a decade-old truck, any performance upgrade is a welcomed improvement and lately, mine had started to feel a bit sluggish, with that familiar hesitation during acceleration.
I was eager to get the new intake installed and see if it could breathe some life back into the drive.
Performance Gains and Dyno Chart
For my specific application, K&N states that this upgrade should deliver an additional 18.98 horsepower, 24.38 ft. lbs of torque, and an increase in airflow (cubic feet per minute or CRFM) of 13.46%. This is supported by the provided Dyno chart, available online and specific per fitment.
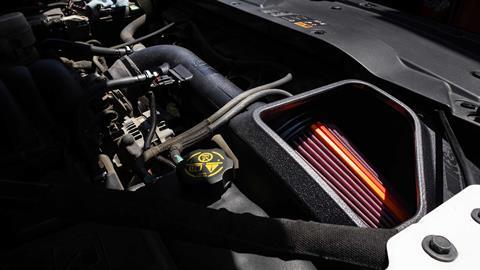
Installation Overview
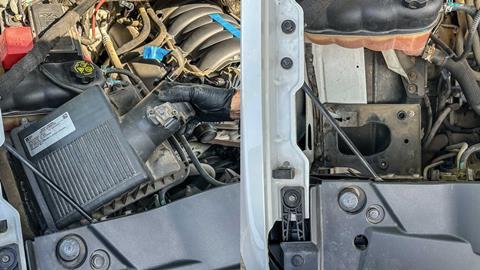
The installation process begins with the removal of the stock intake plenum, air filter housing, and housing plate before installing the new kit.
After disconnecting the negative cable from your primary battery (and secondary battery, if you’re running a dual-battery setup), start by unplugging the mass air sensor’s electrical connector.
Next, the instructions guide you to disconnect the CCV hoses from the intake plenum by depressing the grey locking tabs on the fittings at each end.
After releasing the tabs, leave the hoses in place rather than removing them entirely—this allows you to loosen the hose clamps in the next step without risking debris entering the lines. I used tape to seal the ends of the CCV hoses and swiveled them out of the way before continuing.
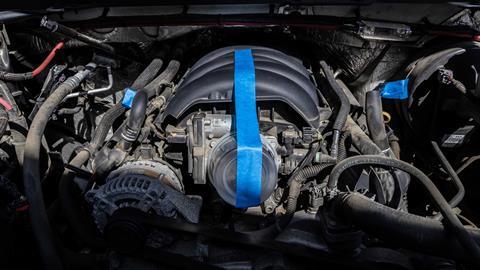
Once the intake plenum is removed, I taped a clean, empty tub over the throttle body to prevent any unwanted debris from collecting.
If you’ve been wrenching on cars long enough, you probably save every food container for sorting or cleaning parts—they always come in handy. And yes, using a decade-old Land O’ Lakes butter tub or parmesan container adds a bit of nostalgia.
Next, simply lift the air filter housing out of the engine bay. You may feel some resistance, but depending on your vehicle, it should just be resting on the mounting plate below. Remove the four bolts securing the housing plate to complete the dismantling of the stock intake system.
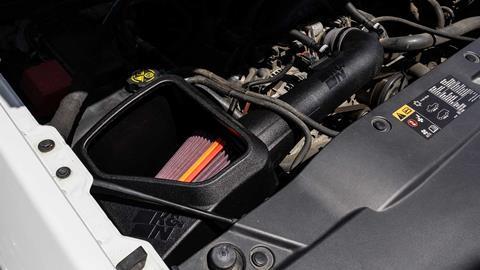
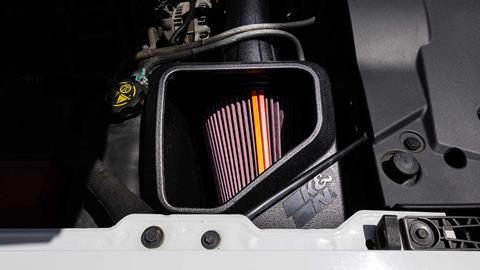
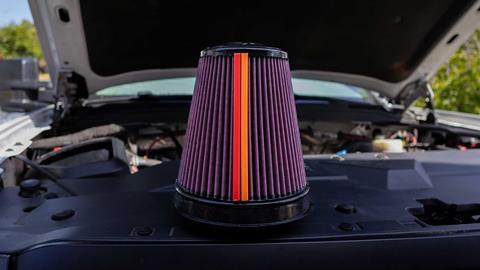
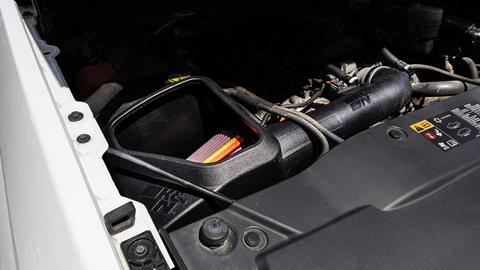
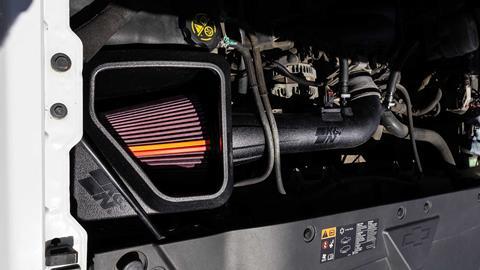
Now it’s time to grab the NextGen airbox and install it using three of the four bolts from the stock mounting plate. This hybrid unit features a semi-enclosed design and an enlarged fresh air inlet, promoting improved airflow and lower intake temperatures.
K&N includes two colored filter clips in their signature orange and red. These are optional, aesthetic add-ons that press-fit onto the pleats of the air filter—definitely worth installing. Out of the box, the filter clips were slightly long, but a fine-bladed hacksaw and some sandpaper made quick work of that.
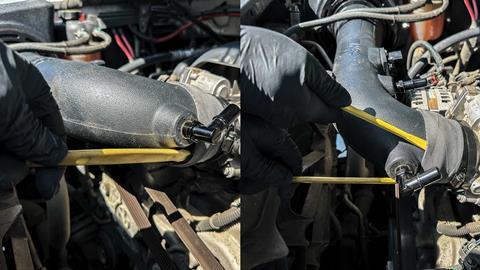
Next, remove the makeshift throttle body cover and install the step coupler. Before installing the intake tube, remove the mass air sensor from the stock system and reattach it to the new intake tube using the provided gasket.

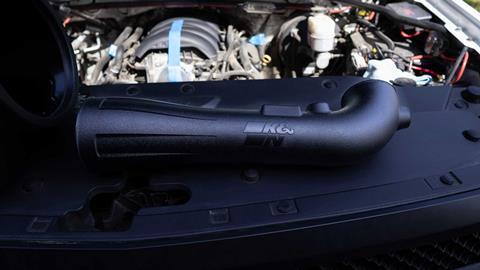
Installing the intake tube requires a bit of patience, as the tolerances between the outer diameter of the tube and the inner diameter of the step coupler are extremely precise.
Begin by pressing the passenger-side end of the tube into the NextGen airbox. There are set ridges on the intake tube that indicate how far it should be seated.
Moving on to fitting the coupler from the throttle body to the intake tube, using a set of plastic pry bars proved to be the best solution for getting the two to connect. Before proceeding, vacuum out any debris or dust that may have accumulated inside the coupler.
Once the tube is fully installed and all hose clamps are tight, grab the provided CCV hoses. Trim only the passenger-side hose to 12 inches, attach the new CCV quick-connect fittings to each end, and install it. The driver-side hose requires no trimming and follows the same connection process.
Finally, reconnect the mass air sensor and negative battery cable. It’s finally time for road testing and at-home comparisons using a simple OBD-II reader.
In total, the product install including the removal of the stock intake was just under 2 hours–truly an easy and stress free upgrade process for less than $500.
At-Home Benchmark Testing with a Standard OBD-II Reader
Prior to installing the K&N NextGen Cold Air Intake, I wanted a clearer understanding of my vehicle’s stock performance to establish a benchmark for comparison. This, along with the provided dyno chart, would help quantify the exact performance gains delivered by the new intake.
By monitoring key metrics such as Mass Air Flow (MAF) and Intake Air Temperature (IAT)—both of which directly influence how efficiently the engine manages air-fuel combustion—I could track meaningful changes.
MAF measures the volume of air entering the engine, while IAT monitors the temperature of that air, affecting power, throttle response, and fuel economy.
The goal was to record these metrics across multiple conditions: at idle and while driving at various speeds (25 mph, 40 mph, and 65 mph). Using the live data feature on a standard OBD-II reader, the following reflects the benchmark test results with the stock intake:
Stock Intake Benchmark TestDaily Temperature: 59°F |
||||
|
MAF |
0.01 g/s |
0.15 g/s |
0.14 g/s |
0.12 g/s |
|
IAT |
73°F |
69°F |
69°F |
69°F |
|
RPM |
560 |
1,150 |
1,100 |
1750 |
|
Speed |
0 mph |
25 mph |
40 mph |
65 mph |
Analyzing the numbers from the benchmark test with the stock intake, it’s common to see MAF readings fluctuate between 0.10–0.15 g/s, along with IAT temperatures ranging 5–20°F above ambient.
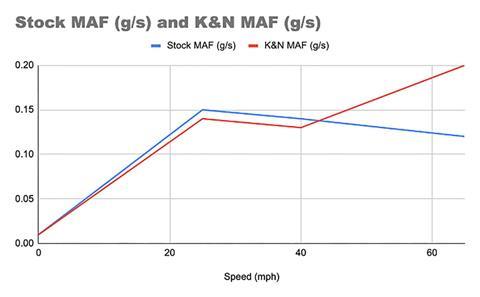
Post-install, the data from the new K&N NextGen cold air intake clearly shows a significant increase in airflow at higher speeds. At 65 mph, the MAF reading increased by 0.08 g/s over stock—a measurable improvement.
Additionally, comparing the ambient temperature (78°F) to the IAT reading (80°F) at that same speed shows just a 2-degree difference, further indicating that the larger-diameter intake tube is effectively boosting airspeed and delivering cooler, denser air to the engine. Together, these are clear and immediate signs of improved overall performance.
K&N NextGen Cold Air Intake TestDaily Temperature: 78°F |
||||
|
MAF |
0.01 g/s |
0.14 g/s |
0.13 g/s |
0.20 g/s |
|
IAT |
93 °F |
80°F |
82°F |
80°F |
|
RPM |
565 |
1,000 |
1,100 |
1750 |
|
Speed |
0 mph |
25 mph |
40 mph |
65 mph |
Referencing the visual chart below, the difference in g/s at lower speeds is negligible, with 0.1 g/s likely falling within the tolerance range of the OBD-II reader’s accuracy. However, at higher speeds, the performance gains from the upgraded intake become much more apparent.
Verdict: Easy Installation With Immediate Impact
Breathing life into a decade-old truck shouldn’t be this easy. From the first test drive, the difference between the stock intake and K&N’s newest offering is both audible and immediate. The semi-enclosed airbox delivers a throaty roar under acceleration, a welcomed sound in the mid-range and a massive upgrade from the muted, restrictive OE system.
Throttle response also gets a noticeable bump. That familiar delay or “lag” when you step on the pedal is sharply reduced. Like most modern vehicles, the Silverado uses electronic throttle control (ETC), and with more efficient airflow, the ECU appears to respond more aggressively to the same pedal input. The dyno numbers and live OBD-II data back up this newfound responsiveness and performance.
K&N NextGen Air Intakes are available for purchase in stores and online for Chevy, Ford, RAM, Jeep and Toyota vehicles: MSRP: $425.99.
Access More Great Stories!
For more informative articles like this, consider subscribing to OVR Magazine in print or digital versions here. You can also find the print edition of OVR at your local newsstand by using our Magazine Finder.


No comments yet