What’s the difference between an off-road vehicle and an adventure vehicle? In our opinion, it’s the ability to carry the gear you need for self-sufficiency in a secure and organized manner. 

Most vehicles come from the factory with the bare minimum of tie-downs and plenty of wasted space. The key to a good setup is finding products that utilize these unused spaces and allow for flexible storage.

031-OVR-Adventure-Lab

Organization for days, even in the back of traditionally space-deprived Jeep Wrangler JL. With American Adventure Lab’s slide-by-slide arrangement, we can stack our Dometic Go 50L hard boxes to one slide and still access them without removing them from the vehicle.

When it comes to cargo management, there are several great companies out there to choose from. One of those companies is veteran-owned and Utah-based American Adventure Lab, or AAL. The company has been innovating since 2018 with the its halo being the Wrangler JL. Other applications include everything from pickups to Ford Broncos, and even a few adventurous CUVs, including Subarus. 

American Adventure Lab’s mission of “advancing the development of adventure vehicles” manifests itself in every product the company makes out of its St. George, Utah, manufacturing facility. Obsessive with light-weighting, aluminum construction, and tight tolerances, AAL products are designed to be additive in nature to adventure vehicles, with a robustness designed for off-road excursions and a modularity designed for just about any use case.

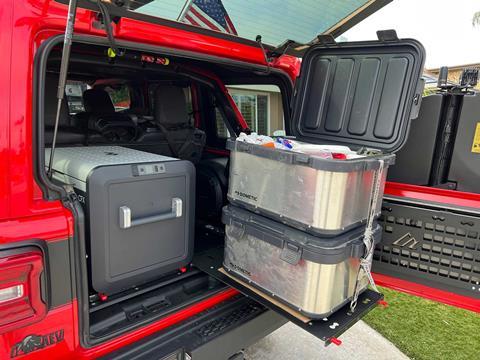
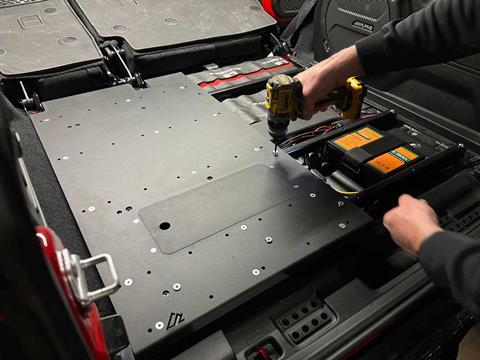
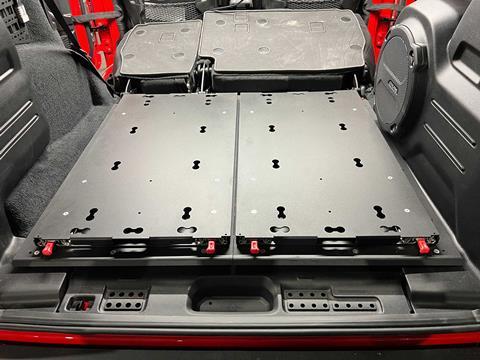
For example, the American Adventure Lab M.A.S.S. (Modular Adaptable Storage System) is a base plate made from durable and corrosion-resistant 5052 aluminum, which on its own features flexible tie-down positioning via M.A.S.S. connector holes for different gear loadouts.

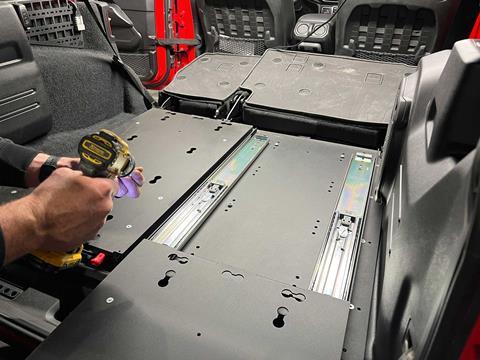
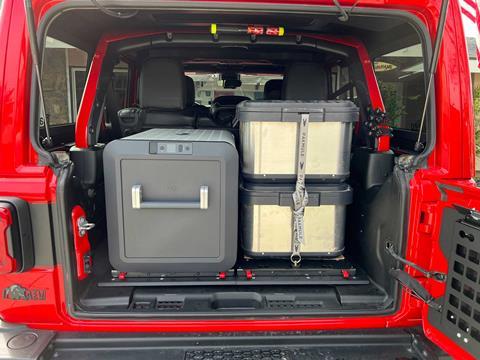
However, the M.A.S.S. system also supports a range of slides and stackable drawer options of various sizes that can be configured in dozens, maybe even scores, of different arrangements to fit the needs of adventurers and maximizing their organizing potential.

002-OVR-Adventure-Lab

1. We began our install by running appropriately-sized wire from the battery to the rear of our Jeep and by removing the factory floor and tie-downs.

003-OVR-Adventure-Lab

2. Next, we installed the new AAL battery bracket and support crossbars that make up the foundation for the M.A.S.S. platform.

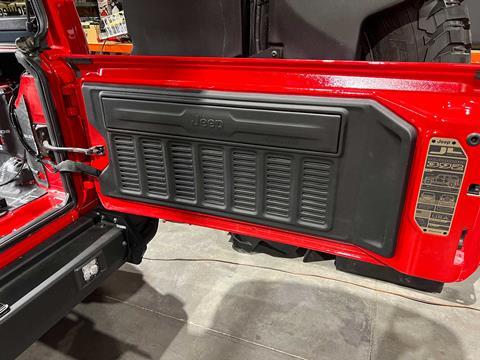
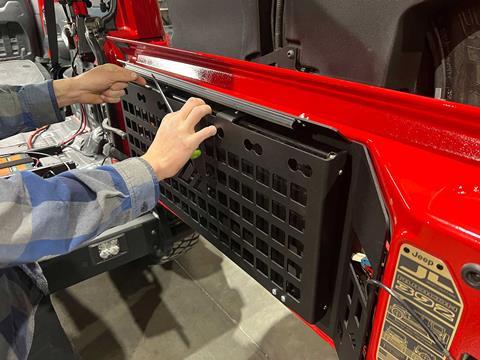
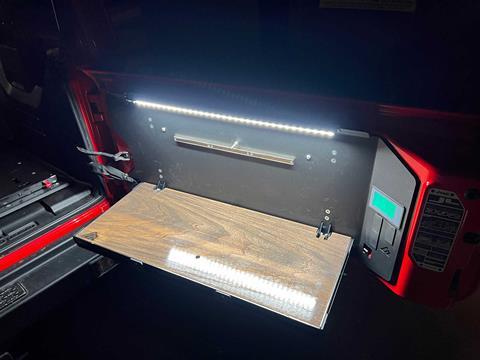
Another AAL product is the VersaTable, which is one of the most feature-packed tailgate tables on the market. Devoid of cable supports that could get in the way, the VersaTable’s work surface can be ordered in either sealed bamboo or poplar wood, and it incorporates magnets on the backsplash to hold knives and other utensils to free up the table surface. When stowed, the table’s underside becomes a MOLLE panel with additional M.A.S.S. connector holes.

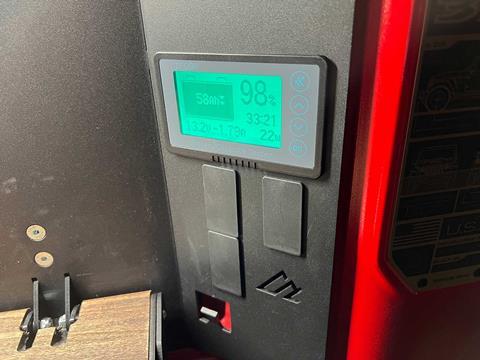
The VersaTable is wired with an LED strip light to illuminate the work area and has an integrated trash bag hook. Options include a cutout for a battery monitor, a bottle opener, or a series of switch blank cut-outs to mount multiple Contura 2 switches.

004-OVR-Adventure-Lab

3. With the AAL bracket installed we were able to put the star of the show, the Redarc BCDC1240D dual input battery charger, in place. This DC-to-DC battery charger is the device that safely charges the battery system and seamlessly hands off input between the vehicle’s charging system and solar panels.

005-OVR-Adventure-Lab

4. Here you can see the Redarc BCDC being secured to the American Adventure Lab bracket and wires waiting to be connected.

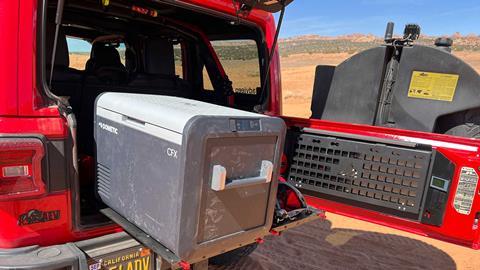
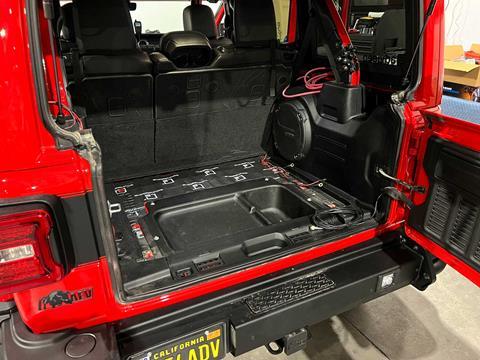
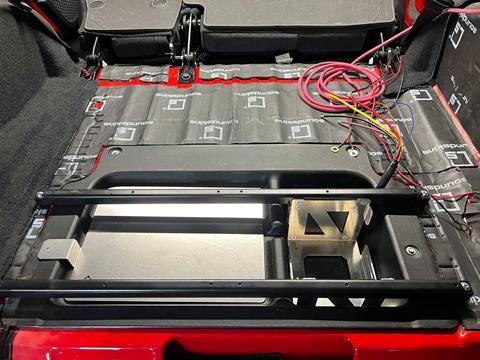
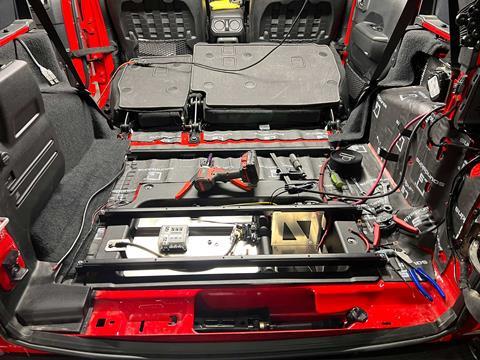
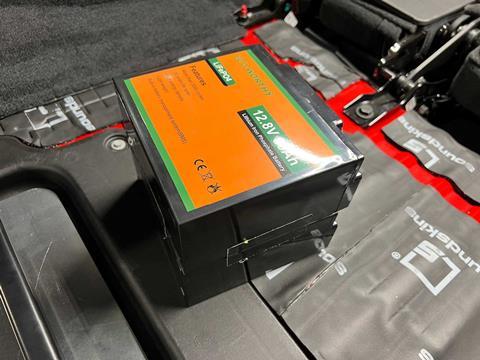
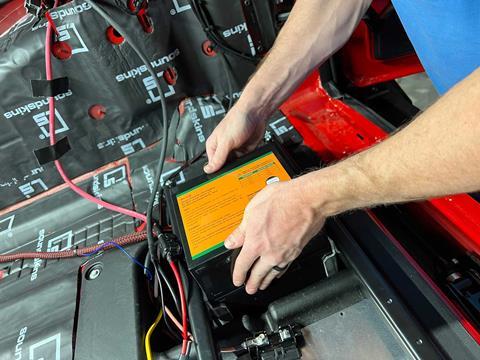
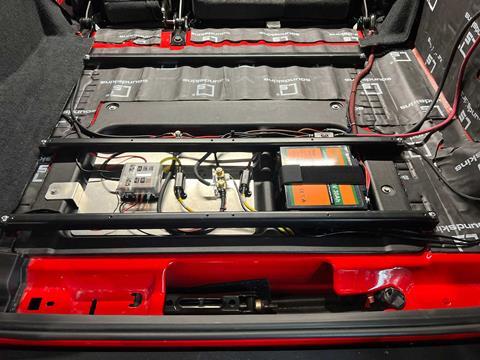
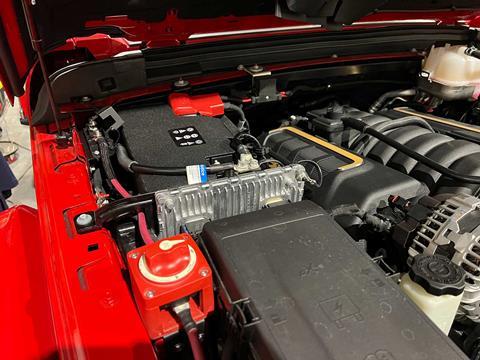
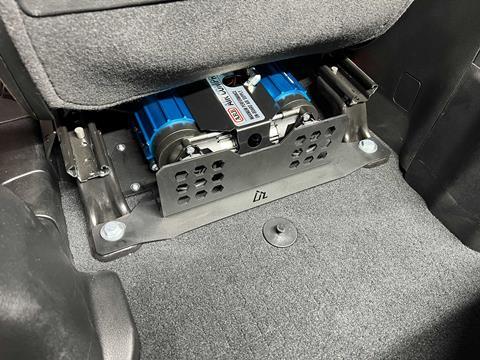
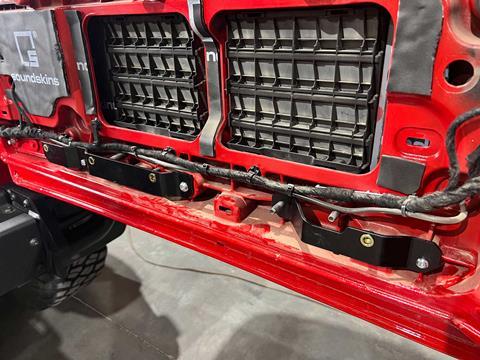
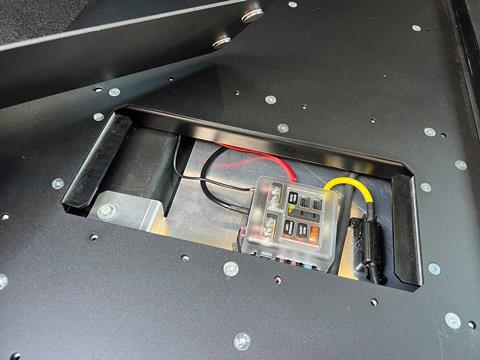
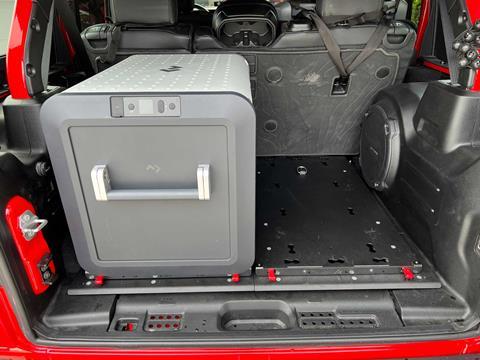
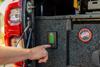
AAL also offers a slew of electronic products, such as auxiliary battery setups on Wranglers, Gladiators, Broncos, and other popular vehicles. On the Wrangler Rubicon 392, for example, AAL’s auxiliary battery system features two 30Ah lithium-ion batteries mounted in the rear underfloor storage cubby and wired in parallel for a total of 60Ahs of power.

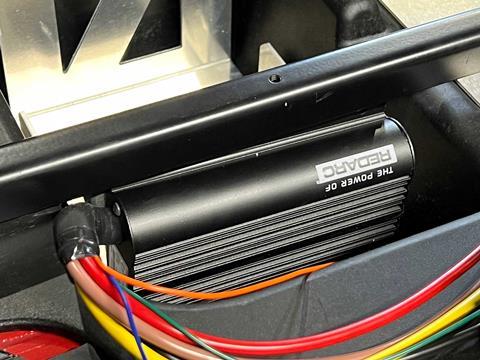
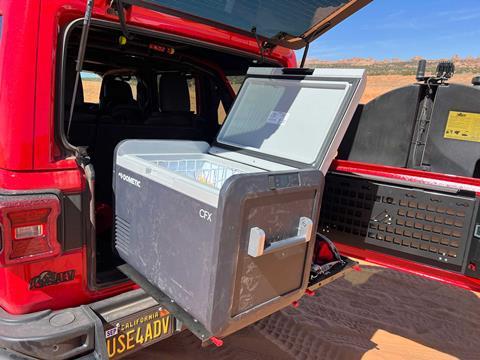
That’s enough to power a fridge like our large Dometic CFX355IM for a full two days before needing a recharge. When paired with a Redarc BCDC battery charger, the batteries can be charged by the vehicle’s alternator or with solar panels.

Optionally, the auxiliary battery system can be mated with a multi-circuit fuse block for added electrical circuits, such as lighting.

006-OVR-Adventure-Lab

5. Wiring the system is pretty straightforward for someone who is electrically inclined, but probably shouldn’t be attempted by a novice. As you can see here, there is a lot going on to get everything wired correctly. One of the nice things about this setup is that no vehicle wires are spliced or cut, leaving the integrity of your factory electrical system and CAN bus intact.

007-OVR-Adventure-Lab

6. AAL utilizes two 30Ah lithium-ion batteries that are stacked and wired in parallel to provide 60Ah of output.

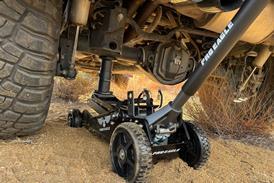
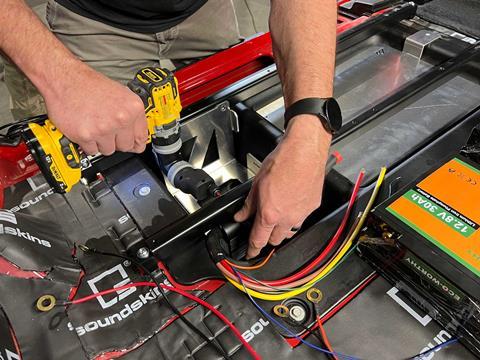
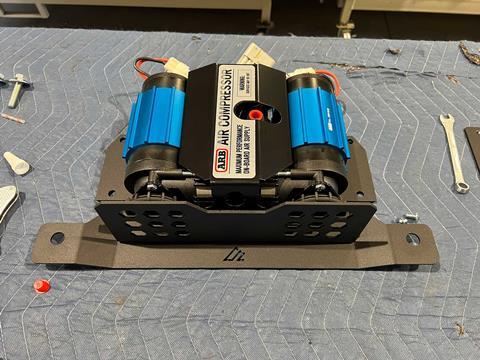
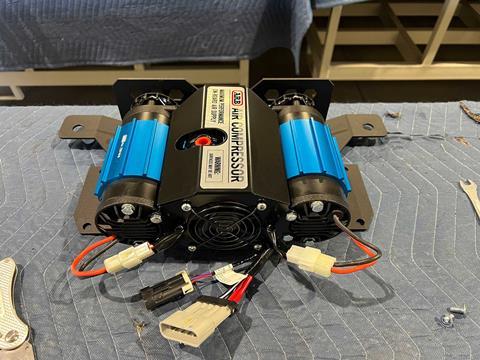
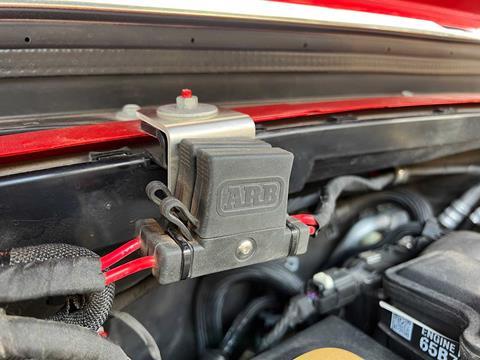
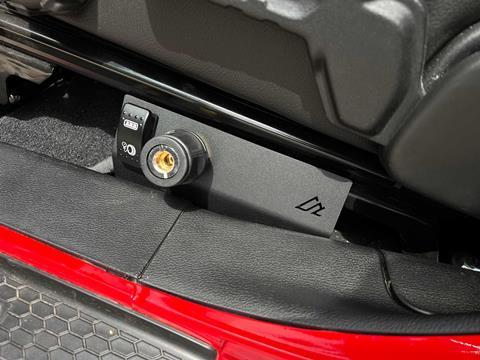
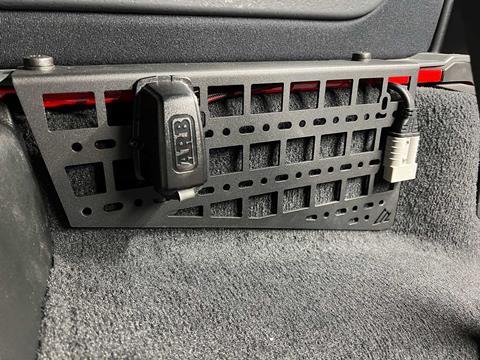
American Adventure Lab has another popular product for the Wrangler in the underseat ARB compressor mount. In the V6 and 2.0T-equipped Wranglers, the rear cubby is large enough to house an ARB CKMTA12 twin compressor and a 50Ah battery, but in the 392 the cubby is only large enough for the batteries, so AAL developed an under-seat mounting bracket that integrates the ARB switch, air chuck, and compressor all on one mount that can be installed on either the driver or passenger side.

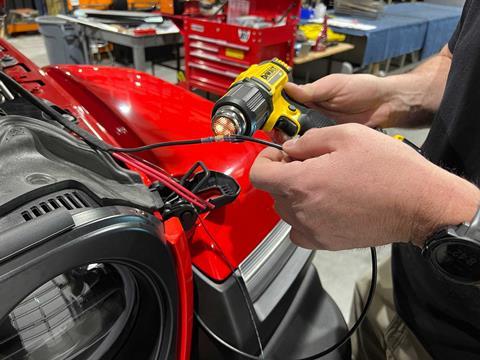
Across the product line, AAL offers a slew of powdercoat options to further customize its products, and their universal offerings ensure the largest swath of vehicle compatibility. Follow along with the numbered steps to learn what’s involved with outfitting a Jeep Wrangler 392 with all of the American Adventure Lab products discussed in this story, but be sure to visit the website for a look at the entire catalog and which products are right for your adventure rig.

008-OVR-Adventure-Lab

7. Installing the batteries has to be done carefully and deliberately because the tolerances are tight.

009-OVR-Adventure-Lab

8. With the battery in place, we started to tidy up our wire routing and installed the fuse block and battery monitor shunt and started completing connections at the rear of the vehicle.

010-OVR-Adventure-Lab

9. After placing the battery and finishing up the wiring in the rear of the Jeep, we moved to the engine compartment and installed the power cable, 60A system fuse, and in-line battery cutoff switch.

011-OVR-Adventure-Lab

10. From there we moved on to installing the ARB CKMTA12 twin air compressor on the AAL under-seat bracket. This is hands-down one of the best compressors available today, offering compactness with an impressive output volume. It has built-in thermal protections and is weatherized for harsh environments, making an interior mounting even better for durability.

012-OVR-Adventure-Lab

11. Note the fan between the ARB compressor’s aluminum cylinders. This is part of the thermal management system that keeps the compressor from overheating at high loads. ARB compressors are easy to wire and come with a very well-engineered loom that uses high-quality connectors.

013-OVR-Adventure-Lab

12. Because of the high amp draw of the compressor, we wired it directly to the starter battery after extending the ARB-supplied wiring loom.

014-OVR-Adventure-Lab

13. The fuses for the compressor are mounted to the firewall for easy access in case one of them ever needs to be replaced.

015-OVR-Adventure-Lab

14. With the wiring to the starter battery completed and the driver’s seat slid fully forward, we put the compressor and bracket in place and bolted them down using new AAL-supplied hardware. AAL also offers a passenger-side bracket that can be used for a compressor or anything else you might need to mount under the passenger seat.

016-OVR-Adventure-Lab

15. AAL designed the under-seat bracket to fit as far forward as possible, preserving foot space for rear seat passengers. The bracket also includes a kicker panel to prevent accidental foot strikes.

017-OVR-Adventure-Lab

16. With this setup, the switch and chuck for the ARB compressor are right on the side of the driver’s seat and easily accessed.

018-OVR-Adventure-Lab

17. Next, we turned our attention to the tailgate of the Jeep so that we could install our VersaTable.

019-OVR-Adventure-Lab

18. After popping off the factory tailgate trim panel, we installed the American Adventure Lab mounting brackets and ran the wiring from our auxiliary battery shunt to the far side of the tailgate.

020-OVR-Adventure-Lab

19. We then installed the VersaTable to the tailgate and routed the wiring for the table’s LED strip light.

021-OVR-Adventure-Lab

20. The final part of the VersaTable install was to connect the battery monitor to the wire we ran from the auxiliary battery system shunt and to pop the monitor into place.

022-OVR-Adventure-Lab

21. Finishing up our install of the VersaTable, we installed Contura 2 switch blanks for now and fired up the battery monitor to make sure everything was wired and working correctly.

023-OVR-Adventure-Lab

22. Here is the VersaTable at night, showing off just how bright the lighting is. Our table came with one of the most beautiful planks of poplar we’ve seen for the table surface, and the lightning is a game-changer when cooking or working at night.

024-OVR-Adventure-Lab

23. Once we confirmed that all of the new electronics were operating correctly, we placed the second-generation M.A.S.S. Plus platform panels in place and secured them with the supplied hardware.

025-OVR-Adventure-Lab

24. The M.A.S.S. Plus platform has strategically placed magnetic trap doors that allow for access to the batteries and auxiliary fuses without having to remove the entire plate.

026-OVR-Adventure-Lab

25. After installing the M.A.S.S. Plus platform, we installed our matching sliders and custom-colored powdercoated slide face.

027-OVR-Adventure-Lab

26. American Adventure Lab has a host of powdercoat colors available to further personalize your tables and slides. We chose a color for our slide faces and VersaTable accents that perfectly matches the Granite Crystal on our Wrangler’s dash.

028-OVR-Adventure-Lab

27. For our build, we chose a unique “slide-by-slide” arrangement, which utilizes two flat sides mounted next to each other. Since our vehicle doubles as a daily driver, this still allows us to have a flat load floor, or alternatively, when the fridge is mounted, we can secure our boxes to the other slide and pull them out for easier access.

029-OVR-Adventure-Lab

28. With everything wired and working, an AAL MOLLE panel behind the driver’s rear seat was the perfect way for us to mount our fridge plug and Anderson SB50 solar input connector.

030-OVR-Adventure-Lab

29. To our amazement (JL cargo areas are tight), we were able to upgrade from a Dometic CFX345 fridge and hard-mount and fit a larger Dometic CFX355IM fridge to the American Adventure Lab flat slide.


032-OVR-Adventure-Lab

Here you can see everything stowed and secured to the AAL slides. This allows us to go hard off-road and not fear any load shifts. Best of all, after over a thousand off-road miles, we’ve experienced no squeaks, rattles, or quality issues with the American Adventure Lab products.

033-OVR-Adventure-Lab

Our Dometic fridge is easily accessible thanks to American Adventure Lab’s slide-by-slide configuration.


Sources

American Adventure Lab
americanadventurelab.com 

ARB
arbusa.com 

Dometic
dometic.com 

Redarc
redarcelectronics.com


Access More Great Stories!
This article originally appeared in OVR Issue 03. For more informative articles like this, consider subscribing to OVR Magazine in print or digital versions here. You can also find the print edition of OVR at your local newsstand by using our Magazine Finder.