


Say goodbye to drilling into your Pelican Case! Pelican has released roof rack mounts for their Air, Protector and Vault lines of hardcases.
Pelican makes some of the best loved hardcases used in any industry. They are renown for the protection they provide and their tenacious longevity. It’s no wonder that people like taking them on their road trips and trail outings.
We’ve seen fellow vehicle-based adventurists install them by drilling their Pelican cases and directly bolting them to their roof racks. While that certainly is a solution, drilling the cases degrades their weatherproof abilities and voids the Pelican limited lifetime warranty. Plus we imagine having holes in the case makes it less than useful if it was ever to be used off the roof rack.
Pelican’s aren’t exactly cheap so we’re glad that they now offer brackets that are made to mount their hardcases to roof racks without the need to drill into them.
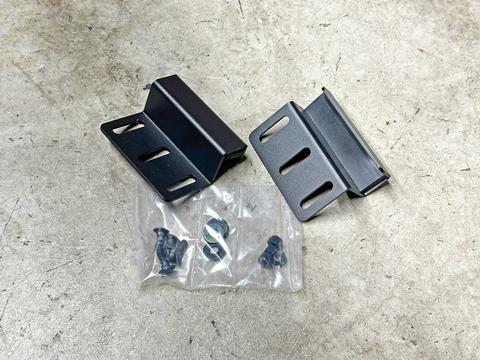
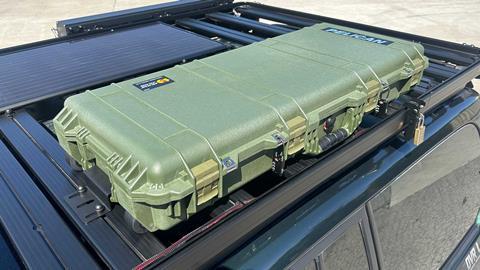
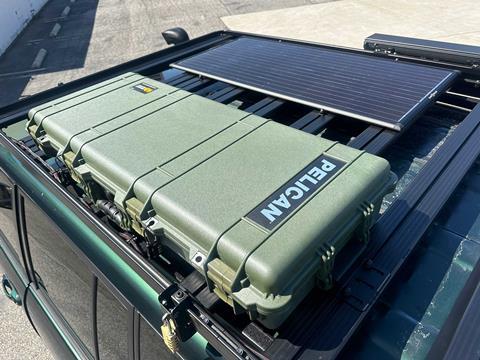
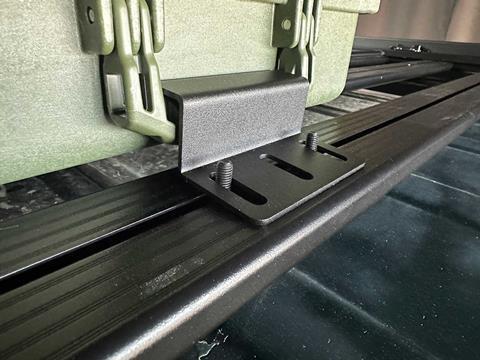
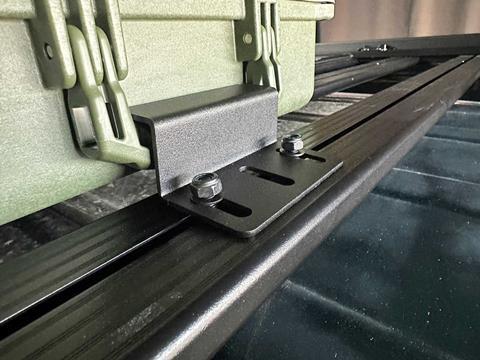
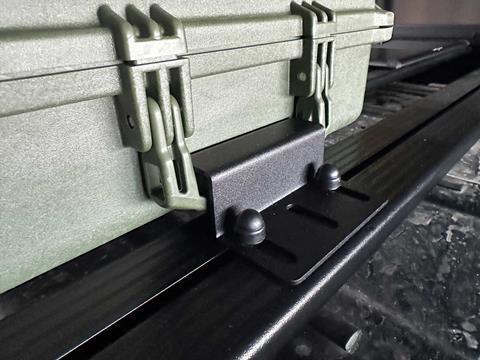
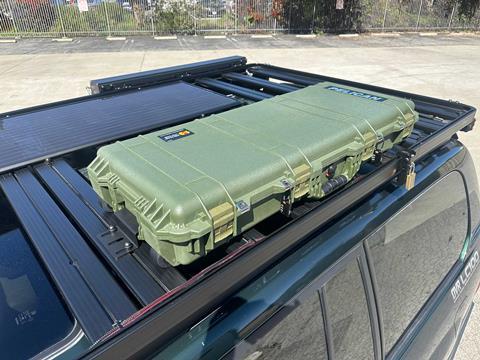
The Pelican Case Roof Mounts provide a solution for mounting most Pelican long cases onto a variety of aftermarket roof racks and even homemade 80/20 racks. Simply clamp the solid steel bracket over the carrying handles (on the short sides of the case) and secure it to the roof rack. These mounts are easy to use and install, offering a hassle-free solution for securing your Pelican Case to your roof rack.
Note that this is a semi-permanent installation, meaning that once the case is mounted, there’s no quick release for it to come off. If you need to remove the case, you’ll have to remove the lock nuts that keep the brackets in place.
Easy DIY Installation
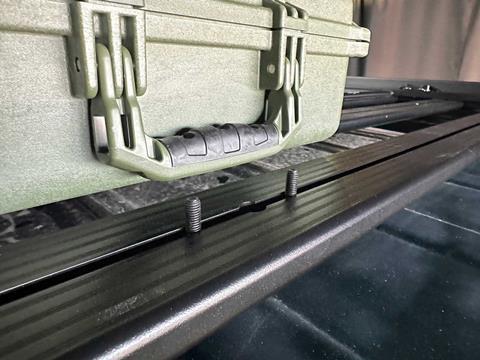
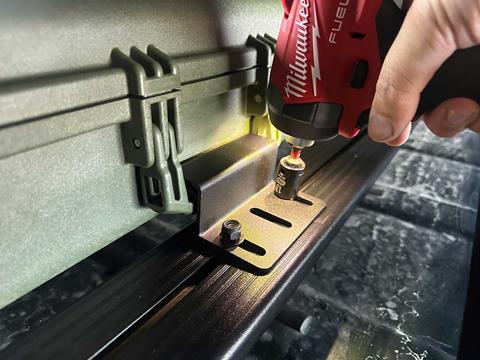
Let’s install a Pelican Protector Case 1700 to the OVR LC100’s Front Runner roof rack. The mount kit comes with two brackets and the necessary hardware to mount them to most roof racks. We found that the bolts that were included with the kit didn’t interface with the Front Runner’s T-slots so we used some spare Front Runner hardware we had instead.
Three Types
There are three styles of mount kits, one for each of Pelican’s Air, Protector/Storm and Vault lines of cases.
| Pelican Case Roof Mount Line-Up | Compatibility |
| LGMT-001A Air Case Roof Mount | 1745, 1755 |
| LGMT-001P Protector/Storm Case Roof Mount | 1700, 1720, 1750 |
| LGMT-001V Vault Case Roof Mount | V700, V800 |
Access More Great Stories!
For more informative articles like this, consider subscribing to OVR Magazine in print or digital versions here. You can also find the print edition of OVR at your local newsstand by using our Magazine Finder.


No comments yet