


When looking to outfit the OVR project Land Cruiser 100 (OVR LC100) with a roof rack, we drew upon our previous roof rack experience to find the right one for our needs. The Land Cruiser is the second overland vehicle that we are building, with the first being a Land Rover Discovery II that we kitted out well over a decade ago. We learned plenty of lessons with the “Disco” and made adjustments to what we were looking to do with the OVR LC100 based on our previous hands-on experience.
Previous Experience
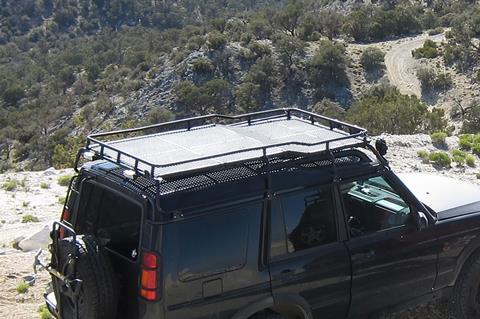
Our old Disco sported a basket-like Safety Devices Highlander roof rack that had raised railing all along its perimeter and was constructed of welded steel tubes. While it looked the part, we realized over time that it was lacking in some functionality that we wished we had. These older style racks, while still abundantly useful, did not have a flat floor.
Because they were constructed of spaced-out welded tubes, the bottom of the rack was not the best surface to stand on and did not leave many modern accessory mounting options. In fact, to retrofit the rack we installed chicken coop flooring used by poultry farms in order for it to have a flat floor and more mounting points.
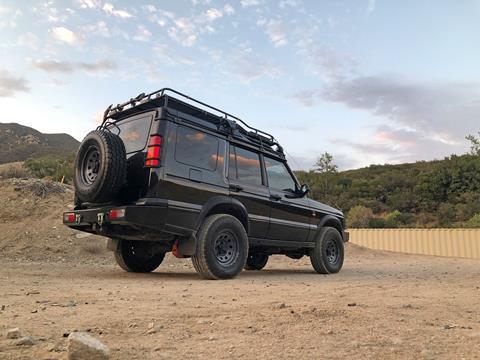
While the railing around the rack was a great place to strap things down, its raised profile made it awkward to mount larger accessories such as a roof top tent. It also raised the overall profile of the truck too, which is not at all desirable.
This style of rack was designed many decades ago so that’s all we had available at the time. Luckily roof rack designs have improved by leaps and bounds over the years.
The Choice Is Made
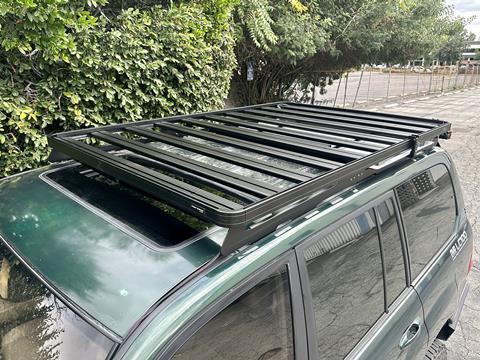
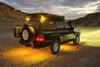
With so many options, which roof rack should we go with? Having spent much time looking at racks, we ultimately decided on a Front Runner Slimline II roof rack for several reasons.
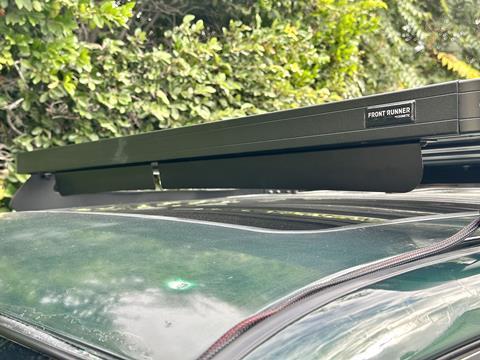
First and foremost, we learned the lessons from our old rack and wanted a low-profile roof rack that didn’t add much overall height to the truck. The Slimline raises the Land Cruiser’s height by only a few inches over the stock roof rail height. The rack on the Disco added a whopping 10-inches to the truck’s height.
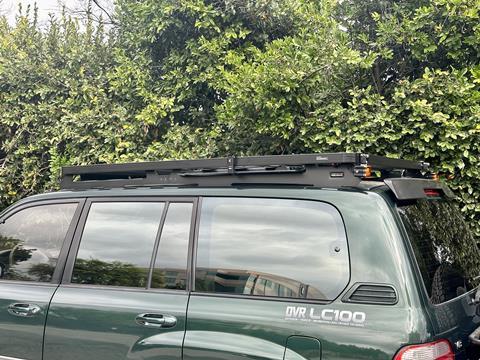
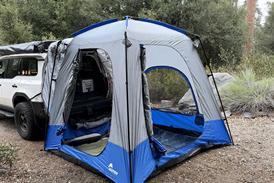
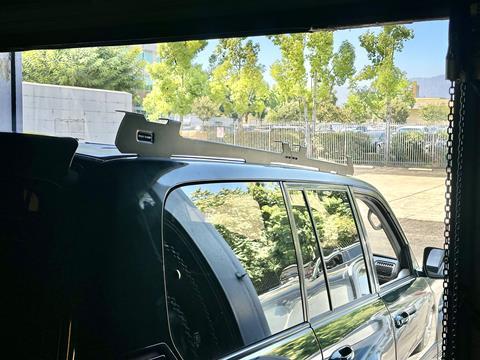
We also wanted a slimmer rack to help cut down on wind noise and hopefully not impact gas milage much. Not having a railing around it opens up the lower profile mounting of items such as a roof top tent or awning. The Slimline II rack is offered in full-length and half-length models, we chose the full-length version which measures 77.3-inches long.
Another requirement for us was a system of mounts that were made for the rack. With our old steel-tube rack, we rigged mounts out of hose clamps, zip ties, universal tube collars and QuickFists, which were not the most elegant of solutions.
Front Runner offers a ton of accessory mounts that are made specifically for the Slimline II, negating the need to rig something yourself – and it’s worth mentioning that they look smart too.
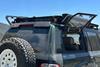
Front Runner’s Slimline II promised to solve all of those problems. It’s one of the lowest sitting racks available and it features wide slats that form the tray’s floor. The slats are even configurable so you can choose to remove any that you don’t want to install.
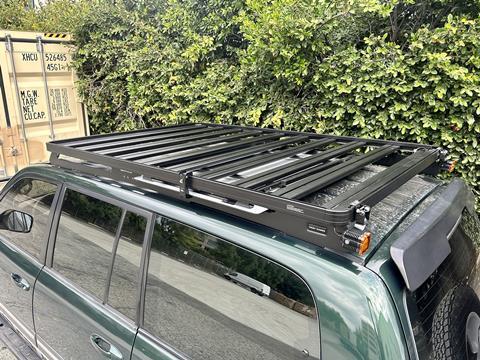
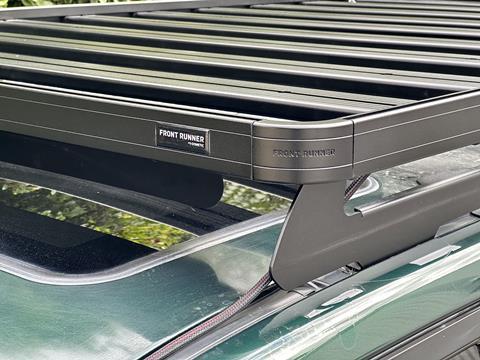
A key feature of Front Runner’s racks is the incorporation of T-slots and mounting points all over the rack from the floor’s slats to the frame that surrounds it. You can use the openings in the slots to slide bolts into them to install accessory mounts pretty much anywhere you need them.
The Slimline II even allows for some accessories to be mounted underneath the roof rack, such as an under-rack-mounted table, for the ultimate is space utilization. We’ll get into this in a moment.
Another important feature for us was a no-drill, no-cut installation. Front Runner’s Slimline II easily installs using the existing factory mounting points with no drilling required.
It’s unlikely that we’ll turn the OVR LC100 back to stock, but it’s nice to know we can. Plus, drilling into the roof of your vehicle sounds like an iffy proposition if you ask us.
Unboxing The Kit
We’re not super mechanical minded, but we do like tackling DIY installs whenever possible and Front Runner’s Slimline II is a project that we were happy to take on. We’d say that if you’re capable of putting a piece of Ikea furniture together, you can do this install.
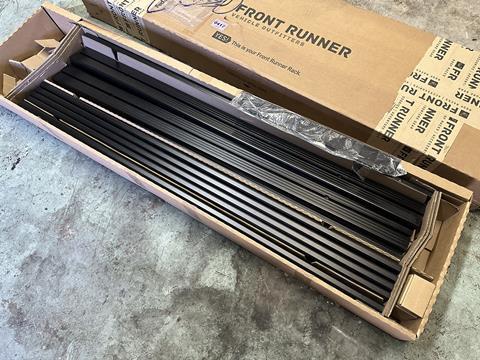
All Front Runner rack kits contain installation instructions as well as all the components needed to mount the Slimline II to your vehicle. It does “require” two-people in some steps but we went ahead and did this install solo – read on to see how it went.
When unboxing the rack kit, we saw that Front Runner included a fully illustrated instruction sheet, a la Ikea and Lego, which is great along with a few goodies such as a snazzy sticker sheet. We’re suckers for that kind of stuff.

We noticed that there are plenty of quality control cards included with every box or bag of parts and hardware. We take these cards as a testament to the quality that Front Runner is known for. Which by the way, the build of the rack’s parts is very nice.
The coatings on the rack’s major parts were flawless and look like they’ll hold up for many years of trouble-free service.

Prepping
Being impatient and excited to get the rack onto the Land Cruiser, we chose to move forward with the install without the benefit of a helping hand. Most of the install doesn’t require help anyway, but was this a smart move when we needed some lifting help? We’ll get into that in a minute. But first we had to remove the OVR LC100’s stock roof rails.
The factory Toyota roof rails have been living on the Land Cruiser’s roof for over 20 years so we were hoping the plastic bits wouldn’t crumble on us. Luckily, it all came out without any issues. After it was removed, we spent some time cleaning the mounting holes and positions in preparation of the new rack’s installation.
Those following along with our project build will know that the OVR LC100’s factory clearcoat was coming off in some areas, and nowhere was this truer than the roof. Since a roof rack would limit the access to the surface of the roof after it was installed, we washed and then sprayed the roof with some gloss paint to help protect the roof as best we could before the rack went on.
A Solo Install
With the vehicle’s roof prepped, we moved onto assembling the Slimline II. Thanks to its illustrated instruction booklet, getting the rack together was straightforward. We do wish the illustrations were bigger on the page however.
Some of the hardware call outs can be hard to see, but perhaps it’s our aging eyes that are at fault for that. That said, the instructions are also available on Front Runner’s website in PDF form so those who wish to pinch and zoom for a better look at the details can do so online. That’s what we did and it helped.
We followed along step-by-step and got the rack’s foot rails installed. To keep moisture out of the mounting points, it’s instructed to apply silicone when installing the mounting bolts.
We added a lot of silicone, probably more than what was required but we don’t want any water pooling at the rack’s base or even worse, into the roof.
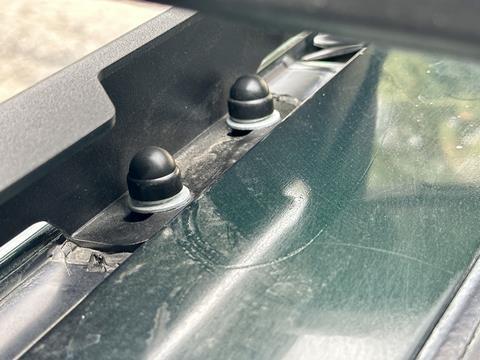
The kit includes what looks like black oxide hex bolts and nylon lock nuts. Front Runner includes nylon bolt head covers to protect the exposed bolt heads from the elements. We think this is a nice touch.
The entire foot rail assembly took us roughly over an hour to install. Those installing the Slimline II to a Land Cruiser 100 Series or Lexus LX470 note that the instructions show an extra pair of foot spacers are included but are not required for mounting. We passed on installing this optional pair as it requires drilling.
With foot rails in place, we proceeded to assemble the Slimline II’s tray. This was also an easy task but it did take some time only because it’s made up of a lot of pieces and we moved slowly to make sure we got it right the first time.
The instructions say this step takes 30 minutes, but we probably took almost an hour. The tray is made up of sturdy yet lightweight aluminum slats and side profile “frame” pieces as well as black oxide button head bolts and nylon lock nuts.
With the tray assembled, it was time to get it onto the foot rails mounted on the Land Cruiser’s roof. This is where we would have benefitted from an extra pair of hands. Instead of waiting for help, we pressed forward solo. We carefully lifted the rack and ungracefully heaved it onto one side of the truck’s foot rails.
From there, it was a game of precariously balancing the rack while we got the first bolts in. While we were able to pull this feat off, we do recommend having someone available to help lift the large and cumbersome-to-handle tray into place. We tightened down the tray’s mounting hardware and completed the installation.
Accessory Mounts
The tray’s floor slats feature holes and T-slots where hex bolts can be installed for accessory mounting. The kit comes with M8-1.25-sized metric hardware for this purpose.
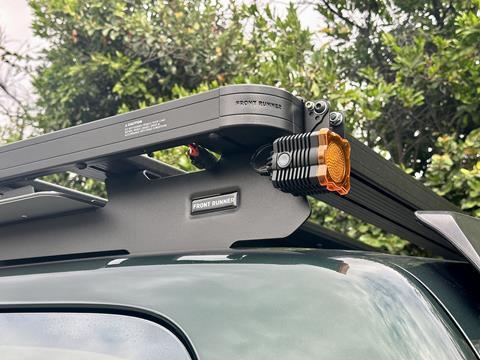
As mentioned earlier, Front Runner makes a wide variety of specific accessories such as LED light bar, Hi-Lift, axe, solar panel, Maxtrax and Rotopax mounts and general mounting accessories such as tie down rings are available as well. The rack’s corner caps can be removed to pass hex bolts through the frame’s T-slots for handy accessory mounting at any point along the rack’s outer edges.
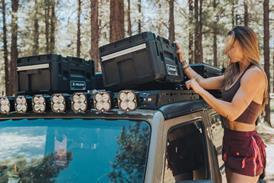
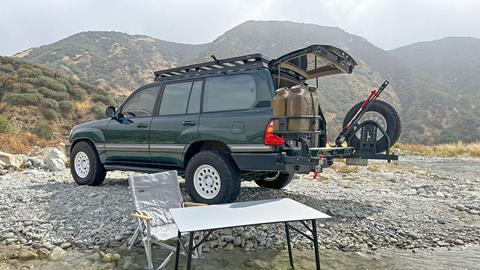
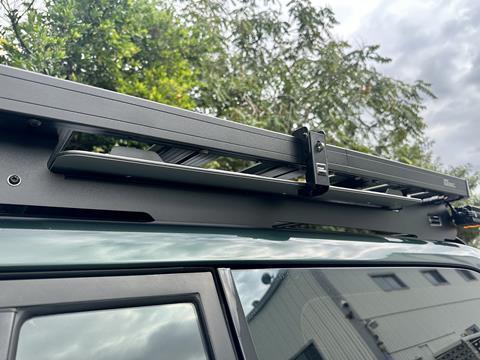
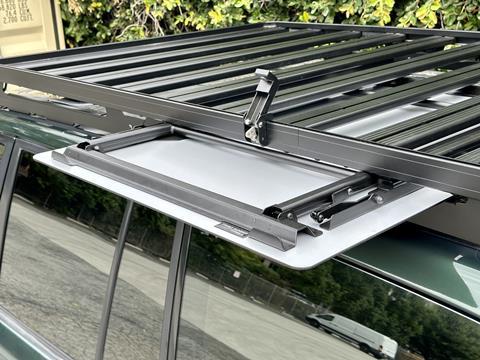
We opted to install just a few accessories while we continue to plan out the OVR LC100’s build. One thing we knew that we wanted for sure was the Front Runner Under Rack Table kit. The table is one of the most PIA things to pack in a vehicle but it’s one of the first things you need when setting up your campsite.
It’s also one of the last things you put away when packing up too. So, we think having an externally mounted table is a brilliant idea. Tucking it up under the roof rack save space as well.
The metal table is solid and fits tight under the rack. There are no rattles when its hanging underneath the rack. Our rack can only fit one table but if we could, we would like to fit another.
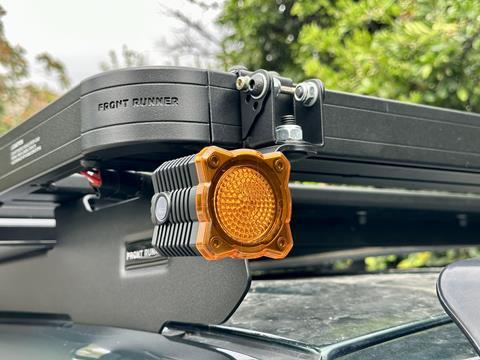
We also installed KC Flex Era 1 lights to act as chase lights on the rear of the rack. For that, Front Runner makes Roof Rack Spot Light brackets that were perfect a solution.
There are many possibilities on how the OVR LC100’s roof rack will get kitted out. We’ll follow up with our roof rack mods in future articles as the build progresses.
What We’d Change
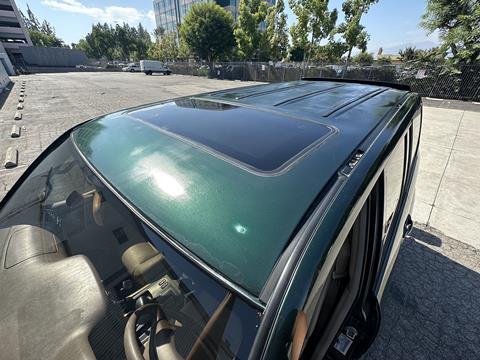
Although we opted for the “full-length” model of the Slimline II, it does not cover the entire roof. The front of it starts about midway over the sunroof, which looks funny to us. We do wish it was 6 to 8-inches longer to really cover the entirety of the roof.
That said, we’re not engineers and aren’t privy to the reasons the rack wasn’t made longer. Perhaps it’s designed this way for aerodynamic or structural reasons, we can’t be sure.
Also, stainless steel hardware is expensive and can add quite a bit of cost to a kit, but we do wish this kit came with at least some stainless parts. The black oxide hardware that comes with the kit is fine for most environments, but for those who reside in places where corrosion is an issue, we suggest upgrading your stock hardware with a set of stainless hardware.
We live inland in the Southern California region so corrosion isn’t much of an issue for us. Even so, we forked out an extra $25 for a set of stainless-steel hardware for at least the foot rail mounting points – that is, anything that actually goes into the roof was swapped out for stainless steel. It’s a small price to pay to insure against roof corrosion down the road.
Limited Usage So Far
We have had the rack on the OVR LC100 for about four months so far and it’s done very well for us. Granted we haven’t fully loaded it up yet, but that’s not our intention with it.
We like a low center of gravity and yet want the utility of being able to mount some accessories to the roof. Wind noise wise, it’s really quite low. The rack comes with a two-piece low-profile wind deflector that can be adjusted to suit your vehicle.
We mounted it according to the instructions and found that it was good to go as is. While we can hear some additional wind noise when compared to the stock roof rails, it honestly isn’t much – not enough to bother us at all.
Final Thoughts
All in all, we are very pleased with going with Front Runner’s Slimline II roof rack. The fit and finish is superb as is its design. Its plenty modular and adaptable with many accessory mounts available for it, so we expect it to serve our needs very well.
Check back for future articles to see how we further outfit the roof rack and see which accessories that we attach to it.
Read more about OVR LC100 by clicking here


No comments yet