


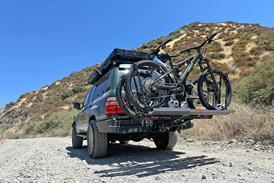
Insipred by OVR Editor-At-Large, Sean P. Holman’s article, Essential Trail Comms: Forget CB Radios- GMRS is the New Standard for Outdoor Communication, we decided to install a GMRS radio into our OVR 2021 Ford Bronco project vehicle.
Advantages such as higher wattage, better range, ease of use and a simplified setup are a few reasons why GMRS is preferred by some over CB and ham radio. Other benefits like a plug-and-play solution and improved clarity and range are further reasons why its usage is growing amongst overlanders and other trail users.
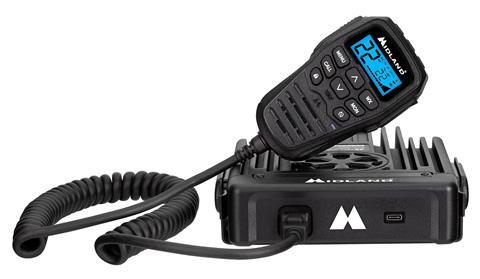
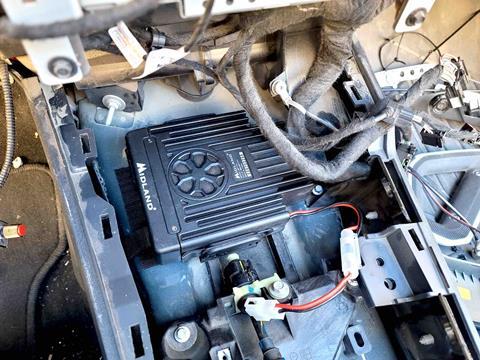
To add this essential communications capability to our 2021 Ford Bronco project vehicle, we installed Midland’s highly regarded 50-Watt MXT575 GMRS mobile radio.
About the Midland MXT575
Midland’s flagship MicroMobile MXT575 is a proven radio that’s seen use by explorers and adventurers alike to great success. It’s a powerful, full-featured GMRS two-way radio that includes integrated controls on the microphone, 50-Watts of broadcasting power, 8 repeater channels, wide and narrow band, 15 high-power GMRS channels and 142 privacy codes, and that’s not all.
The two-way radio can also scan the NOAA weather station, has a USB-C charging port and is compatible with Midland’s FRS and GMRS walkie-talkies and more. Suffice it to say, it has all the bells and whistles that can arm our Bronco with the GMRS comms capability that we’d need on the trail.
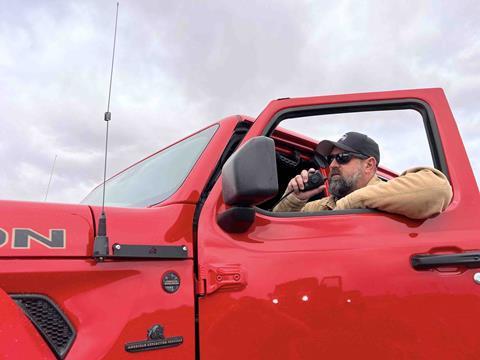
The MXT575 comes with a hand-held microphone that has its operating controls on it so access to the main radio base isn’t required for its use after its installed (which is why we can squirrel it away within our Bronco, but more on that in a second). It also includes a magnetic mount all the required cabling and an antenna as well.
A Hidden Installation
To protect the radio from would-be thieves, we planned to install it hidden from view; but the question was where? Those familiar with the Bronco will probably agree that the truck’s interior storage areas are rather tight and that most would-be installation locations give up valuable interior storage space. The search for a suitable location was on.
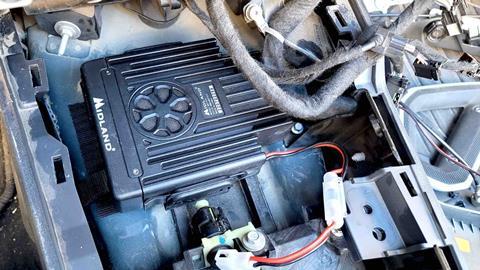
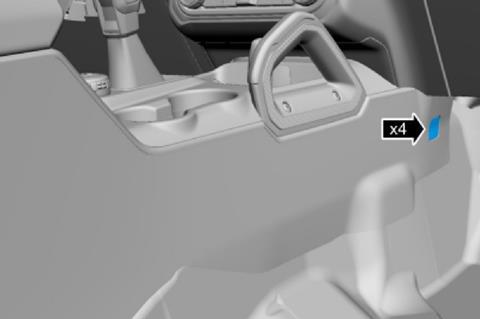
After removing the glove compartment, head unit and center console, we discovered the perfect place for the installation. The spot we found is located just under the center console, in front of the automatic gear shift right where the USB-C power outlet is located.
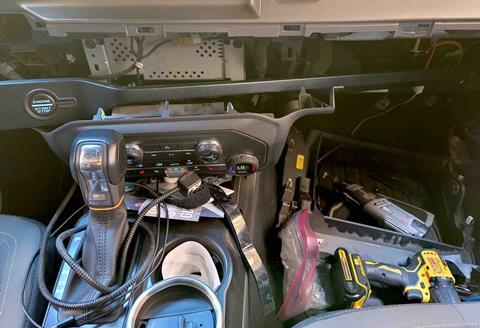
Follow along as we demonstrate step-by-step how we installed the Midland MicroMobile MXT575 into our project Bronco.
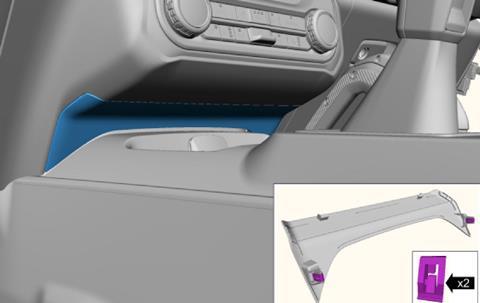
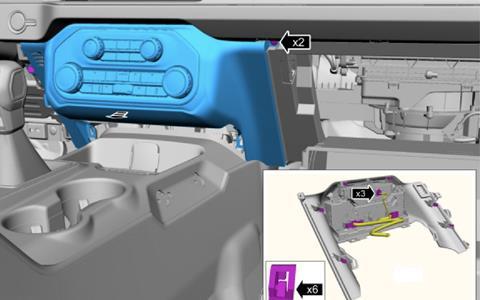
1. Release the retainers and remove the trim panel.
2. Remove the covers and the bolts on either side.
3. Release the retainers and lower the steering column opening trim panel. Using an interior trim tool makes the job easier.
4. Open the glove compartment.
5. Remove the handle and the bolts or trim plate whatever came in your vehicle.
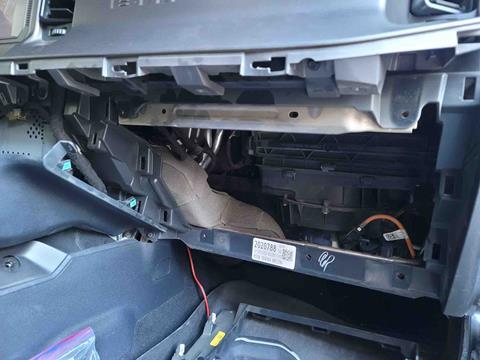
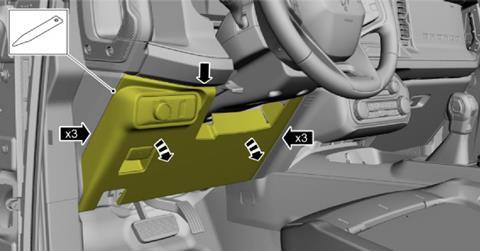
6. Remove the screws, release the reteianers and remove the lower instrument panel trim panel. Disconnect the electrical connectors.
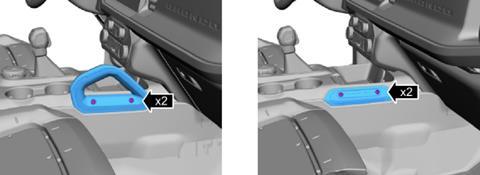
7. Remove the driving mode selector boot. Insert a trim tool between the selector lever boot and the trim ring to release the retainer tabs from the trim ring then lift the selector lever boot upwards. You don’t have to remove it to pull the center console.
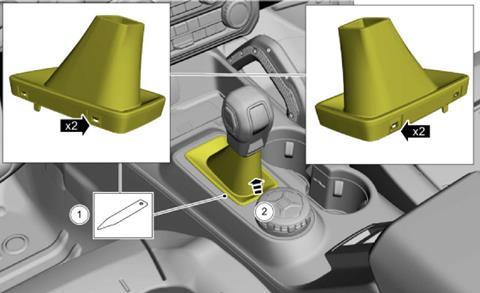
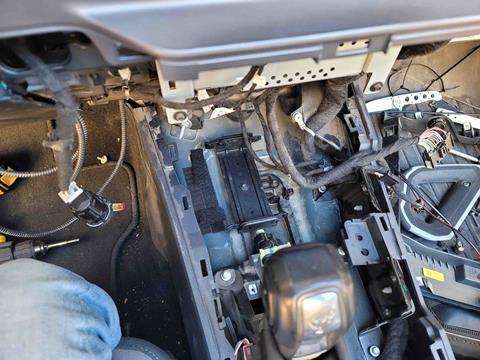
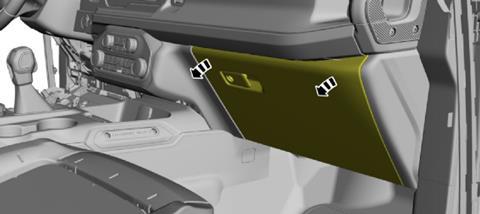
8. Release the retainers, feed the shift boot through the panel opening, and remove the floor console upper trim panel. Disconnect the electrical connectors.
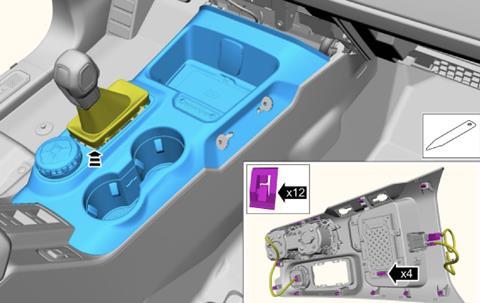
9. We used the existing left screw to attach the bracket. As you can see, in order to stabilize, secure and absorb vibrations, we used adhesive and felt tape.
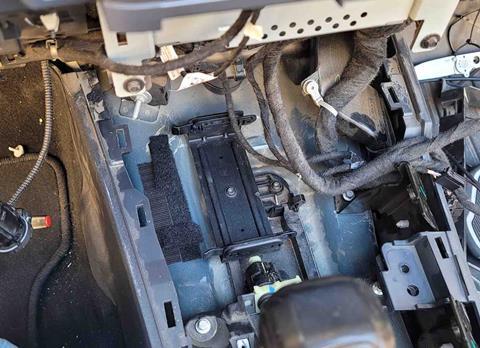
10. Slide in the MXT575 unit, grab your USB-C and ethernet cables and the extenders and attach them to the unit. For power, we ran the lines through the firewall.
11. Put everything back, you shouldn’t have any extra screws or bolts. Clean up, and voila, hidden comms acheived.
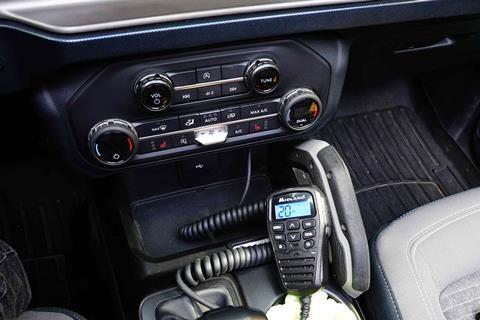
For even more flexibility, we purchased an ethernet cable, ethernet male/female adaptor and a USB-C cable so that we could pull the radio’s cable anywhere in the vehicle that we need it.
Staying Legal
To legally broadcast using a GMRS system, you will need to purchase a $35 license that is good for 10 years. A GMRS license is good for the individual applicant, and their immediate family members. You must be 18 years or older and not represent a foreign government to receive a license. Potential penalty for transmitting with a license can be up to $10,000 and jail time.
If you would like to read the detailed Rules & Regulations before operating your GMRS system, here is the link to the FCC Rules & Regulations.
Applying for a GMRS License
Purchasing a GMRS license for the first time can be confusing so we created the following step by step guide.
In steps 1-4, you create an account with the FCC Commission Registration System (CORES), once you create a username, you will be given an FRN # which will be used to purchase your GMRS license. In steps 5-7, you will go to FCC License Manager Page with the FRN number to apply for the GMRS license. Finally, in steps 9-10, you will make payment and grab your license.
Below is the quick step by step guide to getting your license.
- Go to the FCC Commission Registration System (CORES) page and Register to create an FCC username and account.
- Once you’ve created and verified, log-in using your FCC Username and password.
- On the “USER HOME” page, choose “Register New FRN” and answer a few questions.
- You will get an FRN number immediately.
- Go back to FCC License Manager Page and log in with your FCC Registration Number (FRN)
- Click “Apply for a New License”
- SELECT SERVICE: Scroll to the bottom: ZA- General Mobile Radio (GMRS)
- Answer the ensuing questions and verify your information
- You will need to go back to the CORES page to make payment
- Once your payment has been accepted, wait a couple of days, log back into your FCC License Manager Page (Step 5 above), and keep a copy handy.
For more stories about our OVR 2021 Ford Bronco project vehicle, click here.
More Great Information!
For more informative articles like this, consider subscribing to OVR Magazine in print or digital versions here. You can also find the print edition of OVR at your local newsstand by using our Magazine Finder.


No comments yet