


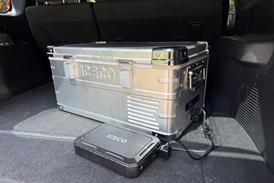
With OVR’s Project Bronco under full swing, upgrades like the Bilstein 6112 suspension kit was installed as a DIY while other projects were entrusted to professionals. To ensure the perfect lighting solution for our requirements, we opted for professional installation.
Greg Amendola, founder of Wired by Greg, is a lifelong automotive enthusiast who specializes in 12-volt installations. He tells us that what began in 2016 “as a side-gig, turned it into something that pays the bills.” Thanks to a deluge of word-of-mouth referrals and a growing backlog of demand for his services, Greg set up shop in 2022 to concentrate on automotive electronics installs full-time.

Greg says, “We are the small guys, high on quality control and we like to offer really good product for a very affordable price.” This evidently resonates with his customers as appointments are scheduled months in advance even though his shop operates up to 15-hours a day.
More Lights
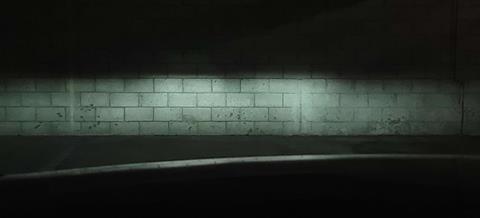
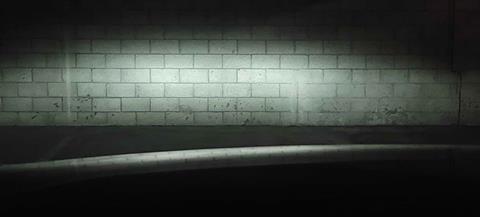
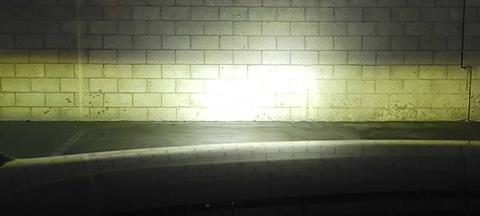
The stock headlights, low and high beam, are functional on well-lit streets and highways but on the back roads, especially with no moonlight, it’s like driving with blinders and sunglasses on. Anything around the corner is difficult to see and too many dark shadows hide potholes and other hazards.
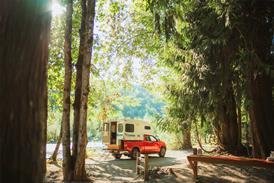
After driving thousands of miles on unlit back roads of Arizona, up the mountains and down in the deserts of California, it was time to get auxiliary lights installed for safety reasons and to lessen the strain on my old eyes.
Lights for the Bronco
We discussed with Greg the outdoor activities the Bronco would be going though: Overlanding wherever we can, back country hiking, fishing trips and desert runs in Baja, Mexico.
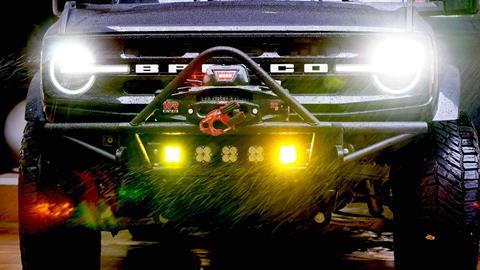
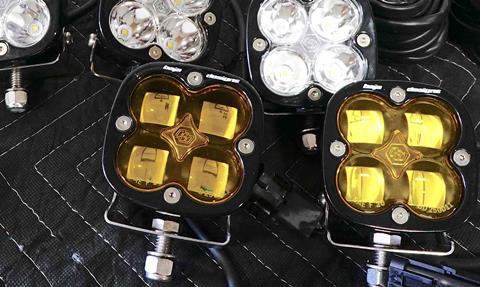
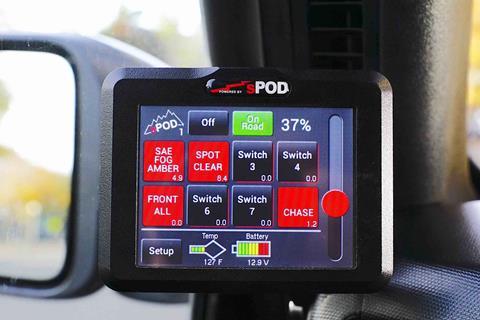
We ultimately decided on a setup that includes three Squadron PROs to light up the night ahead, a pair of Squadron SAE LED Auxiliary Light Pod in Amber to help us through fog, dust, and inclement weather conditions, and a pair of S1 Black LED Aux Light Pods for the rear. All of these lights were fed into and controlled with the sPOD BantamX Touchscreen controller.
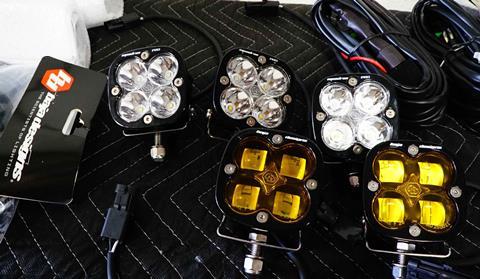
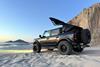
We wanted more visibility in front of the Bronco and these lights delivered a combined rating of 17,125 extra lumens on top of our stock headlights.
As our SVC Baja styled tubular bumper came pre-tabbed for five lights, we placed the two SAE Amber lights on the outside, each producing 2,440 lumens and the three PROs in the middle, each Squadron PRO producing 4,095 lumens.
Not too shabby considering each pod is about the size of a cube of Post-It Notes (each Squadron light measures only 2.77” x 3.70” x 3.07”).
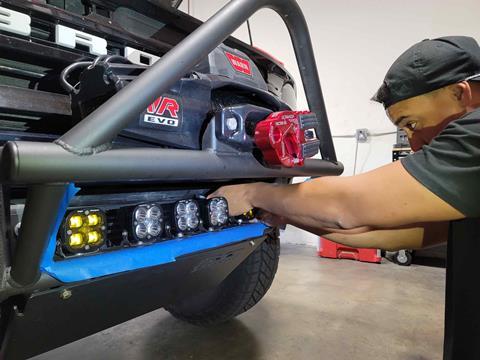
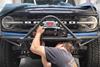
PART 1: Installing the Squadrons
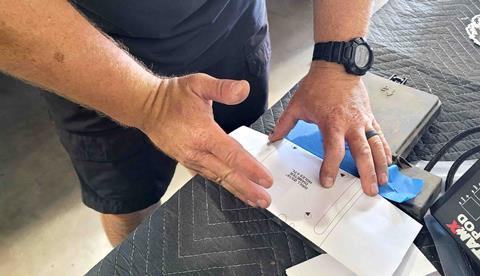
Before you begin any project, double check to make sure all the parts are in the box, take a quick look at the instructions and then let the fun begin. In summary, Part 1, entailed attaching the brackets to the lights, attaching the lights to the bumper, and then running the harnesses to the BantamX.

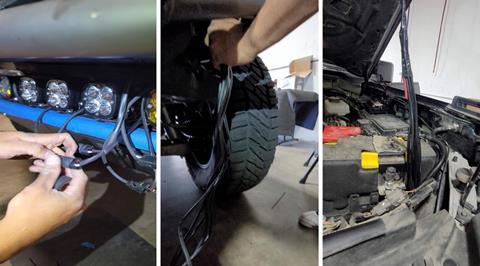
PART 2: Installing the S1 Chase Lights
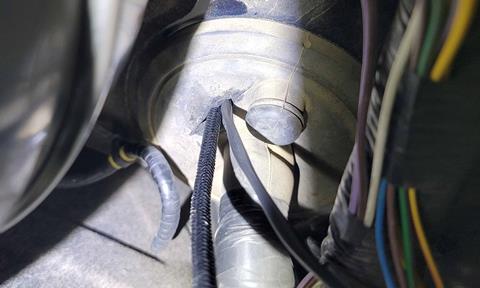
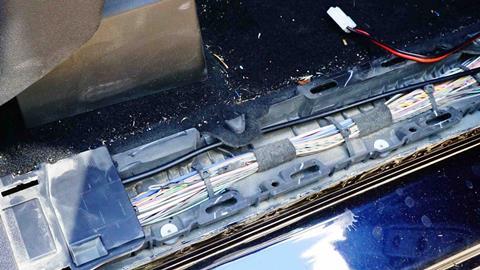
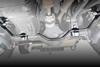
We ran the harness for the chase lights from the BantamX through the firewall, along the wire channel, through the rear gate and finally to the bracket on the rear tire.


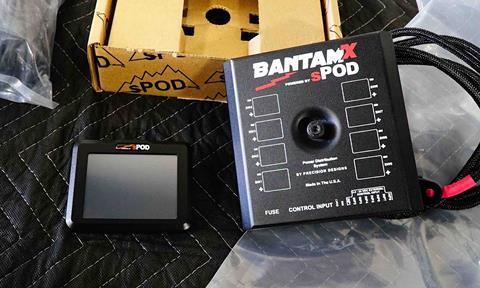
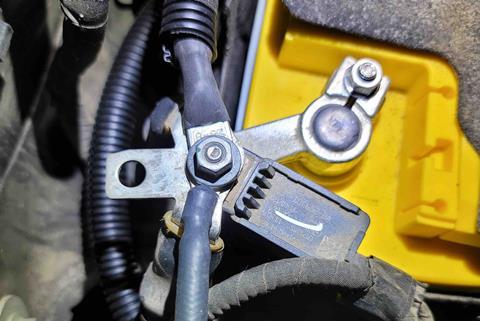
PART 3: Installing the BantamX
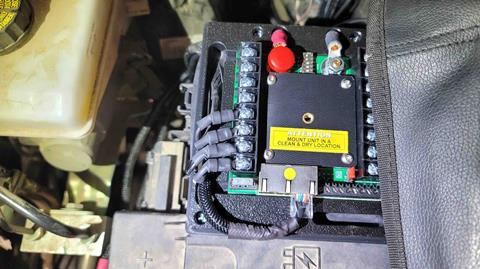
The beauty of the BantamX is how this small device plays a critical role in allowing you to add and control accessories that make your vehicle function better. One of these roles is how it acts as a central power distribution system for your lights and accessories. It is also a safety mechanism in preventing battery damage by cutting off components during electrical faults.
If that isn’t enough, should your battery drop below 11.6V, the BantamX will shut off after two minutes to prevent the battery from getting drained and leaving you stranded in the back country.
Installing the BantamX is fairly easy and only required a few minutes. We mounted our BantamX to the top of the fuse box lid and connected to the battery. After, we connected the light harnesses and the sPOD controller data cable to the BantamX unit.
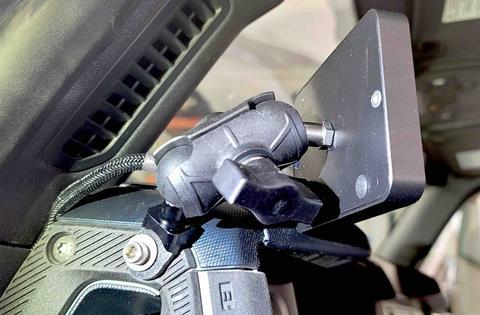
PART 4: Installing and Programming the sPOD Touchscreen Controller
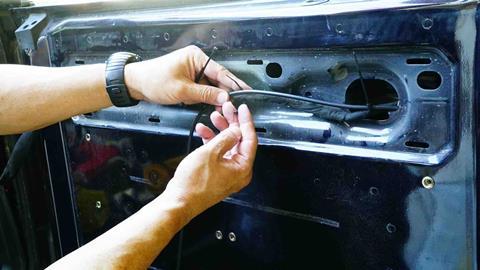
As shown in an image above, we ran the data cable from the BantamX through the firewall, up the dash, and connected it to the sPOD controller. To hold the sPOD controller in place, we attached it to the RAM double ball mount as seen below.
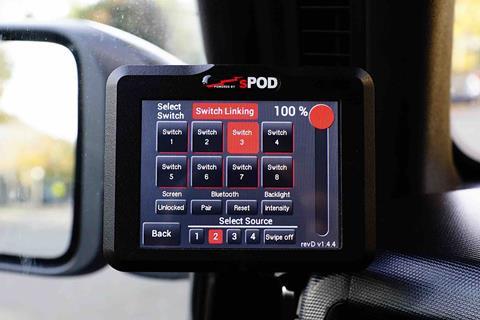
Programming the sPOD was very intuitive and easy to learn. Greg programmed Switch 1 to control the two SAE Ambers, Switch 2 to control the three middle Squadron Pros, and for Switch 5, we grouped all five Squadrons for quick access to blast out man-made daylight out the front of the Bronco. Lastly, we grouped the two S1 chase lights to Switch 8.
If you got this far, then consider reading how to set up your lights to miximize coverage in our START HERE story called ”How to Choose the Right Lighting Zones and Patterns for Off-Road Driving”.
Read more about OVR’s non-Sasquatch Bronco Project by clicking here.
Sources
Wired By Greg
Personalized Services
Baja Desings
Squadron PRO
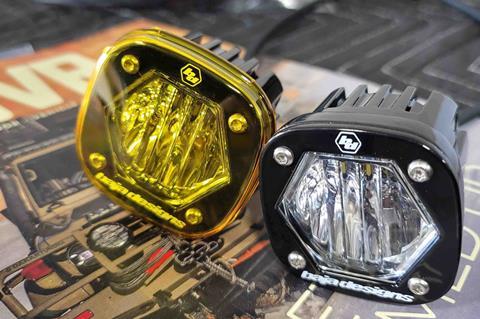
Squadron SAE LED Auxiliary Light Pod in Amber
S1 Black LED Aux Light Pods
For more informative articles like this, consider subscribing to OVR Magazine in print or digital versions here. You can also find the print edition of OVR at your local newsstand by using our Magazine Finder.

No comments yet