


We’ve already proven Front Runner’s Slimline II roof rack system on our Land Cruiser. Now, the same modular expedition rack moves to the OVR G63 AMG, transforming exterior cargo capacity for overlanding and keeping expedition gear where it belongs—outside the cabin and ready for the trail. This comprehensive review covers installation, real-world performance, and how this roof rack system expands the G-Wagon’s capability for serious adventure travel.
When it came time to add exterior cargo capability to the OVR G63, the decision was straightforward. We’ve already logged real miles with a Front Runner Slimline II Roof Rack on our OVR LC100, and it proved itself in daily use and on extended trips.
Rather than start from scratch with another brand, we went back to what already worked well for us.
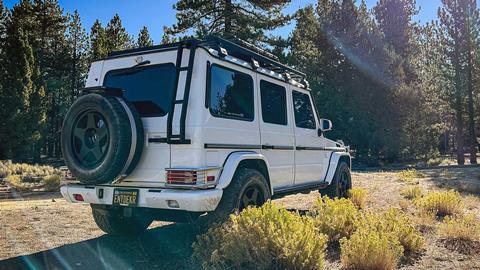
This time, the platform is the Mercedes-Benz G63 AMG. The boxy roofline and upright body panels of the G-Wagon lend themselves to a full-length rack.
Front Runner offers its G-Class Slimline II in multiple lengths, including full, three-quarter, and half configurations to suit different needs.
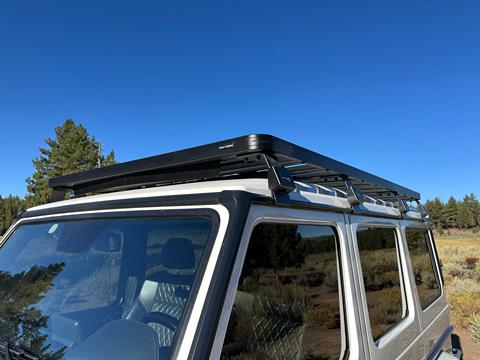
The Slimline II is known for its low-profile design, which helps minimize added height, wind noise, and aerodynamic drag. For those who need additional under-rack clearance, it’s also available in a taller configuration in its full and three-quarter lengths.
The tall version creates space beneath the rack for mounting Front Runner tables or other compatible accessories.
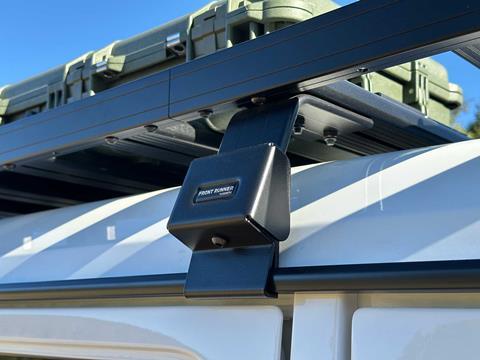
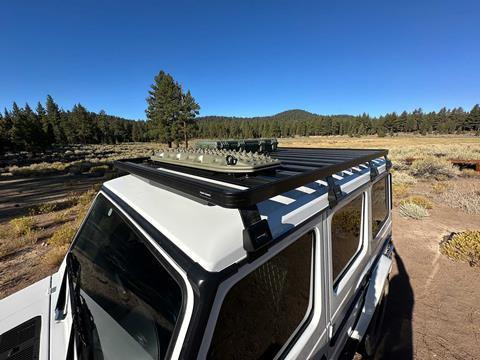
For our build, we selected the low-profile, G-Class-specific Slimline II full cargo rack along with the matching Front Runner G-Class Ladder.
There’s also a bit of history here. Front Runner’s journey traces back to a G-Wagon build known as the Front Runner Entdecker—a heavily outfitted expedition G that helped shape the company’s modular rack philosophy. With that in mind, fitting a Front Runner rack to our own G felt like carrying that lineage forward.
Slimline II Roof Rack Installation: DIY-Friendly Process for the G-Wagon
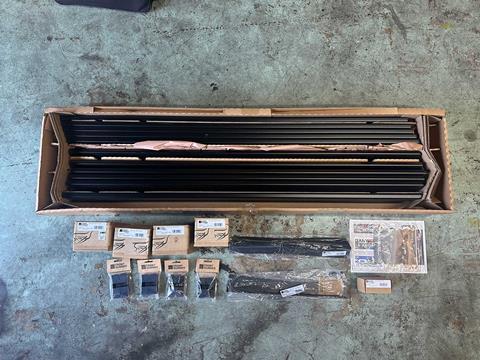
Both the rack and ladder were installed in our own garage using basic hand tools. No specialty equipment, no fabrication, no guesswork. The roof rack installation is straightforward.
Front Runner’s modular roof rack mounts cleanly to the the truck’s roof rails, and the included hardware is clearly labeled and organized.
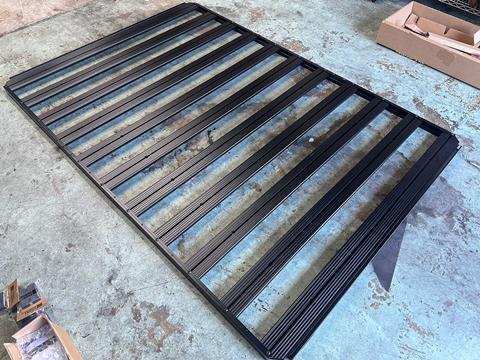
Fitment on the G63 was spot on. No trimming. No dilling. No forcing panels into place. Everything lined up as intended. The provided mounts mechanically grip onto the G’s roof rails, allowing the rack to be solidly mounted with confidence.
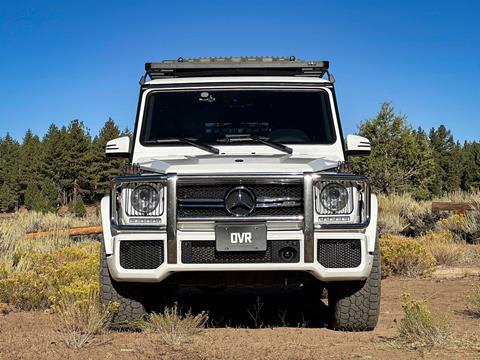
Our rack also includes two sets of adjustable wind deflectors—one tall and one short—that mount beneath the leading edge to help redirect airflow and reduce noise. We opted for the taller set and can confirm that wind noise is minimal; with the windows and sunroof closed, there’s virtually no added sound from inside the cabin.
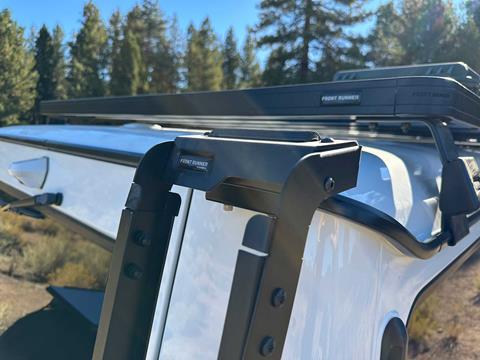
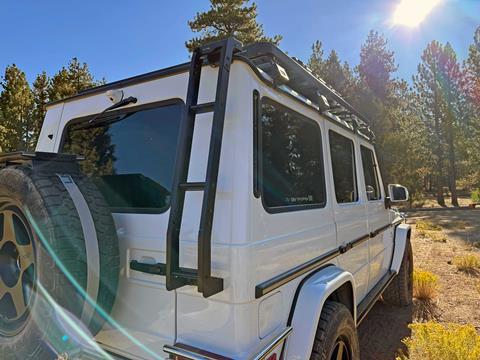
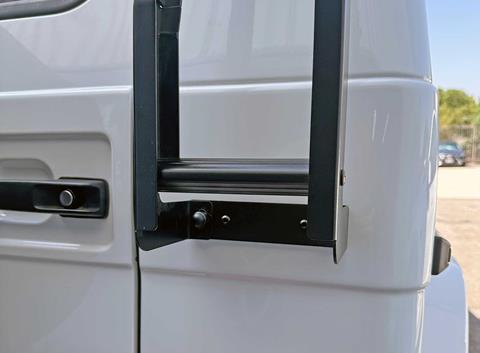
Mounting the Front Runner Ladder
The ladder installation was equally direct. It aligns with the rear door without interfering with operation, and once torqued down, it feels solid. There’s no flex or rattling, even after miles of washboard roads.
The ladder hangs on the G-Wagon’s roof rails and can be mounted on the left or right side of the vehicle. In the United States, the G-Class door swings to the left, so the ladder is installed on the right side.
In some countries, the door swings to the right and there is also a split door version. Our ladder kit came with both sets of parts to allow for the ladder to be mounted on either side.
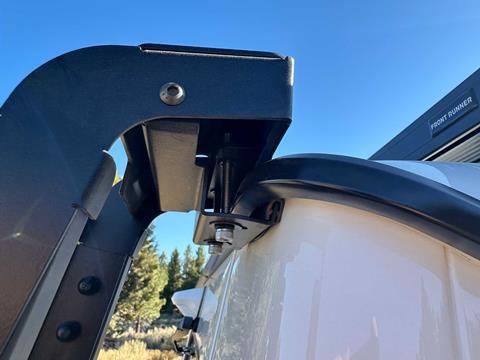
The bottom of the ladder can be secured by 3M double stick tape or screwed into the body of the G Wagon. See the sidebar below for our DIY experience on permanently attaching our ladder with screws.
Expanding G-Wagon Cargo Capacity: Why External Storage Matters for Overlanding
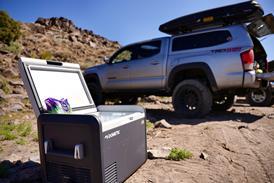
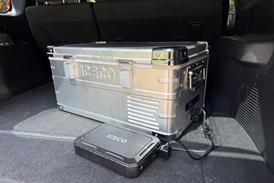
The G-Wagon has usable interior cargo space, but once you begin loading it for overland travel—recovery gear, camp equipment, camera cases, refrigeration, power solutions—it fills up quickly. Adding a full-length rack shifts bulky or exterior-ready gear outside the cabin.
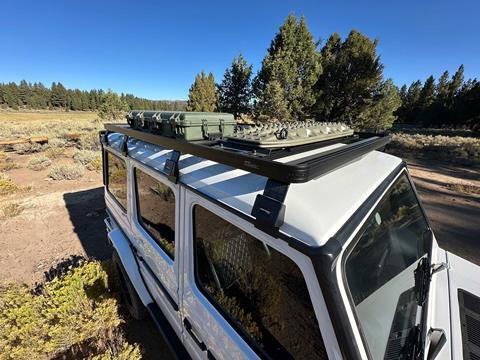
Since the install, we’ve run Maxtrax traction boards and a Pelican hard case up top using Pelican’s roof rack mounts. The Slimline II’s slat system makes mounting straightforward, and the platform footprint provides flexibility for different loadouts.
On recent trips, we’ve also staged Starlink hardware on the rack when needed, keeping cables short and deployment simple.
Exterior mounting frees interior space for items that need to stay clean, secure, or temperature controlled. It also keeps dirty gear—like recovery boards—outside where it belongs.
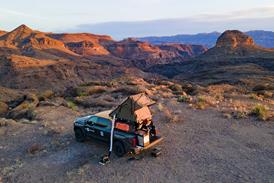
Real-World Performance: Wind Noise, Clearance, and Trail Testing
We’ve now taken the OVR G63 on several overland trips with the rack and ladder in place. Wind noise is minimal, especially considering the upright shape of the G. The rack hasn’t shifted, loosened, or required retightening.
Even with the low-profile configuration, the sunroof operates without any clearance issues, allowing it to open fully without contacting the rack.
The ladder has already proven its value. Accessing the roof is quick and controlled, which matters when you’re grabbing gear at the end of a long day or adjusting equipment in poor weather.
Fuel Economy & Car Wash Practicality
Two common questions we get are whether the rack affects fuel economy and if it complicates running the vehicle through a car wash. In our experience, we haven’t noticed any meaningful change in fuel economy since installing the rack, at least in typical mixed driving and highway use. The unfortunate truth is that the G is a gas guzzler with or without roof rack.
As for car washes, it hasn’t been an issue for us—we’ve run the G through without any problems. As always, it’s a good idea to check clearance and avoid anything with aggressive brushes, but in day-to-day use, the rack hasn’t added any extra hassle.
Height Restrictions
For those following our OVR G63 build, you’ll remember that we keep the OVR G63 in an older residential garage with limited clearance. Even in low-profile form and without any accessories mounted, the rack added roughly six inches to the overall height of the truck.
That was enough to prevent the G from clearing our garage opening, so if you’re working with tight height restrictions like we are, it’s something to factor in before installation.
Front Runner Slimline II Review: Is This the Best G63 Roof Rack?
For us, the Slimline II isn’t just an accessory. It’s an important part of how the vehicle functions on a trip. It turns the G63 from a luxury SUV with limited cargo flexibility into a more capable expedition platform.
Not to mention, we appreciate the added safari-inspired look the Mercedes G-Wagon roof rack brings—functional, purposeful, and right at home on an overland build.
We trusted Front Runner once on our Land Cruiser, and that confidence carried over to the G63 without hesitation. Solid fit, modular flexibility, and a design that complements the G’s shape are exactly what we were looking for as the OVR G63 continues its evolution—backed by a proven track record on Front Runner’s legacy G-Wagons that have traversed the world in punishing conditions.
Permanent G-Class Ladder Installation: Step-by-Step Guide
The Front Runner G-Class Ladder can be installed two ways: semi-permanently using a top mount that hooks to the G’s roof rail with the lower bracket secured by 3M double-sided tape, or permanently using jack nuts and button head screws.
We initially opted for the double-stick tape method. It worked at first, but after real-world use and exposure to the elements, the adhesive eventually let go.
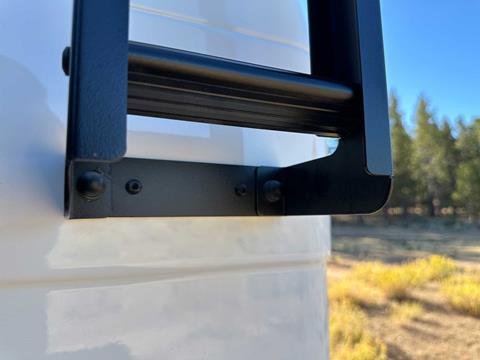
With the OVR G63 seeing regular trail time, we decided a permanent install made more sense—even if it meant drilling into the body of our Mercedes-Benz G63 AMG.
Here’s how the permanent installation process went in our garage:
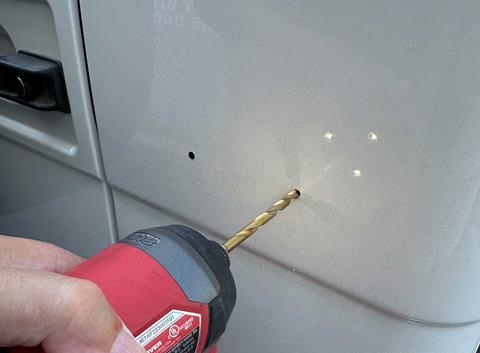
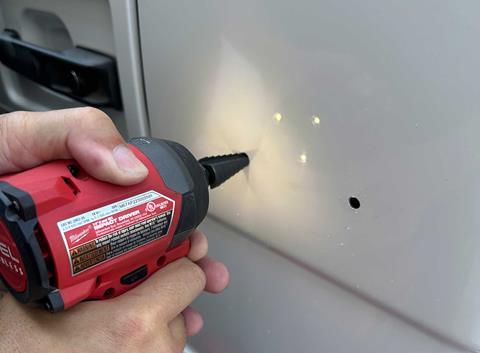
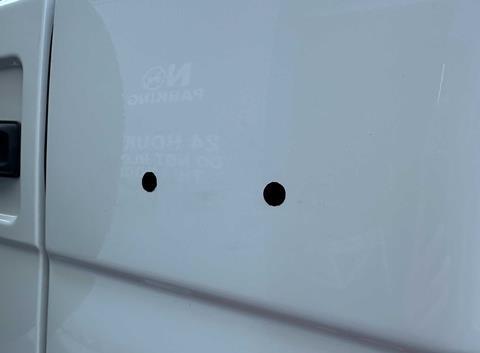
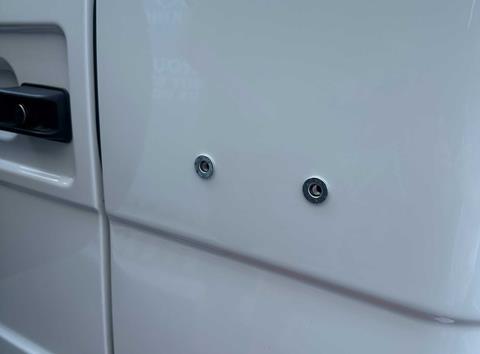
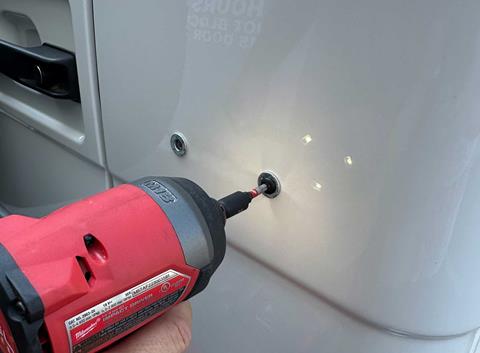

Drilling into the body of a G-Wagon isn’t a decision to take lightly. But once complete, the ladder feels secure and free of movement, even when climbing up repeatedly to access roof-mounted gear.
As always, follow Front Runner’s official instructions for complete installation details and torque specifications.
Read More About the OVR G63 Project Build by Clicking Here!
For more informative articles like this, consider subscribing to OVR Magazine in print or digital versions here. You can also find the print edition of OVR at your local newsstand by using our Magazine Finder


No comments yet