


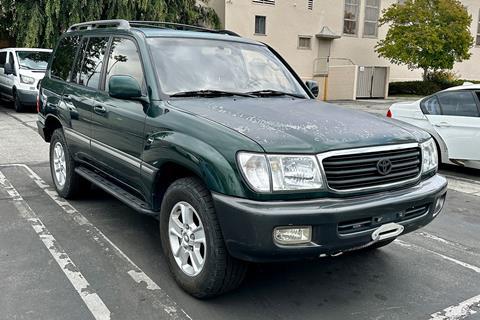
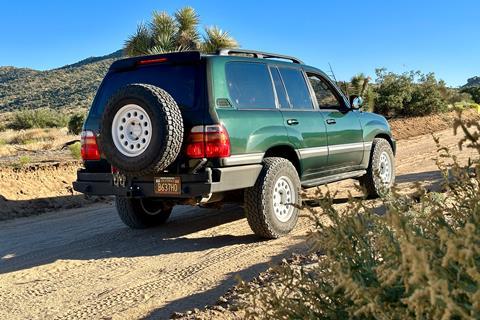
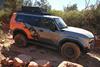
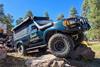
If you’ve been following the progress of our OVR Land Cruiser 100 Series (LC100) project vehicle, you’ll know that we’ve been enjoying this truck since the day we brought it home. Even though its old, it’s been fun to drive, work on, modify and excluding its abysmal fuel mileage, it’s been relatively affordable to own and operate.
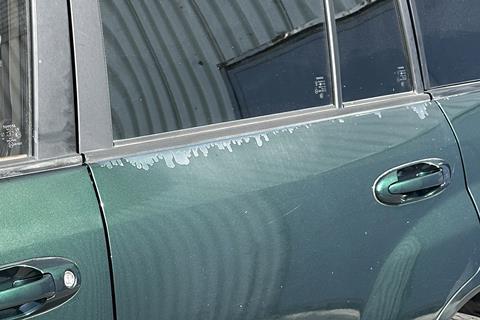
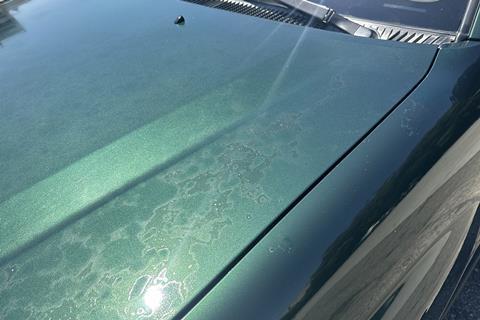
As great as it is, there’s one thing that we don’t like about it – the condition of its paint. Its flaking clearcoat and fading paint is a clear sign of an outdoor kept 300,000-mile vehicle and quite frankly, is an eyesore.
Worse For Wear
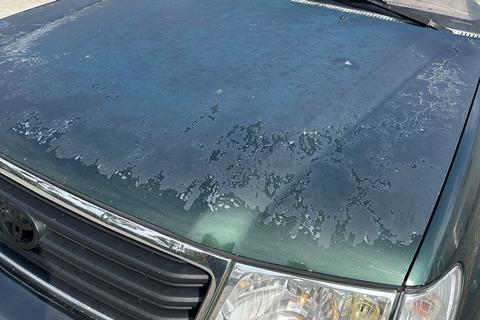
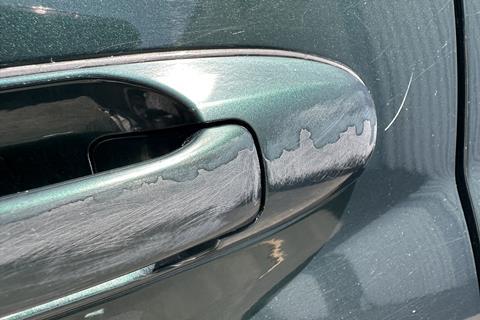
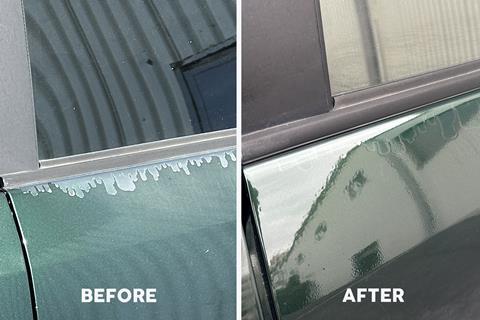
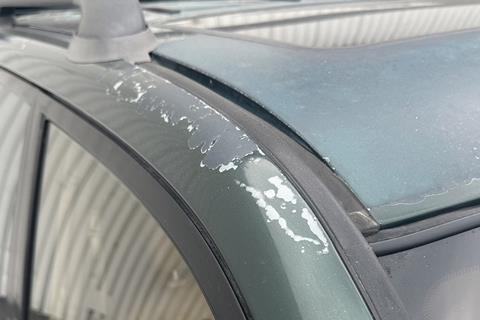
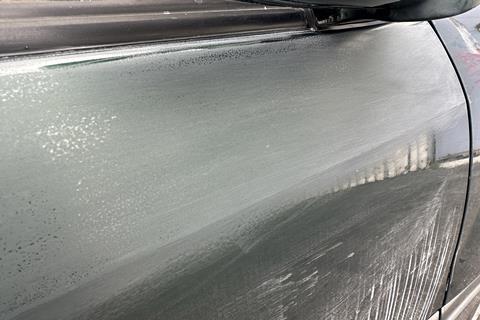
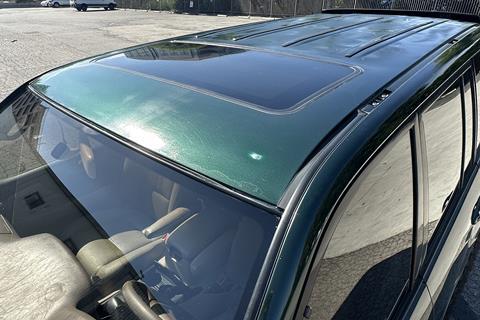
If you also have an older rig, chances are that it may be experiencing the same surface problems that our LC100 does. The problem areas on our SUV include peeling or completely missing clearcoat on the hood, roof, windowsills, A-pillars and door handles. For the areas such as most of the hood and roof where the clearcoat has completely worn off, the base layer paint is gradually coming off too. Every time those areas are washed or wiped; we’ve noticed green paint on our towels.
Professional Advice
In a quest to remedy the problem, we did some research and depending who we talked to, we were told that other than a complete re-paint, there isn’t much else you can do about damaged and missing clearcoat and faded paint. Of course, that advice came from several body shops. A vinyl wrap place said we could wrap the truck in vinyl, in which we could also do a complete color change too.
Both options were quoted to be well north of $4,000, which immediately took them out of consideration; this LC100 was meant to be a budget overland vehicle and not a money pit show truck after all. We had to come up with a wallet friendly alternative to our paint problem.
Nothing To Lose
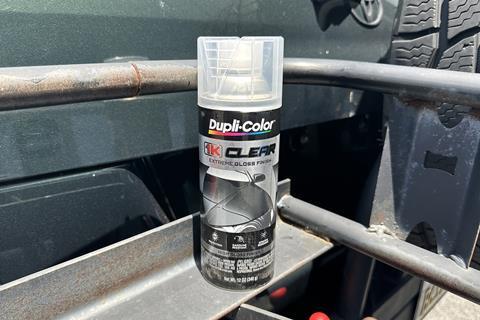
After surmising that most of the problem was simply missing clearcoat, we figured, why can’t we simply spray on a new coat using little more than gloss clear paint from a rattle-can? At about $20 a can, there wasn’t much for us to lose if we tried.
The truck already looked old and battered, if us spraying some clear on it backfired, it probably wouldn’t look much worse. So, with that solid logic in mind, that’s what we set out to do.
Do It Yourself
The first step was to gather the stuff we needed to do the job, which included four cans of Dupli-Color 1K Extreme Clear paint in High Gloss finish, a couple of rolls of blue masking tape, a roll of masking paper, automotive sanding blocks in 400, 600, 1000, 1500, 2000-grit, rubbing alcohol, tack cloth, respirator mask, plenty of microfiber towels, a spray bottle of tap water, as well as a polisher, polishing pads and a couple of polishing compounds and a wax to make it all shine if this plan worked. (Spoiler alert: it did – to varying degrees.)
It’s a big truck with many problem areas so it was an intimidating job just thinking about it. To make the task more manageable, we decided to take on one section at a time. The entire process probably took us about eight days collectively over a span of two months working on it here and there when we had the time, motivation and if weather permitted. Much of this work was done on our driveway so weather was a factor.
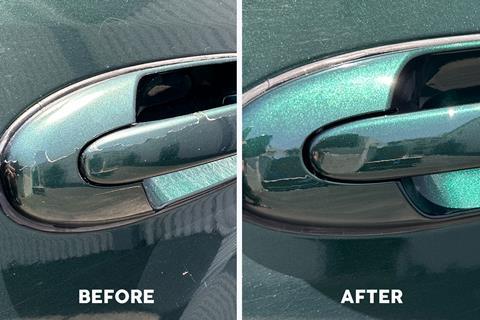
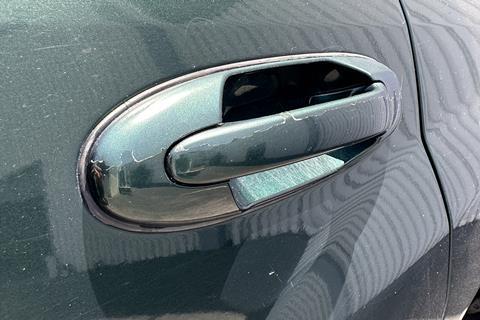
We initially tried our clearcoat revitalizing plan on the smaller problem areas, which were the door handles and windowsills and moved onto the larger sections such as the hood and roof separately later on. We began by giving the problem areas a quick wipe down so we could get a good look at the paint damage.
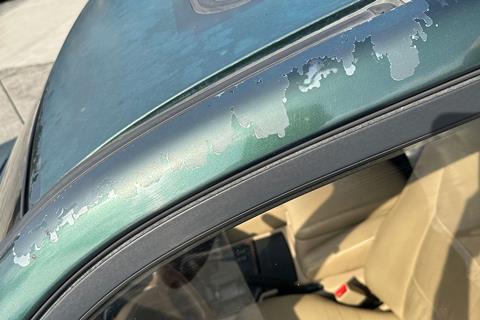
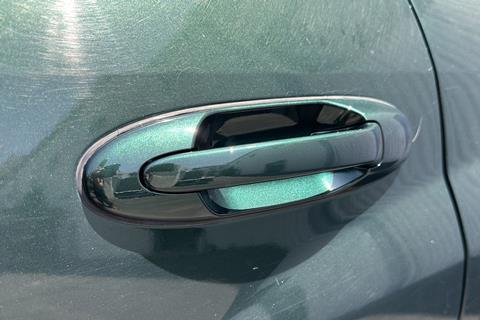
The door handles and windowsills have areas where the factory clearcoat abruptly flaked off to reveal unprotected base layer paint. Not only does the clearcoat to no clearcoat area look obvious, but we can also feel it the when running our fingers over the transition. Our first job was to sand the area so that the edge of the existing clearcoat and the parts lacking clear are smooth to the touch. The idea was to have the new clearcoat blend in and look and feel seamless with the factory clear.
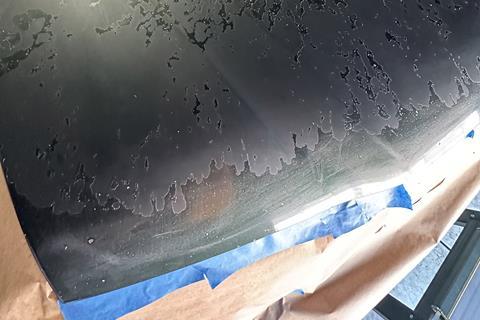
Wet Sanding
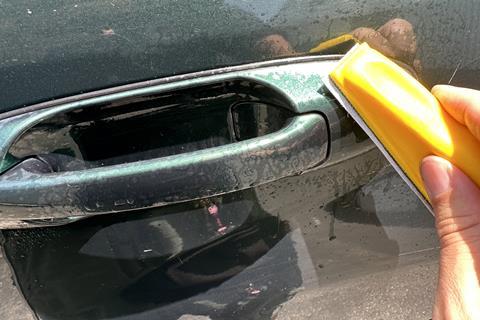
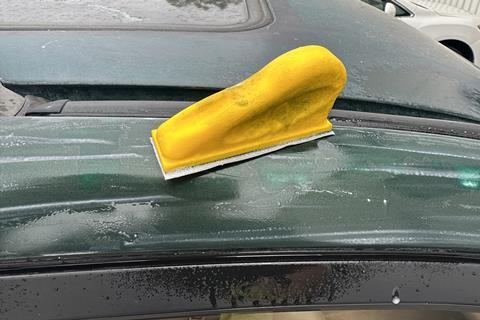
We started by carefully wet sanding the problem area by spraying water on the surface and sanding block and began sanding the factory clear down so that it felt smooth to the touch where it transitioned to the exposed base paint. This is where you want to be very careful not to take off any of the base paint.
It’s a super thin layer of paint, measured in microns, so a few swipes with the sanding block is all it takes to take the paint off. If you do, you’ll end up with primer showing through instead of color. The same goes with any edges and sharper contours as those areas easily catch the sanding block, so care must be taken to avoid sanding those parts down too much.
The original clearcoat on the door and windowsills was still very thick so we started with a rough 400-grit sanding block, worked the clearcoat down with two to three passes of gentle sanding, then switched to 600-grit and worked our way up to 1,000-grit. During this process we kept spraying water and wiping the area down with a towel to check our progress.
The key is to take your time and give just enough pressure when sanding. Unfortunately, it’s a feel thing that can’t be easily taught, but once you start doing it, you’ll get a feel for it. Some body shop guys we spoke to said practicing on an old car part from a junk yard is a great way to obtain “the feel” for it. We bypassed that and learned as we went on our LC100. Take a look at the pics that accompany this article and you’ll notice some white areas where we sanded too much. You live and you learn.

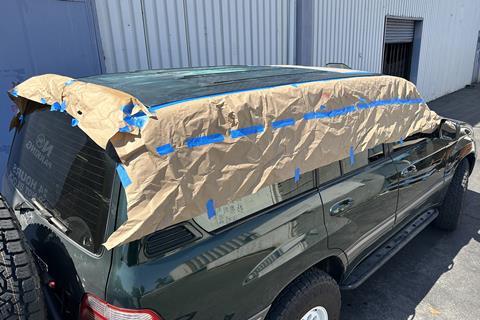
Prepped For Spraying
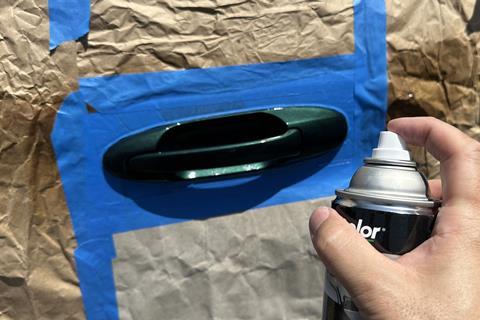
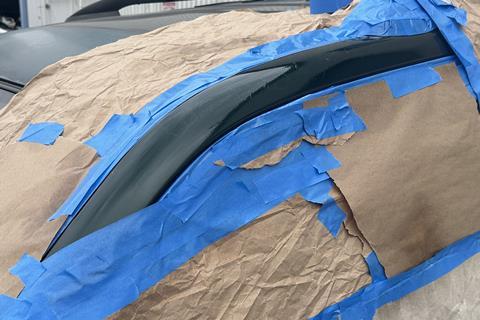
We worked until we were satisfied that the edges of the factory clear were sanded down and smooth to the touch, we then prepped the area for spraying. We washed and wiped it down so that it was completely dry and then masked the area with masking tape and masking paper. The door handles were easy to mask since they have panel lines that we could mask around.
The windowsills and pillars weren’t so clear cut. Since they are part of larger panels, there aren’t panel lines that you can line your masking tape up to. Instead, we found crease lines in the body and masked up to those areas. For parts such as the A-pillar, we had no choice but to “fade” our spray midway down the pillar. We’ll have to figure out how to blend those areas in later.
After everything was masked, we wiped the area down with rubbing alcohol and did a final wipe down with tack cloth just to make sure the surface was dust free. We spray painted in our driveway, so it’s not like we were in a dust-free paint booth, but we made sure the surface was as clean as possible anyway. We also watered down the driveway in an attempt to keep the dust in the area at a minimum. It seemed to work out pretty well.

Rattle-can Time
Following the manufacturer’s instructions, we shook up the spray can and started delivering some sorely needed clearcoat to the LC100’s surfaces. We did multiple light coats, trying to avoid runs and paint globs. We were also conscious about overspray, trying to keep it at a minimum by not getting too overzealous while spraying.
From what we figure, the more clear paint you can get on without runs and drips, the better. Not enough paint leaves a dull, rough surface that’s hard to turn into a smooth, glossy finish later on.
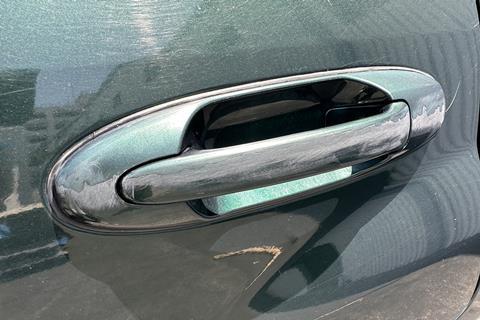
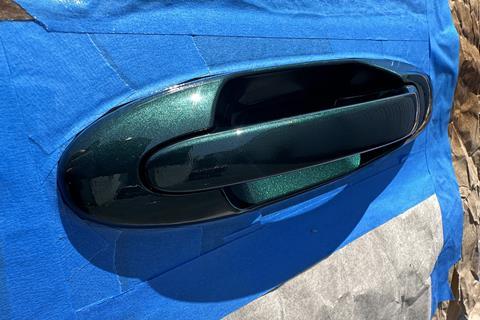
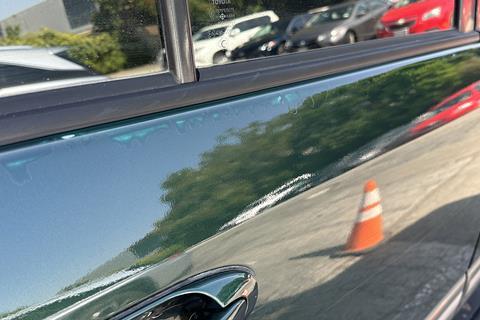
We let it dry overnight and came back to discover a beautiful, factory-like gloss coating on the door handles and windowsills. It was a big difference in terms of looks. Being that the door handles are curvy, smaller and have panel lines around them, all we had to do was remove the masking tape and paper and they looked ready to go as is. As for the windowsills and A-pillars, we spotted some orange peel and they definitely had to be blended with the rest of the body for it to look right.
Sanding Again
We waited another few days for the new paint to harden a bit more before we took on the task of orange peel removal and blending. The process began with wet sanding. Starting with a 600-grit sanding block and plenty of water, we lightly sanded the orange peel areas as well as the portions that needed to be blended. We even sanded some of the factory clearcoat for a smooth transition.
Being deliberate and careful, we went from 600-grit, to 1,000-grit, then to 1,500-grit and finally to 2,000-grit. What you’re looking for at the end of this wet sanding process is a matte, satin-like finish that could be polished up to be clear and glossy. Since we’ve never done this before, it was a nervous time. Wet sanding the new clearcoat was tedious, time consuming and looked questionable while we were doing it but we soldiered on and trusted the process.
The Final Steps
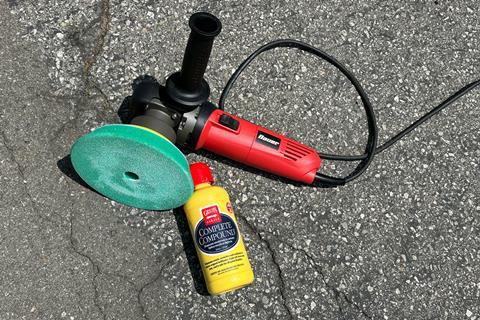
Now came the payoff. We used a 6” polisher that we picked up at Harbor Freight, a trio of Griots Garage 6.5” pads, Griot’s Garage Complete Compound, Griot’s Garage Liquid Wax 3-In-1, and Chemical Guys Butter Wet Wax and set off to see if we could get the newly sanded clearcoat to really shine. After experimenting with different speeds and pressures while we used the polisher, we started to see the shine appear again. The biggest visual difference was during the first step, using Griot’s Garage Complete Compound with 6.5” Microfiber Fast Finishing Pad. The shine came through, but was still a bit hazy. We followed up with Griot’s Garage Liquid Wax 3-In-1 and finished it all off with Chemical Guys Butter Wet Wax.
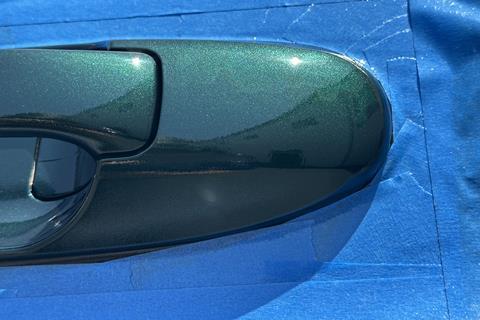
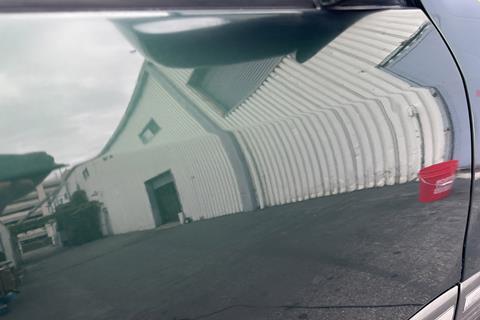
Couldn’t Be Better
With all of the polishing and waxing complete, we took a step back and admired our work. Wow, the truck was looking better than we’ve ever seen it before. In fact, some areas looked so good that it was hard to tell where the factory clearcoat ended and where the new rattle-canned clearcoat began. From not knowing what we were doing exactly to having this result, you could say that we were really pleased with the outcome.
Could Be Better
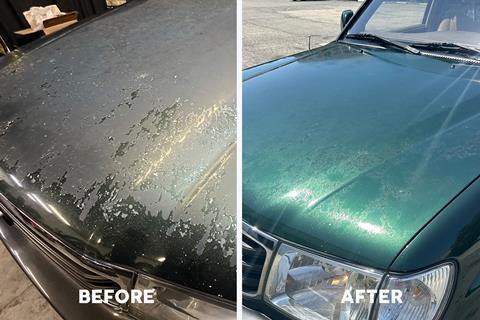
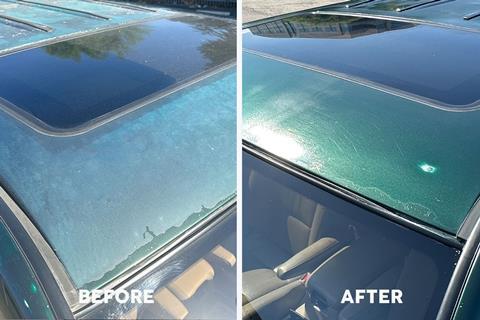
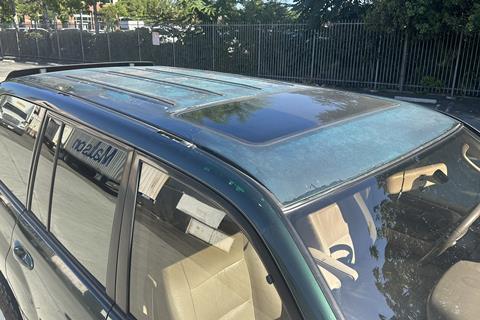
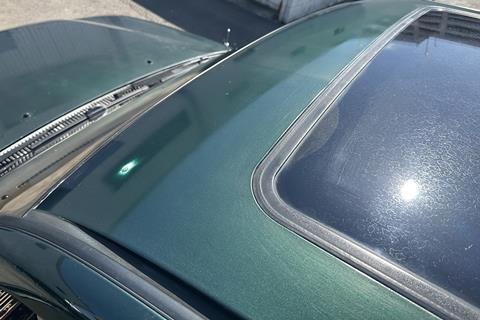
With the door handles, windowsills and A-pillars complete, we went on to work on the major problem areas, the Land Cruiser’s hood and roof. Admittedly, we didn’t do that great of a job on these two areas. The hood and roof had many spots where the existing clearcoat still stubbornly clung on and areas that were bubbling up with trapped air pockets. We tried to remove the old clearcoat as best we could but the fragility of the base paint was a major concern.
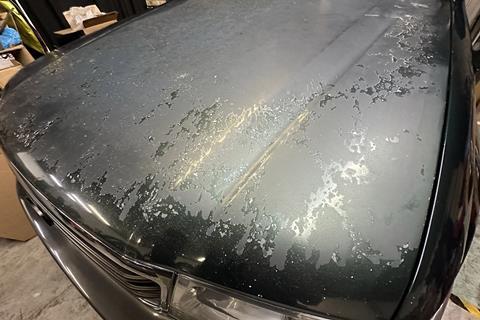
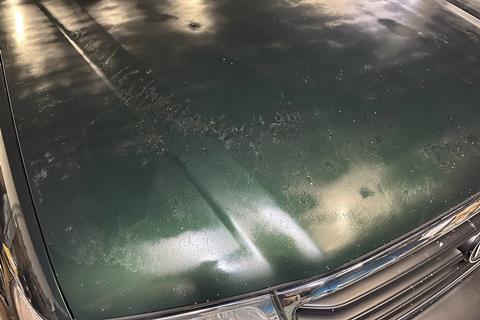
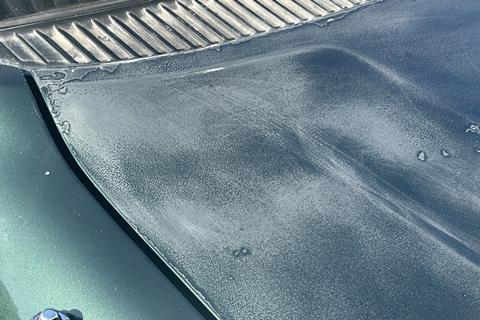
Everything we did to try to remove the clearcoat greatly affected what little original green paint the surface still had. While the hood and roof were wet sanded anyway, we decided to forego wet sanding the existing clearcoat until it was smooth like we did with the door handles and windowsills in fear that we’d lose more of the factory paint.
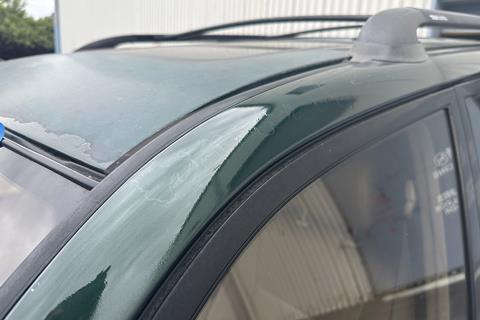
In fact, you’ll see a white splotch on the front left part of the roof, that was due to touch too much sanding on our part. After we did what we could in terms of clearcoat removal and smoothing, we moved onto cleaning and painting. Just as before, the faded green color came alive again as we spray painted.
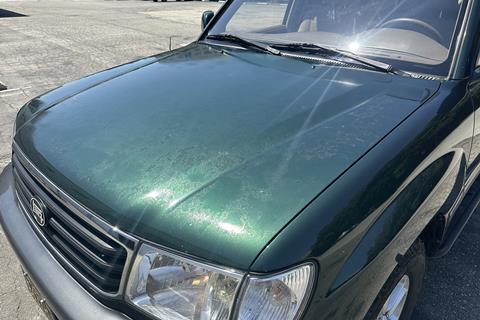
While there’s no doubt that the surface looks much better and is better protected from the elements with this new coat of clear paint, the spots of old clearcoat leaves plenty to be desired in the looks department. Even after we removed the orange peel by polishing and waxing, the splotchy existing clearcoat and pockets of old air bubbles were still visible. The roof isn’t so bad since you can barely see it, but perhaps we’ll try stripping the entire hood down for a complete repaint or a vinyl wrap in the future. But for now, it’s a night and day difference from when we took delivery of the LC100 anyway.
Final Thoughts
All-in-all, we’re proud of the way that this budget clearcoat project turned out. We spent less than $300 in materials plus $70 on a polisher and we have a decent looking clearcoat that now protects the LC100’s body to show for it. The rig looks much better now than before. Now is it show quality? Not by a long shot, but will it suffice on the tail or at a Rigs and Coffee meet? We say absolutely. It can be intimidating going to town on your truck with a sanding block and a spray can, but the results in our opinion, are well-worth the time and effort.
Not only does repairing flaking clearcoat make your ride look better, but it protects your vehicle’s body from rust and corrosion too. If your vehicle’s clearcoat has seen better days, perhaps you’ll try your hand at this inexpensive fix as we did. Our only question now is how will it hold up? Stay tuned for an update to this article when we have a verdict to share with you. Until then, we’ll be enjoying our once again glossy Land Cruiser.
Read more about OVR LC100 by clicking here
[Disclaimer: Sanding, stripping, painting can irreversibly damage any vehicle. Working with paint, chemicals and tools can be dangerous to your health as well. Proceed with caution and at your own risk.]
Read More About the OVR LC100 Budget Build by Clicking Here!
For more informative articles like this, consider subscribing to OVR Magazine in print or digital versions here. You can also find the print edition of OVR at your local newsstand by using our Magazine Finder.


1 Reader's comment