


After lifting our Land Cruiser 100 Series, highway sway and rear-end instability became issues we couldn’t ignore. The rear axle wandered at speed, creating an unsettling fishtailing sensation. It didn’t happen all the time, but when it did, it was quite unsettling. The DR.KDSS Bolt-On Trackbar Correction Kit promised a reversible, no-weld solution to restore proper rear axle geometry. We installed it, drove it, and found the difference worth documenting.
If you’ve been chasing a Land Cruiser rear sway fix after installing a lift, you’re not alone. One of the most common for the 100 Series (1998-2007 Land Cruiser) handling problems after lift is a vague, unsettled feeling from the rear—often described as highway wander. The root cause usually comes down to 100 Series suspension geometry being thrown off once ride height increases.
That’s where panhard bar correction comes into play. By addressing the angle of the rear track bar with a proper track bar relocation bracket, you can restore alignment and improve lifted Land Cruiser stability.
The good news is, solutions like a no weld panhard fix now make it possible to correct this issue without permanent modifications, making it more accessible for DIY builders and daily-driven overland rigs alike.
Highway Sway and Instability: Our Experience After Lifting
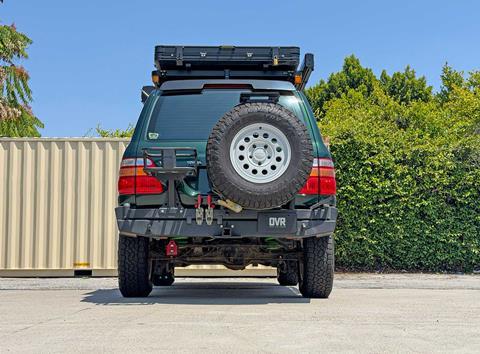
Our OVR LC100 sits about two inches higher than stock thanks to our Ironman 4x4 suspension lift kit and carries a typical overland load. Before addressing the panhard geometry, we noticed an issue: the rear end would sway side to side at highway speeds. It wasn’t apparent all the time, but when it showed up, it wasn’t subtle.
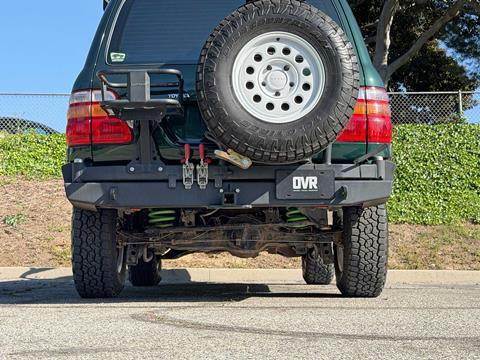
On pavement, the side-to-side movement was easy to feel through the chassis, and it made the truck feel unsettled.
On corrugated dirt roads, the same behavior was present, but less obvious because the surface itself introduces constant vibration. Still, the underlying instability was there.
Having the rear of the vehicle move around like that—especially at speed and under load—isn’t something we were willing to ignore. It was clear that the geometry needed to be corrected.
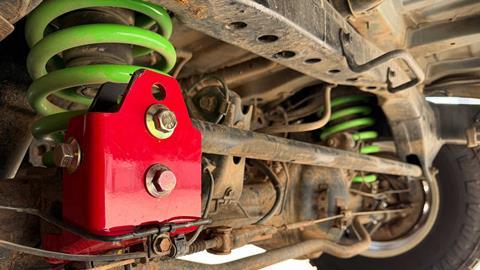
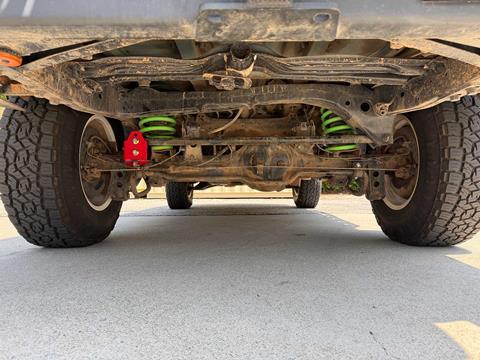
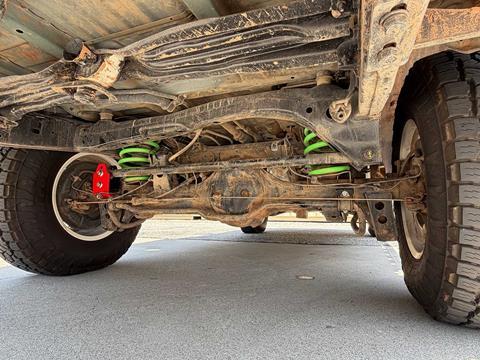
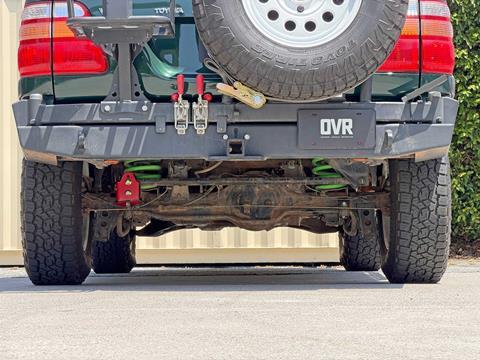
Before & After: A Visual Guide
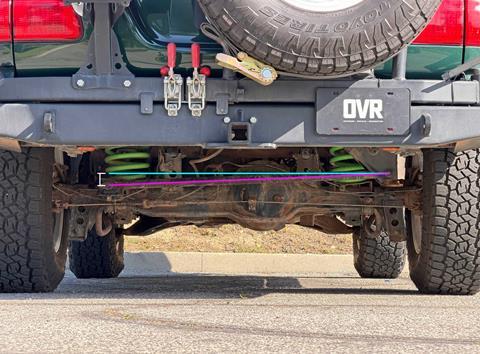
Before: The panhard bar (highlighted in pink) sits at roughly a 2.5-degree angle. The blue line represents a 0-degree reference—the ideal, level position—while the white measurement lines show how far the bar is from level.
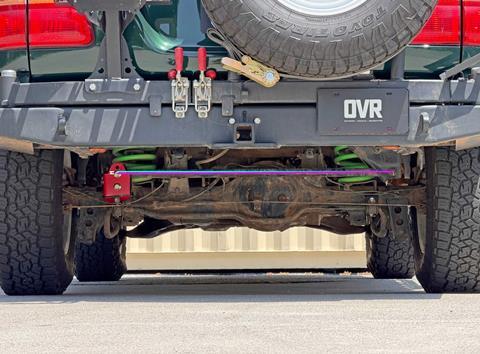
After: The panhard bar (highlighted in pink) is now nearly level at approximately 0.5 degrees after installing the DR.KDSS kit. The blue line marks the 0-degree reference—the ideal position—while the white measurement lines are barely visible, reflecting how close the bar is to level.
Why Lifted Land Cruisers Develop Rear-End Sway
On a solid axle vehicle like the Toyota Land Cruiser 100 Series, the rear axle is located laterally by a panhard bar (also called a track bar). From the factory, that bar sits at a relatively flat angle. Once you lift the truck—even a modest 2 inches—the angle changes. The track bar now runs downhill from the frame to the axle, which shifts the axle slightly off center and introduces unwanted side-to-side movement as the suspension cycles.
That change in geometry affects more than just alignment on paper. It can show up as vague handling, inconsistent tracking, and in more noticeable cases, a swaying or “fishtailing” feeling from the rear of the vehicle. The more weight you add—drawers, fridge, roof rack, camping gear—the more pronounced this ”rear-end wander” can become.
Correcting the track bar angle brings the rear axle back into a more neutral position and restores proper suspension geometry. That translates directly to better stability and predictability both on pavement and on the trail.
Common Signs You Need a Panhard Correction Kit:
- Rear-end sway at highway speeds
- Fishtailing sensation when loaded
- Vague, wandering feeling from the rear
- Visible panhard bar angle after lift installation
- Off-center rear axle
Bolt-On vs. Weld-On Panhard Correction Options
There are several panhard correction options available for the 100 Series. Many of the well-known solutions require cutting, grinding, and welding. While effective, those aren’t ideal if you prefer to keep things reversible or handle installation yourself.
Popular alternatives include various weld-on solutions from established fabricators. These typically involve cutting the factory axle mount and welding on new brackets—permanent modifications that require specialized tools and experience.
In contrast, DR.KDSS notes that its bolt-on design distributes load across the OEM mount rather than concentrating stress at welded points, offering a different approach to strength without altering the factory structure.
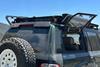
We wanted a simple, yet strong bolt-on solution. That led us to the DR.KDSS B.O.T.C.K (Bolt-On Trackbar Correction Kit).
How the DR.KDSS Bolt-On Kit Works (No Welding Required)
DR.KDSS takes a different route compared to most kits on the market. Instead of mounting on the right side and lowering the mounting point, the B.O.T.C.K uses a two-piece bracket that installs on the left side of the axle.

The key points:
- Fully bolt-on design
- No cutting, grinding, or drilling required
- Raises the track bar mounting point rather than dropping it
From an installation standpoint, that’s a big advantage. It keeps the factory components intact and makes the upgrade more approachable for DIY installs. It also avoids permanently modifying the axle housing.
While raising the mounting point versus lowering it may not change the end goal—correcting the bar angle—it’s worth noting as part of the design philosophy.
While DR.KDSS does not specify a maximum lift height for this kit, based on our experience and the amount of correction it provides, it appears to be well-suited for lifts up to around 3 inches. As always, results may vary depending on overall suspension setup and load.
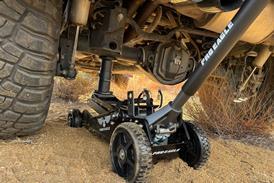
Installation Process and Professional vs. DIY Considerations
The kit is designed to be installed at home, and DR.KDSS provides clear instructions through their website. For experienced DIYers with basic hand tools, installation time is approximately two hours, give or take. The kit requires no specialized equipment beyond standard wrenches and a jack.
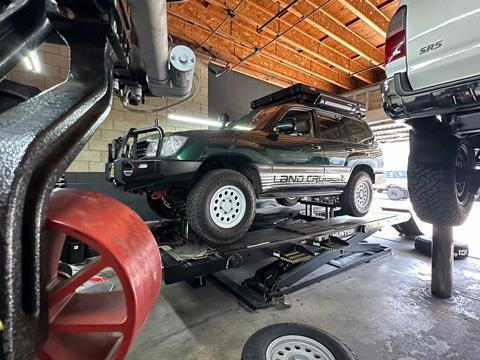
Installation and alignment were completed at RPM Off-Road Garage. The DR.KDSS kit is fully bolt-on and designed with DIY installation in mind, making it accessible for those comfortable working on their own vehicles.
In our case, we opted to have RPM handle the install and alignment to ensure everything was set up correctly. Because this modification directly affects rear axle position and suspension geometry, having a shop verify alignment and centering adds an extra layer of confidence.
Whether installed at home or by a professional, taking the time to get the setup right is key to getting the full benefit of the correction.
How Correcting Panhard Bar Angle Eliminates Sway
After installation, the difference was immediately visible. The panhard bar sat much closer to level compared to its previous downward angle.
This matters because a level track bar minimizes lateral axle movement during suspension travel. When the bar is angled, the axle shifts side to side as it moves up and down. That’s what contributes to the unstable feeling we experienced.
By restoring a flatter angle:
- The axle stays more centered under the vehicle
- Lateral movement is reduced
- Suspension motion becomes more predictable
- Load transfer is more controlled
From a safety standpoint, this is significant. A stable rear axle improves driver confidence, especially at highway speeds or when the vehicle is loaded. It also reduces stress on suspension components over time, which is a plus for long-term durability.
Adjustable Panhard Bar: Do You Need One?
An adjustable panhard bar is designed to re-center the rear axle after a lift by allowing you to fine-tune the bar’s length. When ride height increases, the fixed-length factory bar can pull the axle slightly off to one side.
With a correction kit like the DR.KDSS B.O.T.C.K, the main objective is to restore the proper angle of the track bar and bring the suspension geometry back into alignment. For many builds—especially mild lifts around 2 inches—this alone addresses the most noticeable handling issues.
That said, an adjustable panhard bar can still be used alongside the kit if you want to dial things in further. It becomes more relevant for taller lifts or situations where the axle is visibly off-center. For most overland-focused setups, however, it’s an optional refinement rather than a necessity.
Real-World Results: 100 Miles of Highway and Trail Testing
We put about 100 miles on the truck after installation at the time of this article’s writing, including highway driving and some light corrugated trail sections. The result was straightforward: the rear-end sway is gone.
On the highway, the truck now tracks straight and feels planted. The previous fishtailing sensation has been eliminated, and the overall driving experience is more controlled.
On dirt, the rear end behaves more predictably, even when the suspension is working over uneven surfaces. By correcting the track bar angle and re-centering the axle, off-road stability is restored.
Frame Contact and Bump Stop Considerations
DR.KDSS notes that standard-height correction brackets—including this one—can potentially contact the frame during suspension cycling. This isn’t unique to their design, but rather a limitation shared across similar solutions on the market.
In our testing, we did experience occasional contact over a few harder bumps. It wasn’t constant and didn’t affect overall drivability, but it’s something to be aware of depending on how aggressively the vehicle is driven and how the suspension is set up.
According to the manufacturer, this can be addressed by running longer bump stops or adding bump stop extensions to limit up-travel and prevent contact. In fact, this is an option that we are looking into for our Land Cruiser next.
For most overland use, this is unlikely to be a major concern, but it’s a trade-off worth noting when correcting panhard geometry on a lifted solid axle.
Is a Panhard Correction Kit Worth It for Your Lifted 100 Series?
For anyone running a lifted 100 Series and noticing instability, a track bar correction kit should be high on the list. It’s one of those upgrades that doesn’t add obvious visual impact, but makes a real difference in how the vehicle drives.
The DR.KDSS B.O.T.C.K stands out for its bolt-on design and straightforward installation. It addresses a common issue without requiring permanent modifications, which aligns well with a practical, DIY-friendly build approach.
More importantly, it works. Restoring proper geometry improved stability, reduced unwanted movement, and made the truck feel more composed in every situation we tested. If your 100 Series feels unsettled after a lift, this is a problem worth fixing.
For those considering this upgrade, here are the complete specifications for the DR.KDSS B.O.T.C.K:
DR.KDSS B.O.T.C.K Specifications:
- Fitment: Land Cruiser 100 Series (1998-2007)
- Installation: Bolt-on, no welding or cutting required
- Installation Time: Approximately 2 hours (DIY)
- Mounting Location: Left-side axle bracket
- Compatibility: Works with 2”+ suspension lifts
- Alignment Required: Yes, recommended after installation
Available at: DR.KDSS B.O.T.C.K (Bolt-On Trackbar Correction Kit)
Frequently Asked Questions
1) Do I need an alignment after installing a panhard correction kit?
Yes. While the kit corrects panhard bar geometry, a professional alignment ensures all suspension components are properly adjusted and maximizes the handling improvement.
2) Will this work with lifts over 3 inches?
The DR.KDSS kit is designed for lifts between 2-3 inches. For larger lifts, contact DR.KDSS directly to confirm compatibility with your specific setup.
3) Can I install this without professional help?
Yes. The bolt-on design requires only basic hand tools and takes approximately 2 hours for experienced DIYers. Clear installation instructions and tips are available on DR.KDSS’s website. However, you’ll still need a professional alignment afterward.
4) Do I need an adjustable panhard bar with this kit?
An adjustable panhard bar re-centers the axle after a lift. With this kit, it’s optional—useful for fine-tuning or taller lifts, but not required for most mild setups.
Read More About the OVR LC100 Project Build by Clicking Here!
For more informative articles like this, consider subscribing to OVR Magazine in print or digital versions here. You can also find the print edition of OVR at your local newsstand by using our Magazine Finder.


No comments yet