Steering has always been a bit of an evolving issue for the Wrangler JL. 

The original JLs came equipped with an aluminum steering box that caused the off-road industry and customers fits before it was eventually upgraded to a more heavy-duty cast iron box. Many JLs still come with aluminum knuckles, and while they haven’t proven to be a liability for most users, there are instances of wallowed-out ball joint and tie rod tapers, or even outright failures, by those doing more moderate to hardcore wheeling.

Even Jeep has recognized these problems that can result in sloppy steering and equips certain models, such as the Gladiator Mojave and Wrangler Rubicon 392, with factory cast iron knuckles.

1. With the Jeep up on the lift and the wheels and tires removed, disassembly began. Note the position of the factory tie rod below the centerline of the axle and how the steering stabilizer hands down below the tie rod

1. With the Jeep up on the lift and the wheels and tires removed, disassembly began. Note the position of the factory tie rod below the centerline of the axle and how the steering stabilizer hangs down below the tie rod.

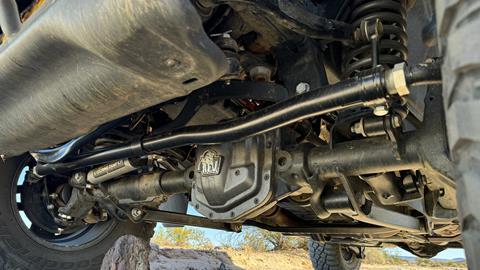
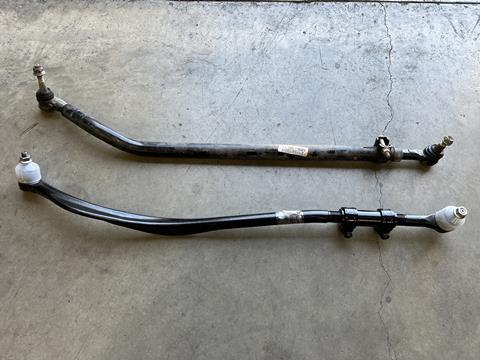
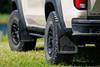
Regardless of which version of the stock steering setup that your Wrangler or Gladiator is equipped with, there is always room for improvement. When off-roading, a major area of vulnerability for the Jeep Wrangler and Gladiator is the steering linkage and stabilizer. The stock setup hangs down below the axle centerline, leaving it exposed to damage from rocks and terrain. We’ve replaced countless stabilizers over years, and more than a few factory tie rods.

2. Here you can see the factory knuckle being removed, giving us access to the ball joints, which we pressed out in preparation for our new joints

2. Here you can see the factory knuckle being removed, giving us access to the ball joints, which we pressed out in preparation for our new joints.

To combat this, there are many heavy-duty tie rod options on the market, and these tie rods are designed to take a hit and are less susceptible to damage. Additionally, there are companies offering high-clearance steering kits, or flip kits, that drill out factory knuckles and re-locate or “flip” the factory tie rod on top of the knuckle mount, improving clearance.

These kits can work well, but they are not compatible with stock suspensions, aren’t always reversible, don’t always come complete, and can cause other component interference issues upstream of the tie rod.

3. The greaseable Spicer Performance heavy-duty ball joint is on the left, while the factory non-serviceable ball joint is on the right

3. The greaseable Spicer Performance heavy-duty ball joint is on the left, while the factory non-serviceable ball joint is on the right.

Rock Jock by John Currie, the new name for a familiar company and product line, tried to solve as many of these issues as possible with the company’s new High Steer Knuckle Kit. Unlike some of the other offerings in the market, Rock Jock provides a fully engineered solution with everything needed to transform your Jeep’s steering without having to piece everything together from multiple sources.

4. Before we could get to installing our Rock Jock parts, we pressed the new heavy-duty Spicer ball joints into place

4. Before we could get to installing our Rock Jock parts, we pressed the new heavy-duty Spicer ball joints into place.

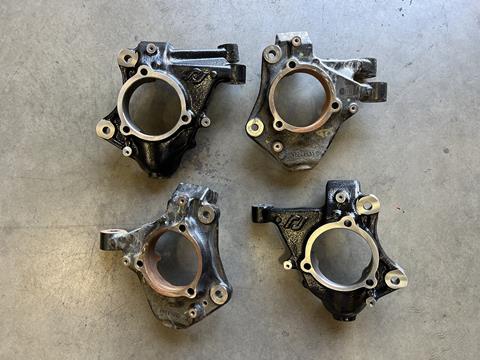
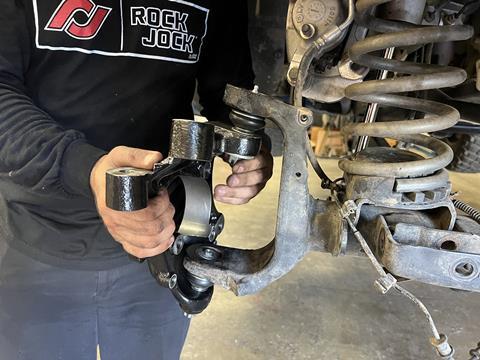
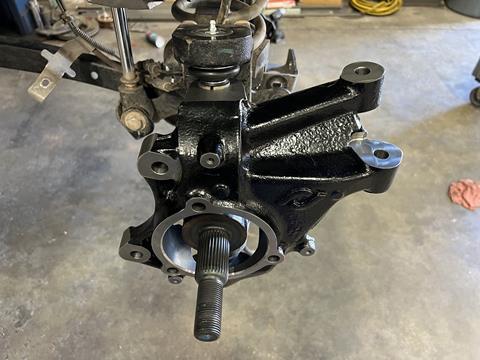
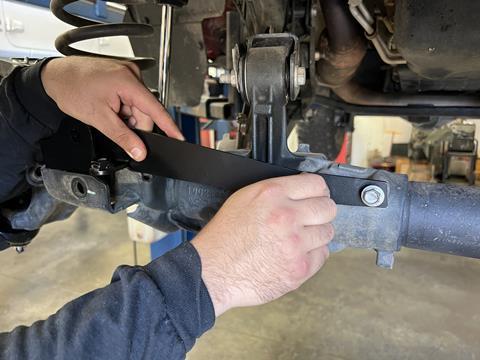
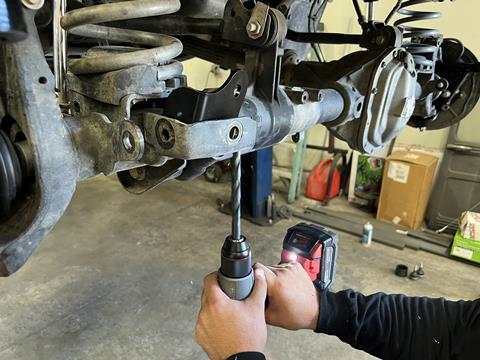
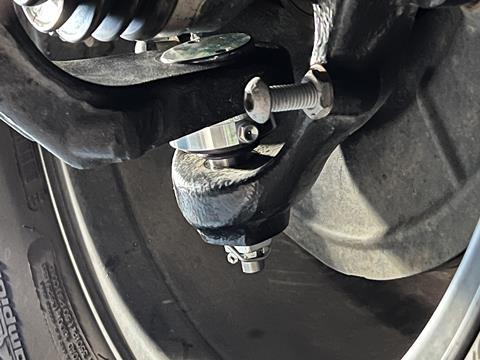
Their specially developed high-steer knuckles are designed to exceed the strength of the factory units and are offered for use on any Jeep Wrangler (JL) or Gladiator (JT), regardless of whether it is equipped with the standard or the wide-track factory axles. Made from high-quality cast iron, Rock Jock’s knuckles incorporate adjustable steering stops and are completely bolt-on.

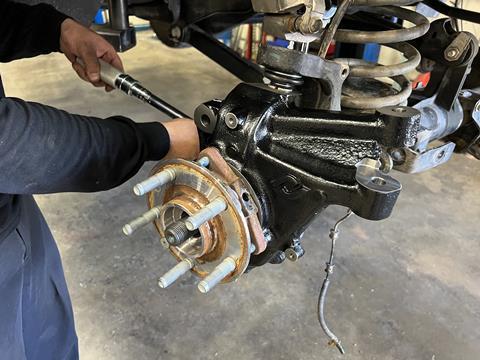
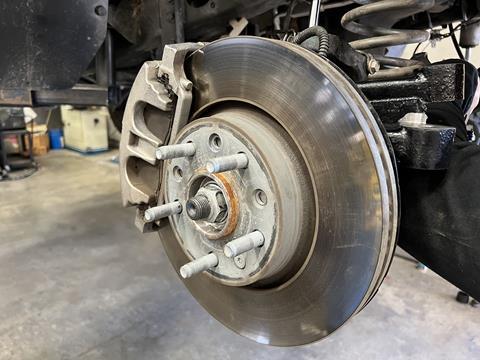
To simplify installation, the high-steer knuckles reuse all of the stock wheel end components, including ball joints, unit bearings, brakes, dust shields and axles.

5. Here are the main parts included with our Rock Jock upgrade. From top to bottom is the trac bar, tie rod, drag link, knuckles, and steering brackets

5. Here are the main parts included with our Rock Jock upgrade. From top to bottom is the trac bar, tie rod, drag link, knuckles, and steering brackets.

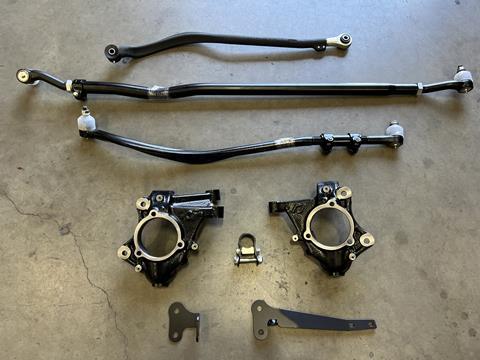
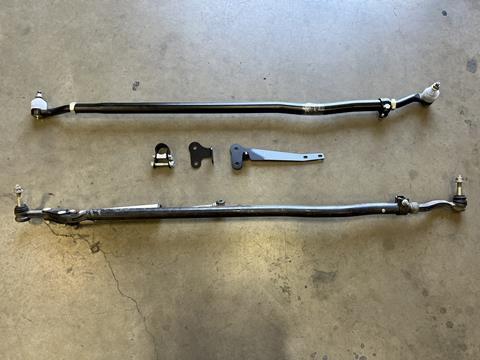
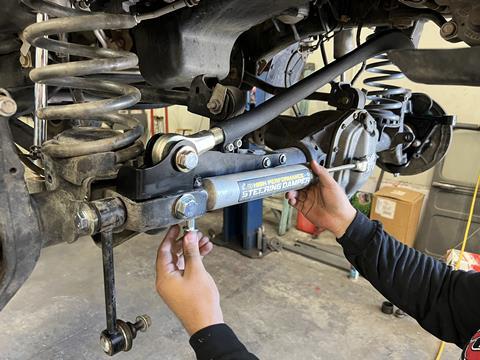
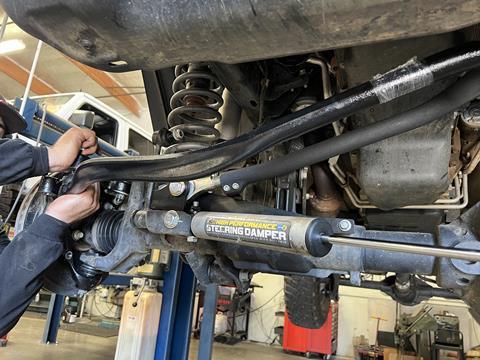
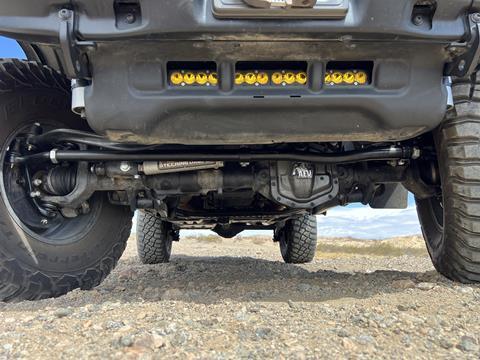
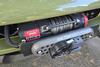
Rock Jock’s High Steer Knuckle kit is designed to be used with lifted Jeeps and raises the tie rod position by 2.75 inches and the drag link by 2.5 inches, restoring factory steering geometry to vehicles with mild lifts and improving it greatly for vehicles with moderate lifts. The Rock Jock provided tie rod checks in at 42mm (1.625 inch), which is slightly larger than the 40mm stock tie rod, and is constructed of chromoly tube with 1-ton-sized forged steering ends. Repositioning the tie rod higher means it no longer hangs below the bottom of the axle tube where it is vulnerable to rock hits.

6

6. Rock Jock developed their own premium cast iron knuckles for this kit. These should be a no-brainer upgrade for anyone with aluminum knuckles, and they are designed to exceed the strength of even the OEM cast iron knuckles.

The steering stabilizer is also repositioned out of harm’s way with a relocation bracket on the axle side that it shares with the trac bar. Rock Jock also offers all the necessary provisions for anyone looking to run ram assist with this kit.

7

7. The Rock Jock Currectlync drag link features an organic shape for maximum clearance on low steer or high steer applications and allows the bar to nest with the tie rod at full compression. The drag link is made from forged chromoly for strength and resists deflection under extreme loads. Features include greaseable rod ends and a premium double adjuster setup so that it can be adjusted on the vehicle, and it can be used with lifts up to six inches, requiring no modification to the vehicle.

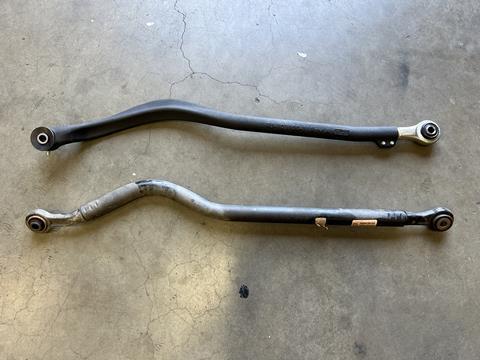
For those interested in upgrading to an adjustable trac bar, Rock Jock has an excellent choice in their optional forged chromoly and organically shaped Johnny Joint Adjustable Length Front Trac Bar.

This bar will allow the user to center the front axle, and, like the drag link, is shaped for maximum stiffness and clearance. It features a greaseable Johnny Joint rod end on the frame side and a Flex Axis rod end on the axle side. There is enough adjustability in the part to be used on stock-height rigs.

8

8. Another organically forged piece of the Rock Jock component universe is the Johnny Joint Adjustable Length Front Trac Bar. The unique shape ensures clearance where you need it for maximum articulation while maintaining strength and rigidity that translates into near elimination of front differential feedback through the steering wheel. The frame end uses a serviceable Johnny Joint and the axle end features a Flex Axis rod end that is replaceable.

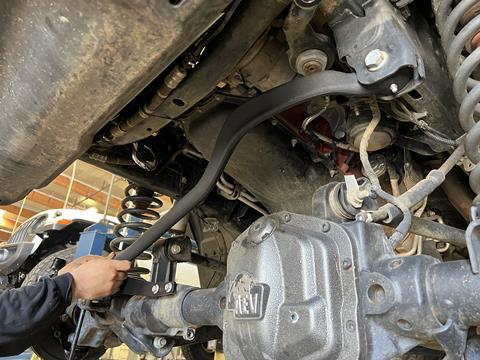
One of the challenges with developing a high-steer kit, especially on the JL platform, is the limited amount of clearance between components, especially at full compression. At the heart of this kit, Rock Jock includes their Currectlync forged chromoly drag link. Utilizing an innovative design, the drag link’s organic shape allows for increased up-travel by “nesting” with the tie rod at full bump.

9. Rock Jock’s 42mm tie rod is made strong from tubular chromoly and is the perfect match for bigger tires. Like the other bars that Rock Jock offers, this one is designed to resist bending and deflection under load

9. Rock Jock’s 42mm tie rod is made strong from tubular chromoly and is the perfect match for bigger tires. Like the other bars that Rock Jock offers, this one is designed to resist bending and deflection under load. The rod ends are greaseable, there is a double adjuster for on-vehicle adjustments, and it can be used with Jeeps that have been lifted up to six inches.

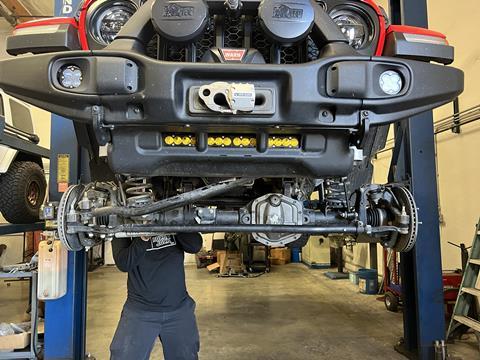
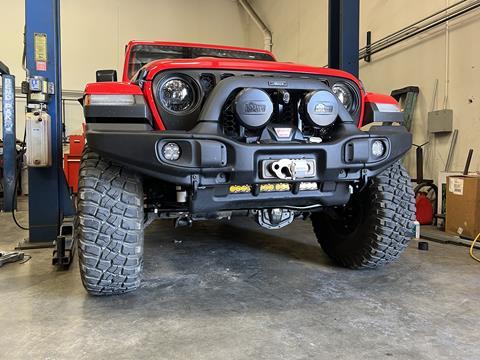
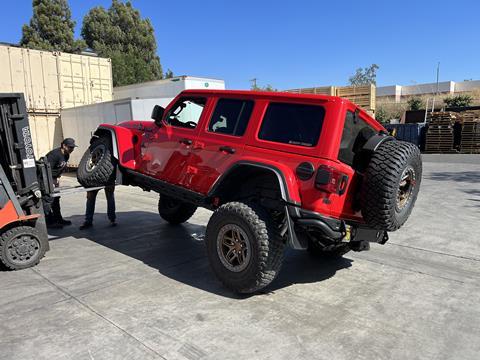
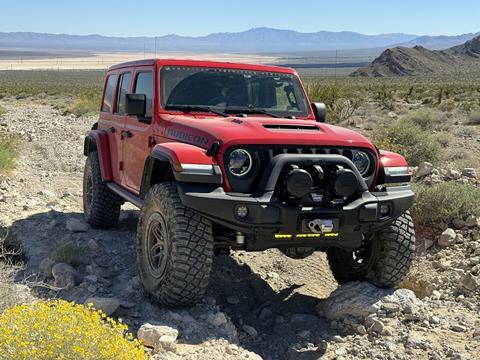
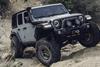
After learning everything we could about the Rock Jock high-steer kit, we were excited to get some first-hand experience to see if it lived up to the claims. For this install at Rock Jock’s Corona, California, facility, we offered up our ’23 Jeep Wrangler 392 with the full American Expedition Vehicles JL370 package, which is equipped AEV’s exceptional 2.5-inch suspension.

While this kit works incredibly well, the Bilstein/AEV steering stabilizer is definitely in a location susceptible to damage, and as with all lifted Wranglers, we are always open to improving our steering performance. The Rock Jock kit also had the advantage of allowing us to center our front axle, and because the 392 XR package already uses extended bump stops, we didn’t have to limit our up-travel.

10

10. The first part of reassembly was to install the Rock Jock knuckles to the factory axle that had been modified with Spicer Performance heavy-duty ball joints. In this photo, note the position of the grease fitting on the lower ball joint.

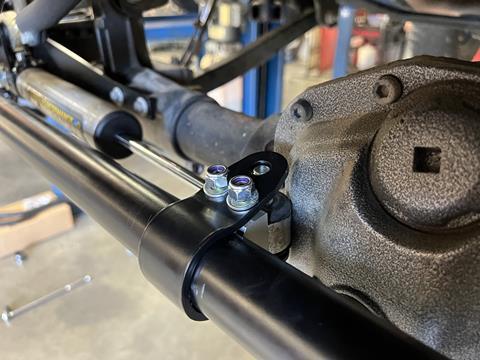
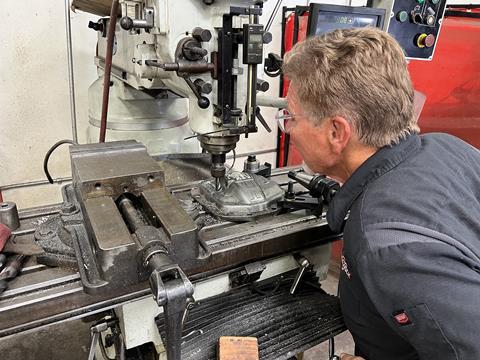
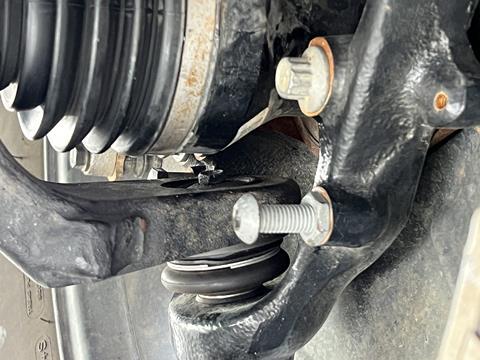
The one caveat worth noting is that the Rock Jock setup was designed to work with a factory stamped diff and not our iron AEV cover. Because we wanted to keep the protection of our front AEV diff cover intact, it had to be milled slightly to allow the steering stabilizer end to recess at full lock to the driver’s side.

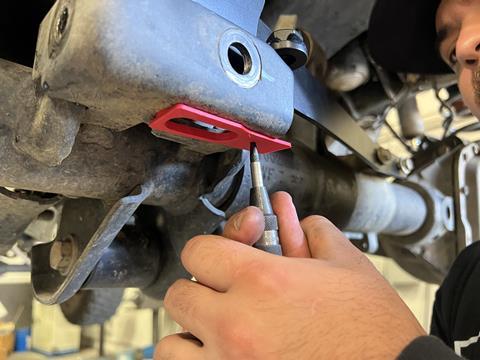
Thanks to Rock Jock’s adjustable steering stops, we dialed back our steering lock by a practically unnoticeable 1/8-inch, which we felt was a good compromise to make everything work together. 

11. Next, the factory CV axle shaft is reinstalled into the axle, through the Rock Jock knuckle

11. Next, the factory CV axle shaft is reinstalled into the axle, through the Rock Jock knuckle.

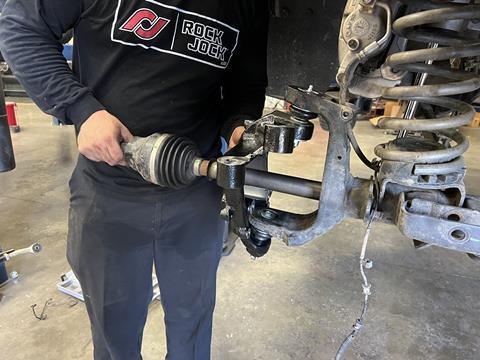
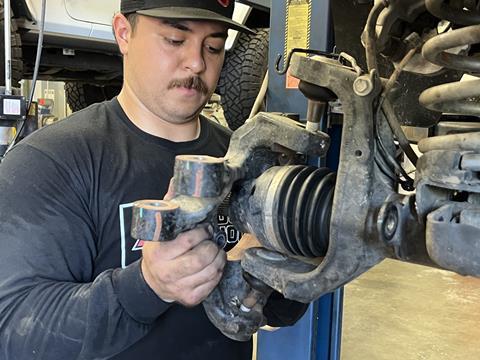
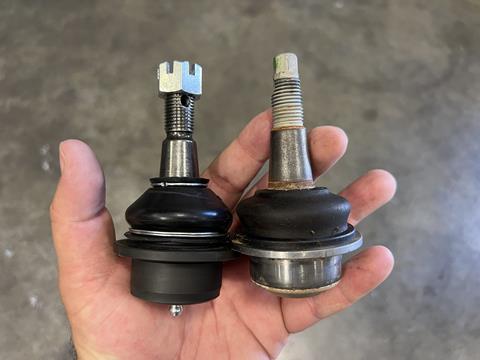
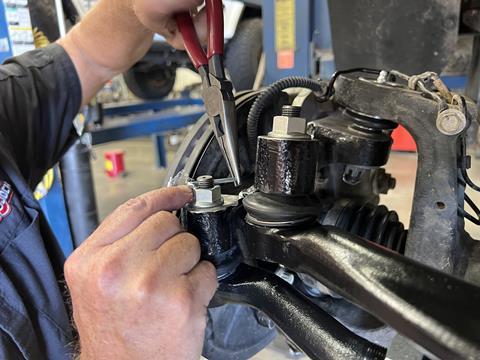
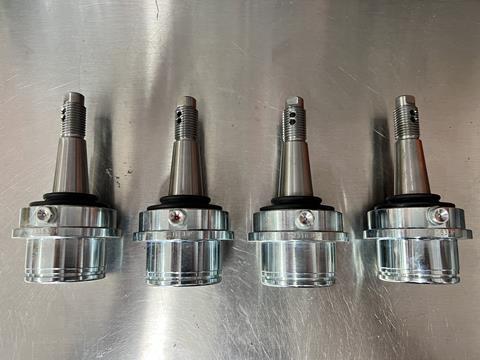
We also took the opportunity to upgrade our factory ball joints. Initially we used Spicer’s upgraded Performance Ball Joint Kit, but because our 392 has the CV axles, there was not enough clearance to grease the bottom joint. Spicer’s grease fitting sits atop the ball joint, where it is a tight fit with the CV’s housing.

After trying multiple needles and tools, our ultimate solution was to invest in a set of Dynatrac HD ball joints, which have a grease fitting on the side of the ball joint, curing any access issues.

12. Here you can see just how much strength was designed into the Rock Jock knuckle and the machining that goes into manufacturing it

12. Here you can see just how much strength was designed into the Rock Jock knuckle and the machining that goes into manufacturing it.

After the install was complete, we immediately noticed an improvement in steering that only improved further as the ball joints broke in. We’ve found the Jeep to be more directionally stable, with less wander, and just overall more pleasurable to drive, especially on the highway. The addition of the stiffer drag link tightens up the feel of the front end and allows the suspension and stabilizer to do their job of soaking up movement. All of it works together to make the steering feel more precise. 

13. With the axle shaft in place, we reinstalled the factory unit bearing

13. With the axle shaft in place, we reinstalled the factory unit bearing.

Off-road, there is less kickback in the wheel and we are no longer stressing about errant rocks just waiting to take out our steering components. In both everyday on-road driving and in taking on more technical trails, our Jeep is less susceptible to trail damage and our confidence in traversing rugged terrain has improved.

After a couple thousand miles, including over 250 of them off-road, we have zero hesitation in recommending this setup for any Jeep owner. Read on as we walk you through an overview of how to upgrade your Jeep’s steering to Rock Jock’s high-clearance setup.

14

14. We wrapped up the knuckle installation by bolting on the brake rotors, calipers, brake lines, wiring, and torquing the axle nut to spec. These knuckles are completely bolt-on and accept all of the factory wheel end components for ease of servicing and repair.

15. Rock Jock provides this trac bar relocation bracket that also doubles as a new steering stabilizer mount

15. Rock Jock provides this trac bar relocation bracket that also doubles as a new steering stabilizer mount.

16. In this entire install, Rock Jock only requires one hole to be drilled, and that is on the underside of the original steering stabilizer mount

16. In this entire install, Rock Jock only requires one hole to be drilled, and that is on the underside of the original steering stabilizer mount. The company provides this trick 3D-printed guide that snaps into an existing hole, ensuring the new hole is precisely marked with a punch.

17. With the required hole marked, we drilled it per the provided instructions

17. With the required hole marked, we drilled it per the provided instructions.

18. Once the bracket was bolted in place, we turned our attention to installing the Johnny Joint Adjustable Length Front Trac Bar

18. Once the bracket was bolted in place, we turned our attention to installing the Johnny Joint Adjustable Length Front Trac Bar.

19. Next, we reinstalled the AEV steering stabilizer to the new bracket, utilizing the new hole that we previously drilled

19. Next, we reinstalled the AEV steering stabilizer to the new bracket, utilizing the new hole that we previously drilled.

20. Moving to the next step, the Currectlync drag link was installed. The innovative and unique shape of the drag link allows the drag link and tie rod to “nest” at full compression

20. Moving to the next step, the Currectlync drag link was installed. The innovative and unique shape of the drag link allows the drag link and tie rod to “nest” at full compression.

21. Rock Jock’s 42mm tie rod was then installed to the new knuckles, followed by the mounting clamp for the steering stabilizer

21. Rock Jock’s 42mm tie rod was then installed to the new knuckles, followed by the mounting clamp for the steering stabilizer. With the steering stabilizer mocked up, it was clear that the thick AEV iron cover had too much material for compatibility. At this point, we had two choices, swap to a stock cover or modify the AEV cover.

22. Wanting to preserve our diff protection, off-road icon John Currie went to work milling the AEV cover, creating a relief area for the steering stabilizer end at full driver’s lock

22. Wanting to preserve our diff protection, off-road icon John Currie went to work milling the AEV cover, creating a relief area for the steering stabilizer end at full driver’s lock.

23. After reinstalling the diff cover and checking for clearance, we refilled the axle with gear oil and buttoned up the install, torquing bolts and adding cotter pins

23. After reinstalling the diff cover and checking for clearance, we refilled the axle with gear oil and buttoned up the install, torquing bolts and adding cotter pins.

24

24. Lastly, the wheels and tires were reinstalled and the Jeep was put on the ground, allowing us to admire our newfound ground clearance for the first time. With the Jeep on the ground, we adjusted the tie rod and torqued the trac bar to spec.

25. Before heading out on our first test drive, the Rock Jock crew grabbed the company forklift, allowing us to fully articulate the Jeep and check for any clearance issues, of which we found none

25. Before heading out on our first test drive, the Rock Jock crew grabbed the company forklift, allowing us to fully articulate the Jeep and check for any clearance issues, of which we found none.

26

26. After we finished the install, we unfortunately realized that it would be impossible to grease the upgraded Spicer lower ball joints in our CV-axle application. Those with traditional U-joint axles won’t have this concern.

27. To solve the issue, we decided to swap out our Spicer Performance ball joints and headed to Adventure Offroad in Huntington Beach, California with a set of Dynatrac HD ball joints in hand

27. To solve the issue, we decided to swap out our Spicer Performance ball joints and headed to Adventure Offroad in Huntington Beach, California with a set of Dynatrac HD ball joints in hand. Dynatrac HD ball joints were the preferred solution because they have a side-mounted grease fitting, which can easily be accessed no matter which axle shaft types your Jeep has.

28. Here you can see the Dynatrac lower ball joint, after being installed by our friends at Adventure Offroad, and how the grease fitting position will allow us to easily keep the lower ball joints lubed

28. Here you can see the Dynatrac lower ball joint, after being installed by our friends at Adventure Offroad, and how the grease fitting position will allow us to easily keep the lower ball joints lubed.

29

29. Having the tie rod and steering stabilizer tucked up above the axle centerline gives us noticeably increased ground clearance off-road and much less worry about damaging steering components in technical terrain.

30. After putting more than 2,000 miles on the Jeep, including over 250 miles offroad, we couldn’t be happier with this modification

30. After putting more than 2,000 miles on the Jeep, including over 250 miles offroad, we couldn’t be happier with this modification. The results are clear; more ground clearance, better steering feel and precision, less wander and steering feedback, and reduced driver fatigue on long highway trips. If you are looking for us to deliver a drawback, we haven’t found one yet.

Sources

Adventure Offroad
adventureoffroad.com

Dynatrac
dynatrac.com

Rock Jock By John Currie
rockjock4x4.com

Spicer
spicerparts.com

Tell us what you think about this article by commenting below. More Great Info! This article originally appeared in OVR Issue 06. For more informative articles like this, consider subscribing to OVR Magazine in print or digital versions here.