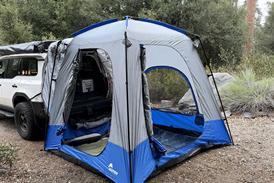
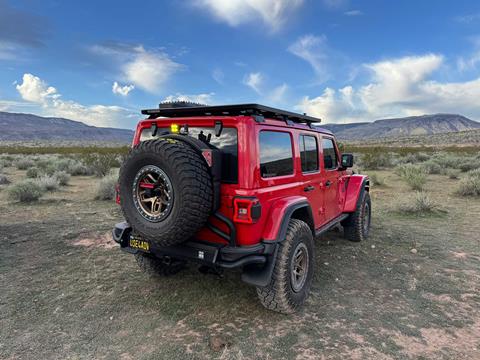
We paired Rhino-Rack’s innovative Backbone foundation system with the versatile Pioneer platform rack to create the ultimate cargo solution for our Jeep Wrangler, offering 175 pounds of dynamic load capacity while preserving the vehicle’s iconic removable roof features.

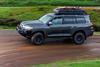
Jeep Wranglers aren’t known for copious amounts of interior space, so more often than not, adding a roof rack is a great way to expand cargo capacity, especially if you carry rear-seat passengers.

That being said, there are several challenges to running a roof rack on a Wrangler, including the removable fiberglass hardtop, lack of reinforced rain gutters, additional wind resistance, more noise, and low dynamic and static load limits. 

002-OVR-Wrangler-Jl-Rhino-Rack

1. The first part of any install is to ensure you have all of the pieces. While Rhino-Rack’s many parts can be overwhelming, they include this comprehensive cardboard template to sort and visualize each component, confirming that…

…nothing is missing and making each piece easier to find.

To counter each of these issues, we worked with Rhino-Rack and paired the company’s Backbone and Pioneer platform rack systems for a complete solution that would meet our needs.

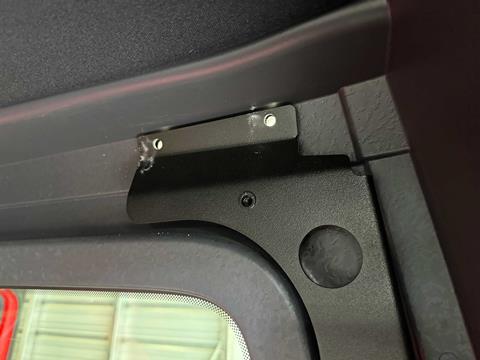
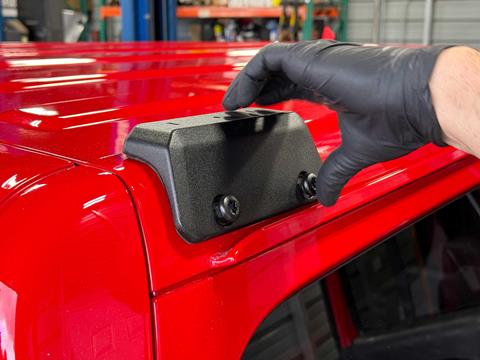
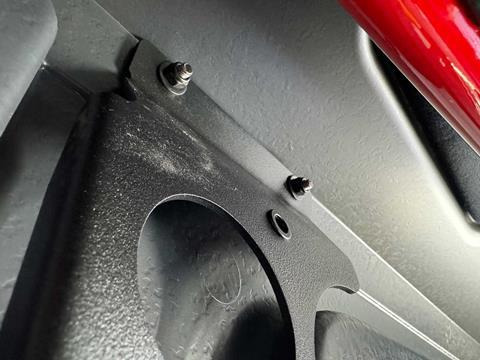
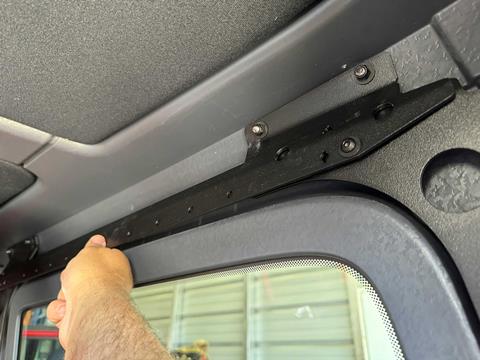
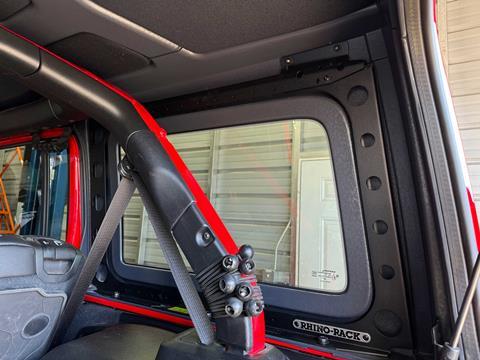
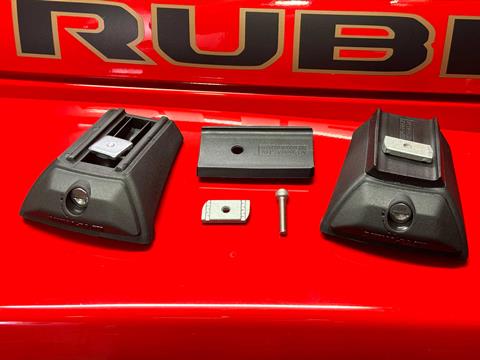
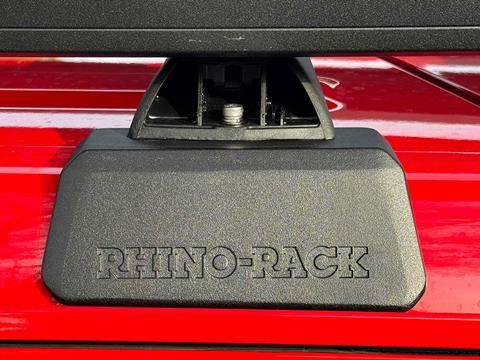
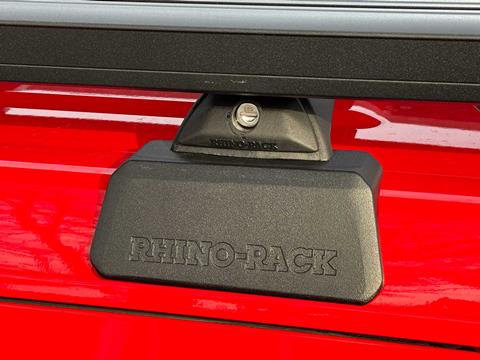
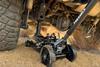
Using an internal structure that spreads the load to either the roll bar or the tub of the Jeep, Rhino-Rack can achieve higher load limits than other racks on the market that only utilize the relatively weak rain gutters.

Rhino-Rack rates the dynamic load of its Backbone at 265 pounds of roof load, including the approximately 90-pound Backbone, RCL Locking Legs, and platform rack (depending on model) combination.

003-OVR-Wrangler-Jl-Rhino-Rack

2. We started the install by removing the factory hardtop mounting bolts.

This translates into around 175 pounds of dynamic on-road cargo load allowance, a 120-pound dynamic off-road cargo load allowance, and more than 700 pounds of static (stationary) load allowance.

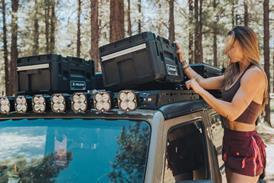
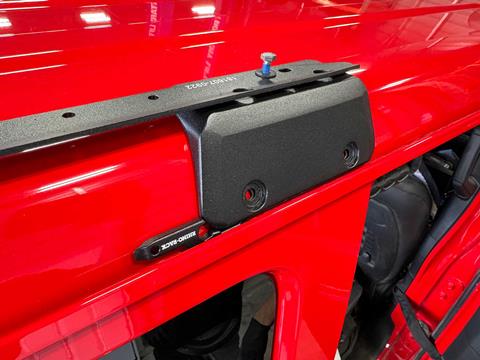
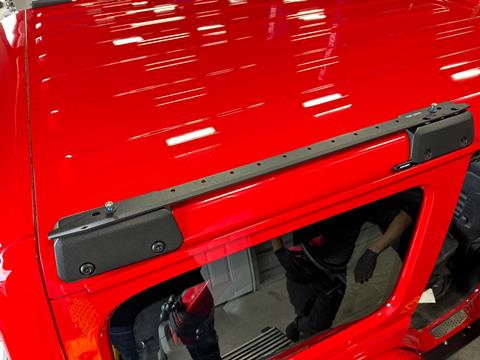
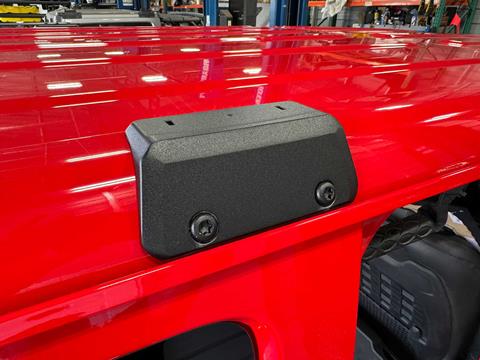
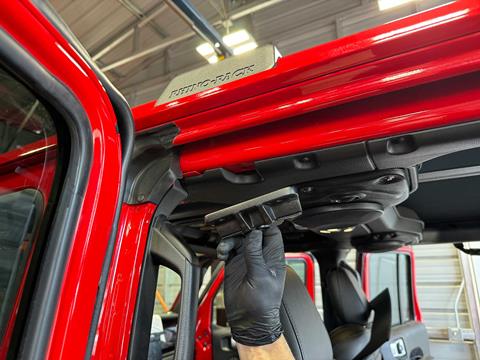
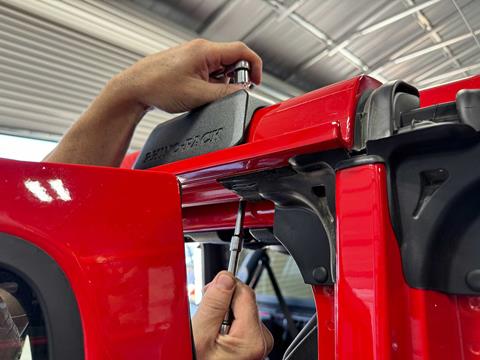
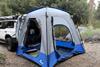
Other benefits to the Backbone system include the ability to mount Rhino-Rack’s crossbars, platform rack, or even aftermarket tent crossbars to the foundational castings.

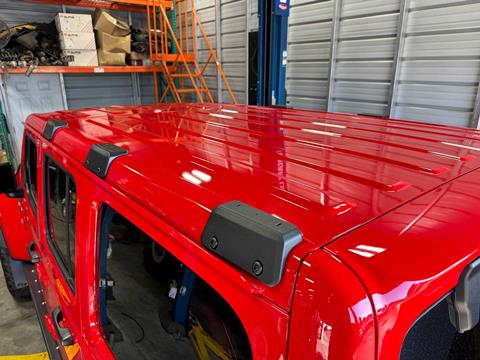
Racks and crossbars are easily removed and when the rack is off, and only three castings are visible on each side, allowing you to run a slick-top setup for improved wind resistance and fuel economy when you don’t require a rack.

004-OVR-Wrangler-Jl-Rhino-Rack

3. Next, the rear upright was positioned inside the rear of the hard top. Notice how it surrounds the window and hugs the inside of the top, taking up no additional interior space.

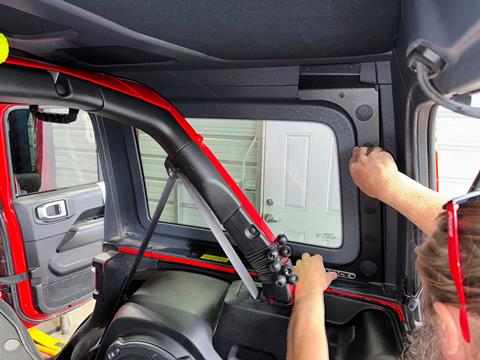
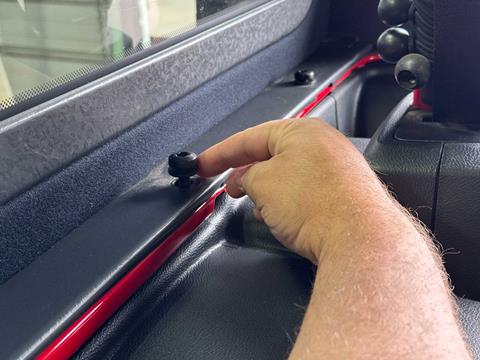
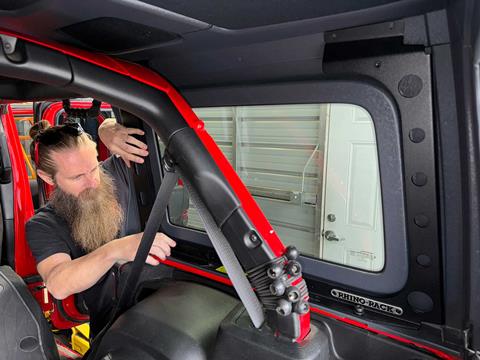
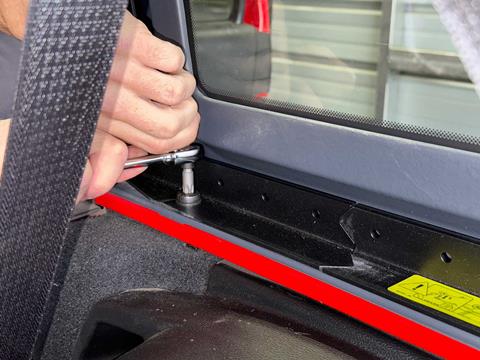
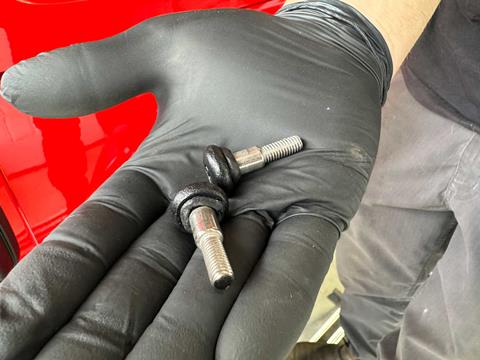
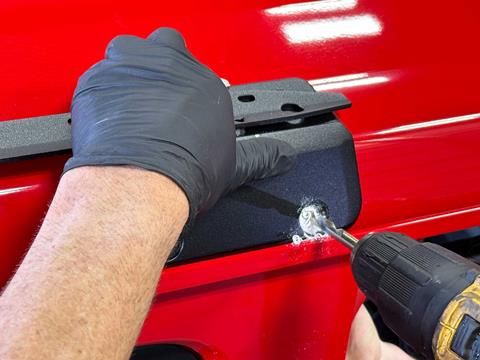
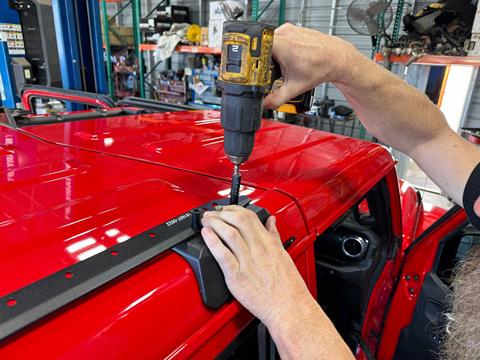
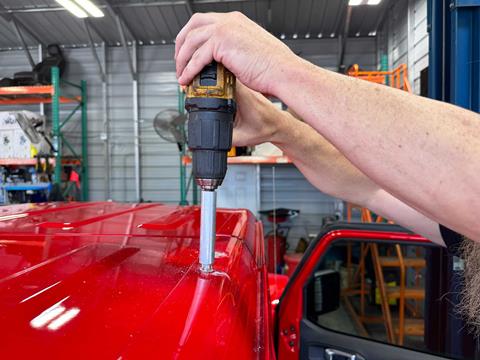
The biggest drawback to using the Backbone system is the fact that you have to drill through your roof for the system to be installed. While this is an emotional hurdle to overcome, Rhino-Rack’s installation instructions, overview video, and the included tools make this a very easy step-by-step installation.

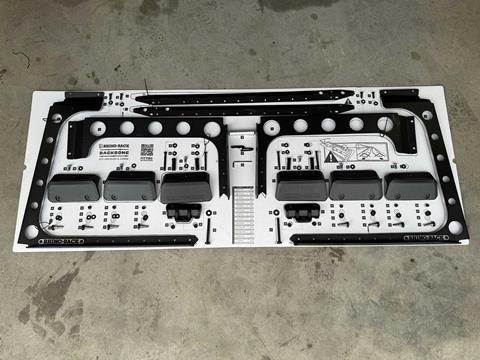
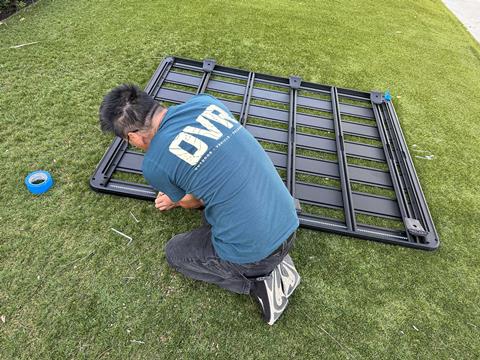
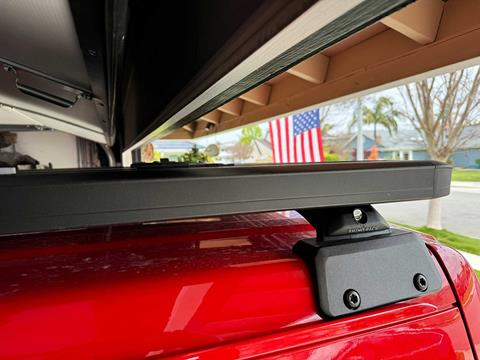
Rhino’s Pioneer Platform is also one of the better rack solutions on the market. Made from extruded aluminum and nylon-reinforced plastic, it’s as durable as it is versatile. The aerodynamic shape complements the Jeep’s lines and adds minimal wind noise, while the generous T-slots and wide planks make mounting just about anything to the rack a modular affair.

Rhino-Rack also incorporates a channel on the underside of the front and rear extrusions for more adaptability, there is integrated wiring capability, and the corners can even be drilled out to provide access to wiring. The rack is finished in black powdercoat and comes with a 5-year warranty.

005-OVR-Wrangler-Jl-Rhino-Rack

4.The forward upright was then placed inside the top as well, completing the lower part of the weight-bearing structure.

We went with the largest size that is recommended for the Wrangler four-door (72 x 56 inches), and yes, it still allows for the Freedom Panels, and even the hard top, to be removed. With the low-mount RCL Locking Legs, expect to add about 3.5 inches to the overall height of your Jeep.

With this configuration we can fit our Jeep, with an American Expedition Vehicles 2.5-inch lift and 37s, through an 86-inch-high garage door.

For the install, we took our Jeep Adventure Offroad in Huntington Beach, California, where our Rhino-Rack Backbone system was installed in just a few hours. Keep reading to see an overview of this process and stay tuned for an upcoming story about how we outfit our rack for adventure.

006-OVR-Wrangler-Jl-Rhino-Rack

5. With both uprights installed, the factory hard top bolts were reinstalled in their original position, sandwiching the top between the uprights and the body tub.

007-OVR-Wrangler-Jl-Rhino-Rack

6. Using the placement of the uprights as a guide, the first set of holes was drilled from the inside out.

008-OVR-Wrangler-Jl-Rhino-Rack

7. In order to clean up the holes, we re-drilled them from the outside in, vacuuming the fiberglass dust as we went.

009-OVR-Wrangler-Jl-Rhino-Rack

8. Here you can see that the hardware has been prepped with butyl around the bolt heads; it was also added around the holes on the top. This is an essential step for sealing the roof and keeping the elements out of your Jeep.

010-OVR-Wrangler-Jl-Rhino-Rack

9. The Backbone system uses six aluminum castings that act as the foundation for any externally mounted rack or crossbars. Hardware goes through these blocks and bolts to the internal structure.

011-OVR-Wrangler-Jl-Rhino-Rack

10. The brilliance of the Rhino-Rack Backbone is the way a foolproof installation has been engineered into the product. In order to guarantee proper placement…

…of the exterior castings, Rhino-Rack utilizes the internal horizontal brace to place the castings in a precise spot on the roof and provides a tool to properly space the block, leaving nothing to chance.

012-OVR-Wrangler-Jl-Rhino-Rack

11. Here is another look at how the internal brace is temporarily used as a guide on the outside of the Jeep.

013-OVR-Wrangler-Jl-Rhino-Rack

12. With middle casting in position, it was used as a guide to mark and drill through the factory hardtop.

014-OVR-Wrangler-Jl-Rhino-Rack

13. As with the rear casting, butyl was applied to the hardware, and the middle casting was secured into place.

015-OVR-Wrangler-Jl-Rhino-Rack

14. Looking from the inside, this is how the castings are attached to the internal uprights.

016-OVR-Wrangler-Jl-Rhino-Rack

15. Using the internal brace one more time as a guide, we positioned the front casting and drilled pilot holes.

017-OVR-Wrangler-Jl-Rhino-Rack

16. With the temporary exterior tasks complete, we put the internal horizontal brace in its permanent position inside the Jeep, connecting and supporting the front and rear uprights.

018-OVR-Wrangler-Jl-Rhino-Rack

17. Before we could place the front casting, we had to drill out the pilot holes to the proper size.

019-OVR-Wrangler-Jl-Rhino-Rack

18. We then put the front casting in place and installed Rhino-Rack’s supplied roll bar casting between the roll bar and the roof to support any load that comes through the front casting, spreading it to the factory roll bar.

020-OVR-Wrangler-Jl-Rhino-Rack

19. The final step to installing the Backbone was securing the front casting and re-checking our torque values on all of the hardware.

021-OVR-Wrangler-Jl-Rhino-Rack

20. As you can see, there is no negative impact to interior cargo space with the Backbone fully installed.

022-OVR-Wrangler-Jl-Rhino-Rack

21. On the outside, the castings have a finished and integrated look to them and are unobtrusive.

023-OVR-Wrangler-Jl-Rhino-Rack

22. For our install, we used the low-profile RCL Locking Legs, which still allows our lifted Jeep to fit in the garage. Rhino provides different types of hardware and spacer combinations, depending on what you are mounting, so be sure to…

…use the correct assembly for your application.

024-OVR-Wrangler-Jl-Rhino-Rack

23. Building the Pioneer Rack is easy thanks to the measurements being printed on the underside of the rack, but it can be a bit time-consuming.

025-OVR-Wrangler-Jl-Rhino-Rack

24. After determining the location of the RCL Locking Legs, we hoisted the Pioneer Rack atop the Jeep, aligning the tabs on the legs with the holes on the castings. We then bolted the rack into place using plenty of blue Loctite.

026-OVR-Wrangler-Jl-Rhino-Rack

25. To keep the rack secure, Rhino-Rack keeps the mounting hardware behind locking doors that are all keyed together.

027-OVR-Wrangler-Jl-Rhino-Rack

26. The installed rack provides a tremendous amount of added space for accessories and gear, and the Freedom Panels can still be removed. We’ll show you how we outfit our Pioneer Rack in a follow-up story.

028-OVR-Wrangler-Jl-Rhino-Rack

27. Garagability is a huge consideration for a lot of people, and our Jeep Wrangler Rubicon 392, equipped with an AEV 2.5-inch lift and 37-inch BFGoodrich Mud-Terrain KM3 tires, easily fits through our 86-inch-high garage door opening.

029-OVR-Wrangler-Jl-Rhino-Rack

28. Overall, our experience with the Rhino-Rack Backbone and Pioneer Rack has been exceptional so far. With a recent trip to Moab, Utah, and a few wheeling trips under our belts, we can report that…

…additional wind noise is barely perceptible, fuel economy has only minimally been impacted to around one mpg or less, and there are no additional squeaks or rattles.


SOURCES

Adventure Offroad

Rhino-Rack


Access More Great Stories!
This article originally appeared in OVR Issue 09. For more informative articles like this, consider subscribing to OVR Magazine in print or digital versions here. You can also find the print edition of OVR at your local newsstand by using our Magazine Finder.