










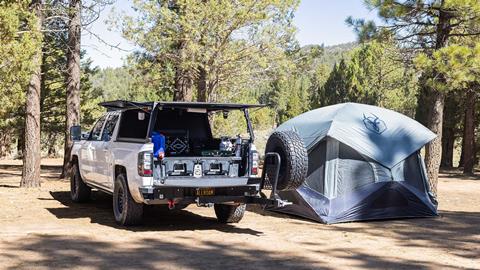
Xtrusion Overland’s XO.SKLTN arrives with an ambitious pitch: a fully modular canopy camper ecosystem you can build at your own pace, from open bed rack to enclosed topper to rooftop tent platform. After a two-month install on a 2015 Chevy Silverado 1500, we have thoughts — plenty of them.
Modularity. Modularity. Modularity. Repeat the word three times, and another overlanding product promising endless customization will magically appear.
The appeal is easy to understand, especially with a modular truck camper system that lets you spread purchases across several stages as your budget and camping habits develop.
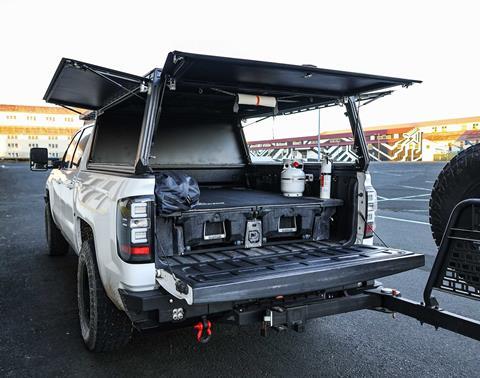
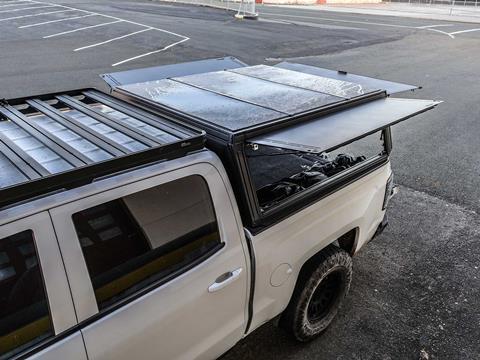
Xtrusion Overland’s XO.SKLTN takes that idea from an open bed rack to an enclosed aluminum topper, with a camper tent upgrade intended to complete the system.
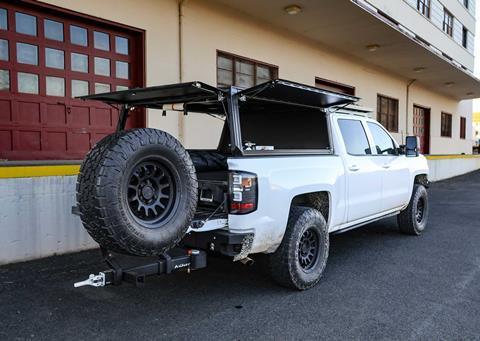
For this Xtrusion Overland XO.SKLTN review, I installed the Stage 2B configuration on my 2015 Chevy Silverado 1500. The finished setup has become my favorite truck bed arrangement to date. Getting there took roughly two months, missing hardware, custom brackets, and several fixes I hadn’t expected to make on a new product. That experience deserves some context.
This review covers the first iteration supplied for my Silverado, including its universal mounting components. The installation challenges and modifications described here reflect that combination; they aren’t a hands-on assessment of every truck application or later revision.
What Is the Xtrusion Overland XO.SKLTN?
Canopy campers have become a familiar way to turn a pickup into a compact travel rig. Go Fast Campers, Super Pacific, and Dirtbox Overland are among the names shoppers encounter in the platform and wedge camper category.
For someone considering an alternative, the XO.SKLTN’s staged purchasing approach is a reason to take a closer look, although this review doesn’t compare those systems side by side.
Purchasing a complete canopy camper can mean committing a substantial amount of money before you know exactly how you’ll use it. A system that starts as a truck bed rack and accepts an enclosure and tent later gives the owner more room to develop the build over time.
The challenge is making each stage practical on its own. Shipping, assembly, weather sealing, durability, and weight all matter, and the transition between stages needs to make sense for the person doing the work.
Wichita, Kansas-based Xtrusion Overland (XO) built its reputation around bed racks and modular vehicle storage. The XO.SKLTN applies that experience to a three-stage system, using an aluminum extrusion frame as the foundation.
How the XO.SKLTN 3-in-1 System Works
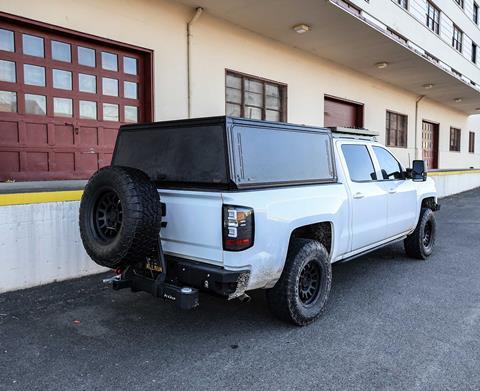
The pitch is straightforward: start with an open bed rack, enclose it with aluminum panels, then add the camper tent when ready. At the time of this test, the configurations were listed as follows:
| Configuration | Included components |
|---|---|
| Stage 1A | XO.SKLTN bed rack |
| Stage 1B | Bed rack with MOLLE panel kit |
| Stage 2A | Bed rack with topper panel kit |
| Stage 2B | Bed rack with topper panel kit and MOLLE panel kit |
| Stage 3 | Bed rack, topper panel kit, and camper tent add-on kit; not yet available to purchase during this test |
Stage 2B, the configuration reviewed here, is an enclosed truck topper. The Stage 3 tent is a separate upgrade, and I haven’t tested its installation or sleeping accommodations.
XO.SKLTN Pricing: What Each Stage Costs
Pricing varies by truck application, bed length, and configuration. These were the listed prices for a full cab-height build on a 2015 Chevy Silverado 1500 short bed during this review:
| Configuration | List Price |
|---|---|
| Stage 1A | $2,700 |
| Stage 1B | $3,150 |
| Stage 2A | $4,400 |
| Stage 2B | $5,000 |
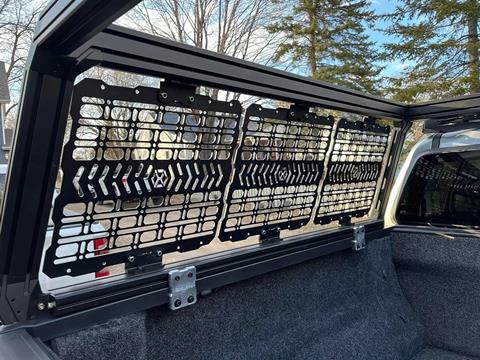
The MOLLE panel kit deserves attention before ordering. On Stage 1B, the panels mount along the sides of the open rack, running between the tailgate and cab. With the Stage 2B enclosure installed, the supplied panels mount outside the side topper panels using topper panel side braces, sold separately.
I wanted the option to mount those panels inside the enclosure for internal gear storage. The supplied brackets didn’t accommodate that arrangement with the topper panels closed, and the panels didn’t fit at the bulkhead either. XO offers a separate front MOLLE panel for that location.
For a product built around customization, more flexibility here would be welcome. A full-height panel with brackets suited to multiple frame locations would make the included MOLLE kit more useful as the build changes.
XO.SKLTN Specs: Frame, Materials, and Load Capacity
The truck bed rack system uses 15-series T-slot extrusion, machined corner pieces, and flush-mount aluminum enclosure panels. XO’s supplied specifications list the following:
| Specification | Listed Figure or Material |
|---|---|
| Static capacity | 1,600 pounds |
| Dynamic load | 850 pounds |
| Off-road load | 450 pounds |
| Bed rack weight | 90 pounds |
| Frame | 15-series T-slot extrusion |
| Corners | Eight CNC-machined 6061-T651 billet pieces |
| Panels | Flush-mount aluminum |
| Listed aluminum alloys | 6063-T6 / 6005-T5 |
The 90-pound figure is for the bed rack, rather than the complete Stage 2B aluminum truck topper. These are the supplied ratings; I did not independently load-test the system.
XO.SKLTN Installation: Instructions and Preparation
The basic frame assembly is fairly straightforward. Each custom-cut extrusion is labeled, and the machined corner brackets and reinforced lower gussets give the structure a clear assembly sequence. The larger challenge was keeping track of everything required to complete the topper.
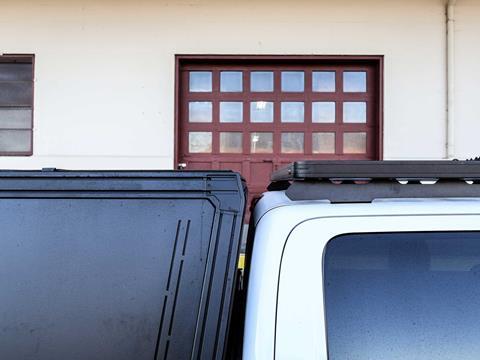
The Silverado Stage 2B order involved five to eight separate shipments containing structural pieces, hardware, hinges, gas struts, mounts, and weatherstripping.
Before starting a truck topper install like this, open the packages and inventory the contents against the instructions. Include assemblies that are supposed to arrive with hardware already fitted.
Twice during my installation, I reached a step and discovered that the necessary components hadn’t arrived.
The rear panel’s gas strut mount brackets, which should have been preinstalled, were one example. Those omissions interrupted progress and added to the overall delay.
Long ball-end Allen wrenches and a 3/8-inch-drive hex socket set made the repeated fastener work easier. A drill can speed up the repetitive work, with final tightening handled carefully by hand. Access around the corner brackets makes short Allen wrenches tedious to use.
The instruction documents used for this build are linked here:
- XO.SKLTN bed rack assembly instructions
- XO.SKLTN topper panel kit instructions
Additional Parts Needed for My Silverado Installation
Completing this first-version XO.SKLTN installation on my Silverado required extra sealing materials, a custom bed rail arrangement, and fabricated mounting brackets. This is a record of the parts used on my truck; other applications may have different requirements.
- Additional D-bulb weatherstripping at the bulkhead, where the topper sat about 1/4 inch above the bed.
- A 36-inch length of steel flat bar, 3 inches wide and 3/16 inch thick, for fabricated brackets and spacers.
- A 10-foot length of 13/16-inch-high solid Unistrut and a 20-pack of 3/8-inch cone strut nuts for the custom bed rail arrangement.
- Adhesive-backed flat weatherstripping, 2 inches wide and 1/16 inch thick, for the roof seams.
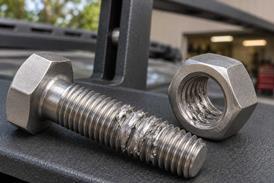
- Assorted hardware, including 5/16-inch socket-head cap screws, 3/8-inch stainless steel button-head bolts, and 1-1/4-inch-long Grade 8 bolts in 3/8-inch diameter.
Universal Clamp Kit: The Biggest Installation Issue
The universal mounting kit was the largest obstacle in this Chevy Silverado truck topper installation. The supplied clamp and pinch plate arrangements didn’t provide the downward clamping action I wanted to hold the shell firmly against the bed rails. After trying two pinch plate options, I moved to a custom mounting solution.
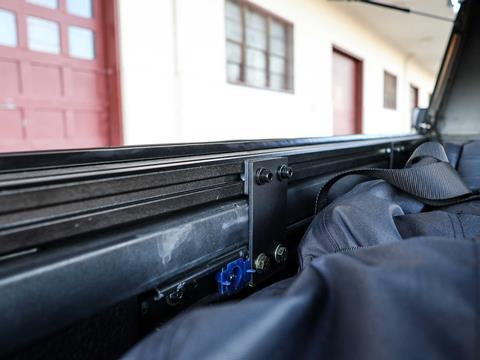
In 2021, I had installed 13/16-inch-high slotted Unistrut bed rails using rivet nuts along the sides of the truck bed. I returned to that rail concept and fabricated six mounting plates from 3-inch-wide, 3/16-inch-thick steel flat bar. Cut to approximately 5 inches tall, the brackets connected the topper’s inner T-slot rail to the Unistrut below.
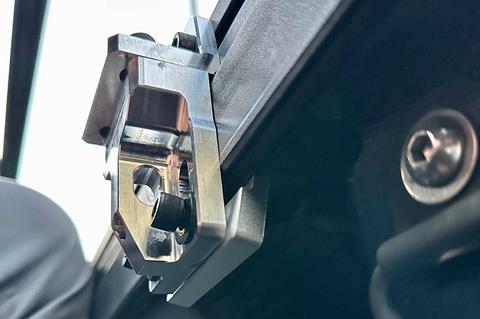
The frame uses 5/16-inch hardware at its extrusion connections. For the custom bed rail connections, I chose 3/8-inch strut nuts and Grade 8 hardware. Another fitment issue then became apparent: the topper frame was square, while the GM truck bed tapered.
Stainless steel spacers and additional plates cut from the remaining flat bar filled the differences between the brackets, topper frame, and bed rails. By the time the fabrication was complete, I had drilled 84 holes through the brackets and spacers. That was a substantial amount of work simply to attach the shell to the truck.
I enjoy fabrication and problem-solving, and there’s satisfaction in making a custom solution work. Even so, a customer purchasing a truck bed camper shell with a universal mounting kit should have a much more straightforward path to installation.
Before ordering for an application like mine, I would ask XO to explain the mounting arrangement supplied for that exact truck and whether it has been revised since the kit tested here.
Panel Locks and Latches: Fitment and Everyday Use
The side panels use pushpins near their lower corners to hold them closed, with separate keyed locks. On my topper, the pin locations pulled the corners in while allowing the middle of each panel to bow outward. Moving the closure points inward or revising the latch design could help distribute that pressure more evenly.
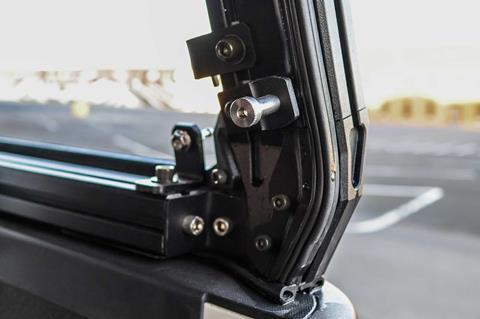
The lock brackets created a separate interference problem. Each uses a double-wing design mounted to the inner rail, where it needs to align with the panel’s keyed catch. At all four locations on my kit, part of the bracket contacted the gas strut mount head when the panel closed.
I used a vertical belt sander to remove the interfering portion of each bracket. The modification was manageable, but having to reshape four lock brackets on a new topper added another unnecessary task.
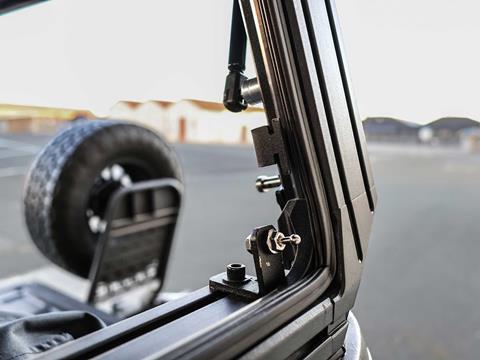
An integrated latch and lock would simplify the side panels and might help address the uneven closing pressure. The rear panel already uses a single T-handle connected to catches on both sides, and that mechanism worked well in use.
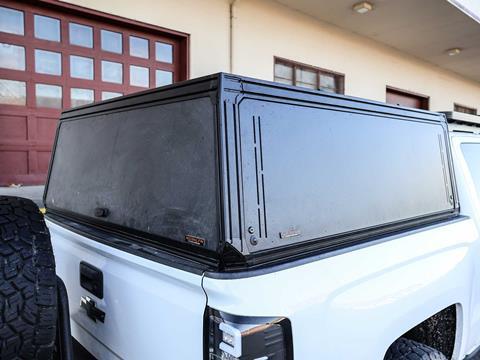
My complaint with the rear latch is its key. It uses a different key from the side panels, leaving me carrying two keys for one enclosure. Matching the locks would make the topper more convenient every day.
Top Panel Fitment and Weather Sealing
The Stage 2 topper kit supplied for this build used three roof panels, fitted into the frame around two crossbars. Weatherstripping was preinstalled along the panels’ inner lips, but getting the roof to fit and seal required additional work.
After positioning the panels and adjusting the crossbars, I was left with a gap of approximately 1/4 inch at the tailgate-side panel. The supplied fasteners were too short to reach the T-slot spring nuts across the remaining space. Longer, 1-1/4-inch socket-head cap screws left over from the mounting work allowed me to secure the panel.
XO explained that the gap allowed adjustment around the crossbars. In my installation, distributing that space across the roof still raised concerns about sealing the seams. It was another detail that needed attention before I could consider the enclosure finished.
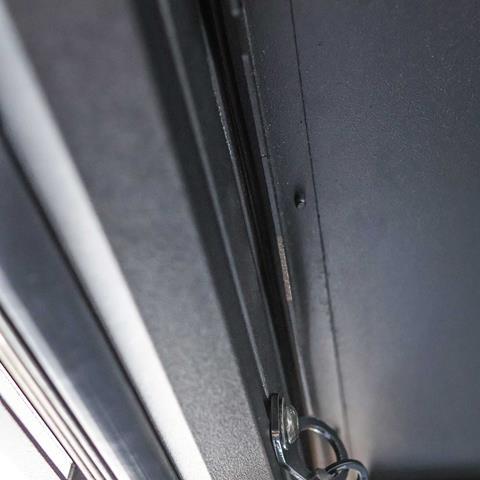
The instructions called for masking either side of the roof seams and applying the supplied black RTV silicone. I chose a different approach, covering the seams with 2-inch-wide, 1/16-inch-thick adhesive-backed flat weatherstripping and pressing it down evenly with a J-roller.
That was my modification, rather than the prescribed sealing method. A dedicated seam gasket or gutter arrangement would be a welcome improvement to a system that already uses preinstalled seals elsewhere.
During the review period, XO unveiled its Stage 3 Camper Tent Add-on Kit at Overland Expo Mountain West 2026 in Loveland, Colorado.
Images from that unveiling appeared to show the rooftop tent platform replacing all three Stage 2 roof panels. I haven’t installed that upgrade, so that observation remains based on the images.
If those roof panels are removed for the tent conversion, I would prefer a single roof panel for the Stage 2 enclosure. Shipping a larger panel would bring its own complications, but eliminating the two crossbar seams could simplify assembly and sealing.
First Drive: Noise and Rain on the Silverado
Once the mounting, panel fitment, and sealing work were complete, the first drive offered some encouragement. Road noise was lower than I expected, with the full-height topper sitting below my Front Runner roof rack.
A substantial rainstorm provided an early check of the finished enclosure. I found no internal leaks during that drive. The side and rear panels’ snap-in weatherstripping, paired with the additional EPDM rubber trim, performed well in those conditions.
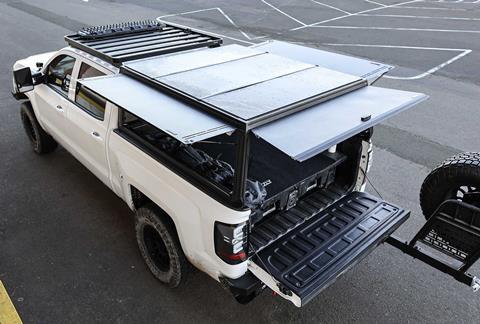
That result reflects the completed installation, including my sealing changes. It was a useful first test, although it doesn’t establish how the seals will hold up over years of use.
Completed Build: A More Useful Truck Bed Layout
Before this installation, my Silverado’s bed had gone through several configurations using Front Runner and Küat racks. Two large Pelican cases, a 1690 and a 1650, protected most of the essentials.
A Dometic fridge slide and a vertically mounted 34-inch Toyo Open Country A/T III spare occupied much of the remaining space.
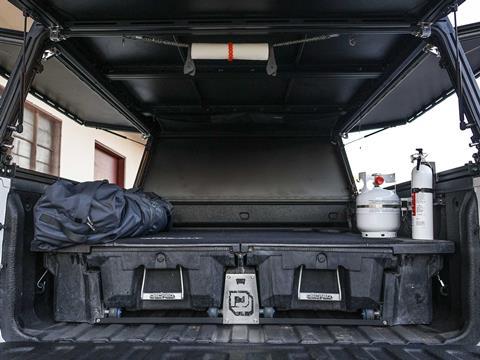
It worked, but getting to equipment often meant working around something else. The enclosed topper gave me a chance to rethink how I organized and accessed the bed on a camping trip, while reducing my dependence on large storage cases.
A set of DECKED Legacy drawers, found through Facebook, became the foundation of the new layout.
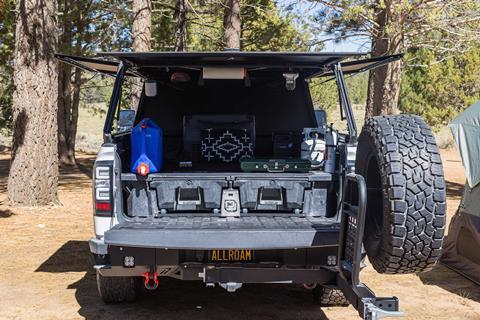
Side access made the Dometic CFX2 37L fridge easier to reach, while the bed still accommodated a 5-pound Flame King propane tank and my Gazelle T4 Overland EXP tent. The decade-old Silverado finally had an arrangement that better matched how I camp.
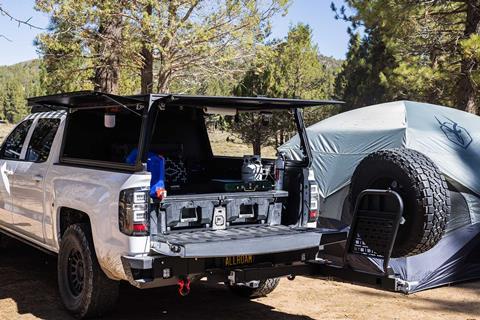
Smaller additions made good use of the frame’s mounting options. A Van Essentials Road Trip Cargo Net at the cab end held jackets, headlamps, and down blankets that didn’t belong in the drawers. Six metal tie-down anchors, attached to spring-loaded T-nuts along the upper rail, supported the net.
The propane tank mounted to the custom Unistrut rail using a compact cylinder bracket and two 6-inch pipe clamps.
With the camp kitchen gear organized around it, setting up my 1975 dual-burner Coleman stove became much easier. These are the everyday improvements that made the finished topper worthwhile to live with.
Final Verdict: Is the Xtrusion Overland XO.SKLTN Worth It?
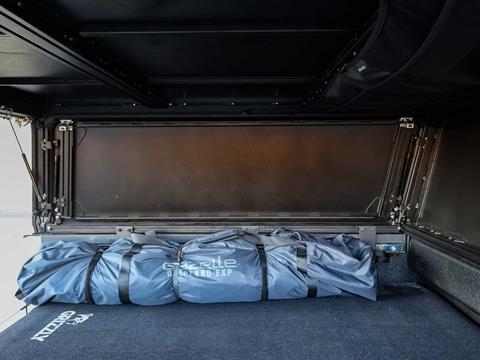
The finished Stage 2B setup has become my favorite configuration on this truck. An enclosed bed, DECKED drawers, and a Gazelle ground tent suit my camping habits well, and the extrusion frame leaves plenty of room to develop the layout further. Even without the Stage 3 tent, the system has made the Silverado more useful.
The installation experience makes the recommendation more complicated. A project I expected to finish over a weekend stretched across roughly two months, interrupted planned trips, and required fabrication to resolve basic mounting and fitment issues. Missing components, interfering lock brackets, roof panel gaps, and limited MOLLE mounting options all added work.
Xtrusion Overland has a promising foundation here, and the aluminum truck topper now sitting on my Silverado looks clean and functions well.
For a buyer considering the same universal-fit application, I would want clear answers about the mounting kit and panel revisions before placing an order.
The Xtrusion Overland XO.SKLTN delivered a useful finished setup on my truck. Its staged approach remains appealing, but the version I tested needed too much owner intervention to reach that point. Addressing those details would make the system far easier to recommend.
Xtrusion Overland’s XO.SKLTN
Access More Great Stories!
For more informative articles like this, consider subscribing to OVR Magazine in print or digital versions here. You can also find the print edition of OVR at your local newsstand by using our Magazine Finder.


No comments yet