


Learning how to fix windshield chips quickly can save overlanders and adventure travelers thousands in replacement costs. The Permatex Windshield Repair Kit offers a practical DIY solution to fix rock damage before small chips spread into expensive cracks—especially important on modern vehicles equipped with sensors and cameras.
Windshield chips should be repaired quickly on overland vehicles because off-road vibration, chassis flex, gravel roads, and temperature fluctuations can cause small chips to spread into large cracks surprisingly fast.
Early windshield chip repair can help maintain windshield integrity and avoid costly replacement on modern vehicles equipped with cameras and sensors.
Can You Repair a Windshield Chip Yourself?
Most windshield chips smaller than 1.25 inches in diameter can be successfully repaired with a DIY kit like the Permatex Windshield Repair Kit. The key is addressing the damage quickly—ideally within days of the impact—before temperature changes, vibration, or additional road stress cause the chip to spread into a crack.
DIY windshield chip repair works best for:
- Bullseye chips (circular damage with cone)
- Star breaks (short radial cracks from impact point)
- Small combination breaks under 1.25 inches
- Chips not directly in the driver’s primary sight line
Professional replacement is typically required for:
- Cracks longer than 3 inches
- Damage at the windshield edge
- Chips larger than a quarter
- Multiple overlapping impact points
- Damage affecting Advanced Driver Assistance Systems (ADAS) sensor calibration
Why Windshield Damage Matters on Overland Vehicles
A chipped windshield might seem minor at first, but for those who spend long hours on highways, gravel roads, dirt trails, and remote backcountry routes, small damage can quickly become a much larger problem.
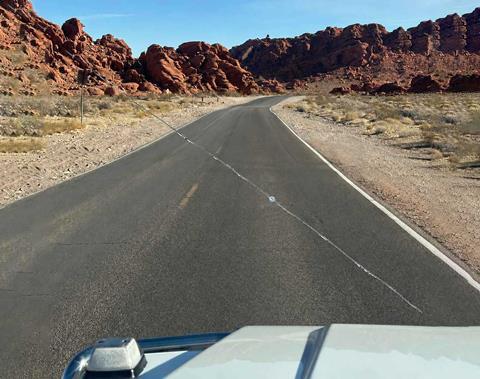
Off-road travel exposes vehicles to constant vibration, chassis flex, washboard terrain, and flying debris. Even daily commuting can worsen a rock chip through temperature swings, potholes, and road impacts. What starts as a tiny star-shaped blemish can eventually spread into a full crack stretching across the windshield.
For overlanders and road trippers, maintaining a clear, damage-free windshield is more than just cosmetic. Visibility is critical during bad weather, night driving, or technical trail sections.
A compromised windshield can also affect structural integrity and lead to expensive replacement costs, especially on modern vehicles equipped with cameras, sensors, heating elements, and recalibration systems. Addressing chips early can help prevent windshield cracks from spreading across the glass and potentially save an otherwise serviceable windshield.
Vehicles Most Susceptible to Windshield Rock Chips
This becomes even more relevant with adventure-oriented vehicles such as Jeep Wrangler models, the Ford Bronco, Lexus GX 550, Mercedes-Benz G-Class models, Toyota Land Cruiser models, the Ineos Grenadier, Mercedes-Benz Sprinter vans and others. These adventure-ready vehicles often face harsh conditions that make windshield protection essential.
Their upright windshield designs are excellent for visibility and classic styling, but they also tend to take direct rock impacts instead of deflecting debris like more steeply angled windshields.

Add in trail use, convoy driving, and long-distance gravel road travel, and windshield rock chips become almost unavoidable. Overland windshield damage is simply part of the territory once vehicles start spending serious time off pavement.
Over the years, we’ve also purchased used vehicles where previous owners ignored small chips before they spread. That was the case with both our Land Cruiser 100 Series and G-Wagon, along with a previously owned Land Rover Discovery Series II.
Rather than immediately replacing otherwise functional windshields, we turned to the Permatex Windshield Repair Kit to stabilize and fix the damage before it worsened.
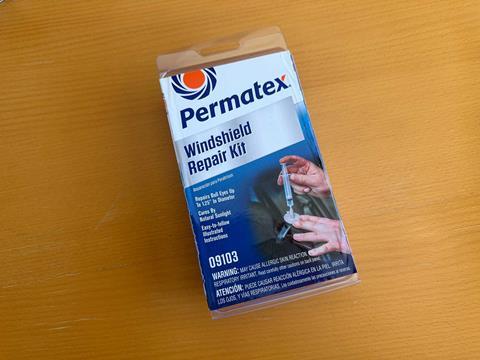
Permatex Windshield Repair Kit: A DIY Alternative to Costly Glass Replacement
The Permatex Windshield Repair Kit has become a regular part of our garage and trail kit over the years. Designed to repair bullseyes, star damage, and small chips, the DIY windshield repair kit uses a resin injection process to fill damaged areas and help prevent cracks from spreading further.
What we appreciate most is how approachable the process is for the average vehicle owner. You don’t need specialty tools, extensive experience, or a professional shop appointment.
While the repair won’t make every chip completely invisible, it can significantly reduce the appearance of damage while reinforcing the laminated safety glass enough to help prevent further expansion.
For vehicles that see frequent off-road use, this can make a substantial difference. We have successfully used multiple kits across several vehicles over more than a decade, including our OVR LC100 and AMG G63 project vehicles.
In some cases, we’ve even used more than one windshield chip repair kit on the same windshield to address several separate impacts accumulated over years of driving.
At less than $20 per kit, it has proven far less expensive than replacing entire windshields, particularly on premium SUVs where replacement costs can easily climb into the thousands once labor and ADAS sensor recalibration are factored in.
Professional windshield chip repair services can easily cost $50 to $125 per repair, while complete windshield replacement on newer adventure vehicles can climb into the thousands once calibration and specialty glass are involved. For many small chips and bullseye chip repair situations, the Permatex kit offers an inexpensive first line of defense.
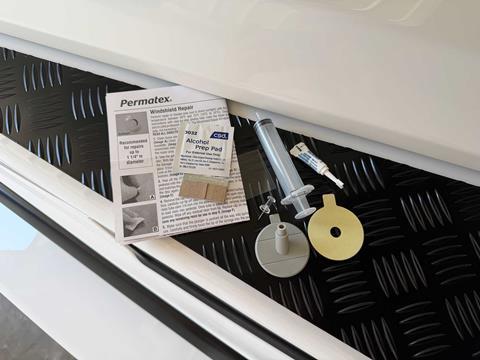
How to Repair a Windshield Chip: DIY Windshield Repair Overview
Repairing a windshield chip with the Permatex kit takes about 60 minutes and requires:
- Cleaning the damaged area
- Applying the adhesive disc
- Installing the pedestal
- Adding repair resin
- Attaching the syringe
- Creating vacuum pressure (10 minutes)
- Applying pressure (20 minutes)
- Removing the repair assembly
- Applying finishing resin
- Curing in sunlight (15 minutes to 1 hour)
- Removing excess resin
Below is an overview for each step of the repair process.
Before proceeding, we strongly recommend reading the complete instructions included with the Permatex Windshield Repair Kit. The following is intended as a simplified overview of the process rather than a replacement for the manufacturer’s directions.
The entire DIY windshield repair process generally takes between about an hour depending on temperatures and curing conditions, with much of that time spent waiting for the resin injection repair process to complete.
Repairs should also be performed in moderate temperatures and out of direct sunlight whenever possible, as extreme heat or cold can affect resin viscosity and curing time.
Before You Begin
-
Perform the repair in a shaded area, not in direct sunlight.
-
Windshield temperature should be between 50°F and 75°F (10°C to 25°C).
-
Avoid allowing repair resin to contact painted or finished vehicle surfaces.
-
The kit is designed to repair damage up to 1.25 inches in diameter.
-
Read all instructions completely before beginning the repair.
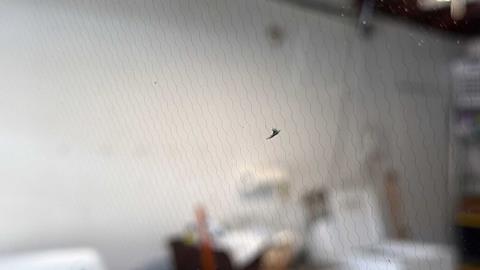
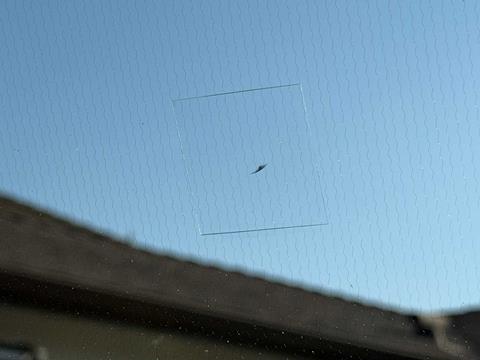
Step 1: Clean the Damaged Area
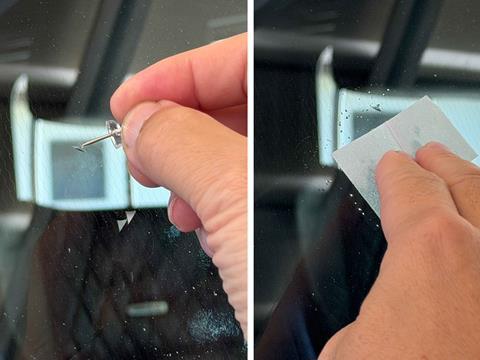
Use the included alcohol towelette to clean the windshield around the damaged section. Use the supplied push pin to carefully remove any loose glass fragments or hardened contaminants from the chip.
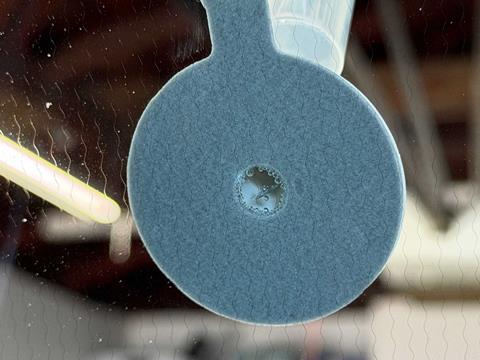
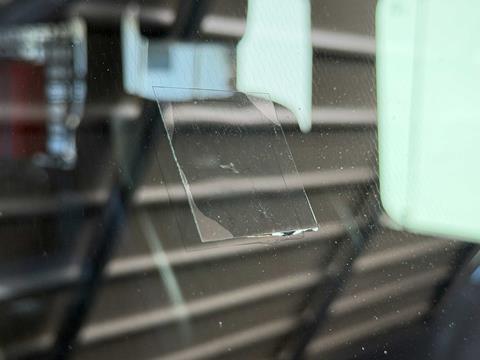
Step 2: Apply the Adhesive Disc
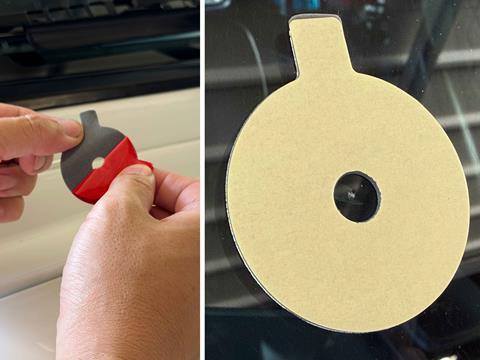
Peel and apply the adhesive disc to the windshield, making sure the center hole aligns directly over the damaged area. Press the disc firmly onto the glass.
Step 3: Install the Pedestal


Align the included pedestal over the adhesive disc and press it firmly into place to create a secure seal.
Step 4: Add the Repair Resin

Open the resin tube and insert the tip into the pedestal opening. Carefully squeeze the resin into the pedestal.
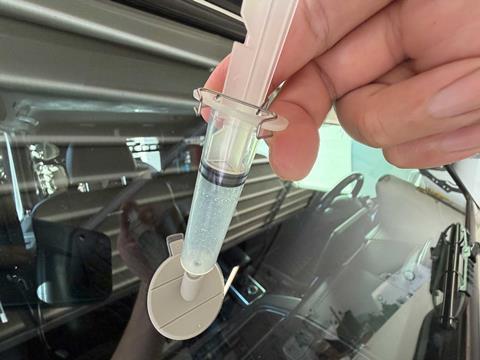
Step 5: Attach the Syringe
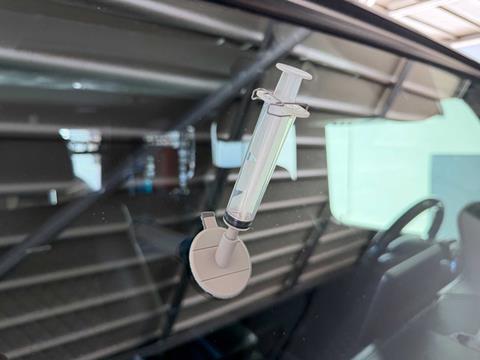
Twist the syringe securely into the pedestal. The connection should fit tightly to properly create suction and pressure during the repair process.
Step 6: Create Vacuum Pressure
Gently pull the syringe plunger upward and lock it into the lowest setting using the built-in spring clip. Leave it in this position for approximately 10 minutes to help remove trapped air from the damaged area.
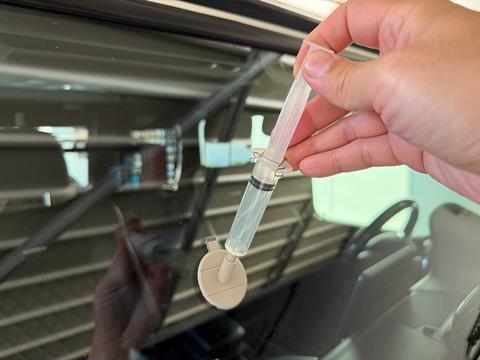
Step 7: Apply Pressure
After 10 minutes, temporarily remove the syringe to allow air back into it. Reinstall the syringe while keeping the plunger locked in place. Then gently press the plunger downward and lock it into the uppermost setting. Leave it for at least 20 minutes to force resin into the damaged glass.
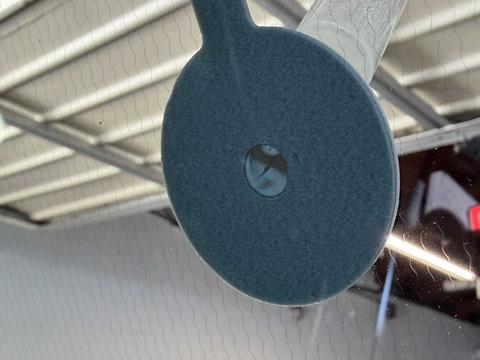
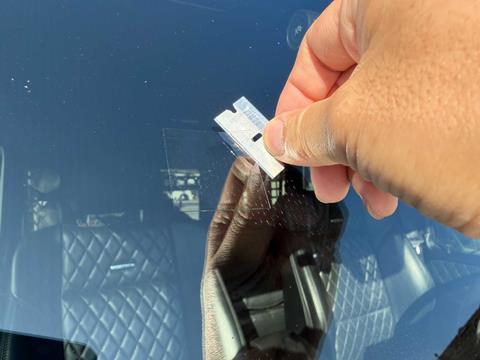
Step 8: Remove the Repair Assembly
Once the pressure cycle is complete, remove the syringe. Using the included safety razor, carefully remove the pedestal and adhesive disc. Clean away any excess resin remaining on the windshield surface.
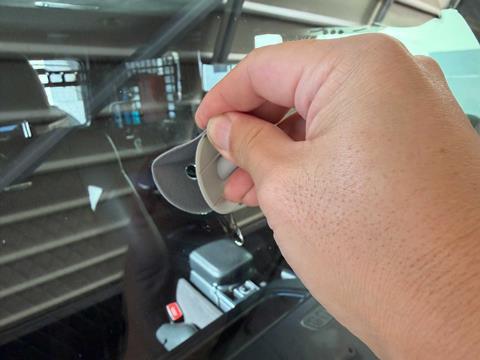
Step 9: Apply Finishing Resin
Apply a small bead of remaining resin directly into the repaired chip. Place the curing strip over the area to hold the resin in place.
Step 10: Cure in Sunlight
Move the vehicle into direct sunlight and allow the repair to cure for approximately 15 minutes. On cloudy days, curing may require at least one hour.
Step 11: Remove Excess Resin
After the resin has fully cured, carefully peel away the curing strip. Use the safety razor to remove any remaining excess cured resin from the windshield.
Finished

Give the windshield one final cleaning with the alcohol towelette, step back, and inspect the repair. While the damage may still remain slightly visible, the windshield should now be far better protected against further cracking and spreading damage.
As with any DIY windshield repair, there are limitations. Large cracks, severe glass delamination, or damage directly in the driver’s line of sight may still require professional repair or full replacement. However, for smaller star break repair and rock chip repair situations caught early, the kit has worked consistently well in our experience.
Real-World Windshield Repair Kit Results
One reason we continue using the Permatex Windshield Repair Kit is simple: it has consistently worked well for us over many years of real-world use. Our vehicles regularly encounter highway miles, gravel roads, desert trails, and rocky terrain where windshield impacts are common.
We’ve used the kit on everything from daily drivers to dedicated overland rigs, and it has repeatedly helped us avoid premature windshield replacements. Some repaired chips have remained stable for years afterward without further cracking.
No windshield repair kit can reverse severe structural damage, and larger cracks may still require professional replacement. However, for small chips caught early, this kit has proven to be worthwhile preventative maintenance and inexpensive insurance against more serious windshield damage.
Considering the relatively low cost, compact packaging, and ease of use, it’s become something we keep on hand whenever we travel. A small chip doesn’t always have to become a total-loss windshield—especially if you address it before the next trail, temperature swing, or freeway vibration makes the decision for you.
For overlanders and road trippers who spend significant time on gravel roads and trails, keeping a windshield repair kit in the vehicle is inexpensive preventative maintenance that can potentially save thousands in replacement costs later.
Find Permatex Windshield Repair Kit on Amazon
How To Fix A Chipped Windshield: Permatex Windshield Repair Kit
Final Thoughts on DIY Windshield Chip Repair
Learning how to repair windshield chips before they spread into costly cracks is essential knowledge for any overlander or adventure traveler. The Permatex Windshield Repair Kit provides an affordable, effective solution for fixing rock damage quickly—often for well under $20 compared to thousands for professional windshield replacement.
For vehicles that regularly encounter gravel roads, trail debris, and harsh conditions, keeping a windshield repair kit on hand is inexpensive insurance against major glass damage. While not every chip can be DIY-repaired, addressing small bullseye and star breaks early can extend windshield life significantly.
The key is acting quickly. The sooner you repair a windshield chip after impact, the better your chances of preventing it from spreading into a crack that requires complete glass replacement.
Access More Great Stories!
For more informative articles like this, consider subscribing to OVR Magazine in print or digital versions here. You can also find the print edition of OVR at your local newsstand by using our Magazine Finder.


No comments yet